Sunday, September 12, 2010

Simple Medallion Wreath

Hello!  I've been away all weekend at a group meeting in Millet, and while we're home now, I'm exhausted!  I forgot my camera, but some of my girls are going to email me some of their pictures so I can share some of the fun we had!

In the meantime, here's my simple card for today!  I didn't come up with this idea...I saw it while blog surfing a while back.  I saved the picture of it, but there's no watermark on it so I don't know who to give credit to.  If this is your idea...thanks!  I love it and so did the girls at my Holiday Headstart class last week!


Love it!!!  It's a super simple card, but has a HUGE impact!

That's all for today, have an inspired day!

Friday, September 10, 2010

Fabric Baby!

Have you seen the new Holiday Mini?  If you haven't, you need to check it out online and then contact me to get your very own copy.  I guarantee it will become your best friend for the next 4 months and will become dog eared and very loved.  You will GASP everytime you turn the page...I will admit, I did!!!

So, I was most surprised by the fabric in the mini.  Surprised and delighted actually!  This fabric is FABULOUS.  You get three designs per package and quite a bit of each design.  There's also an instruction booklet that comes with it, which is also FABULOUS!!!

Ok, so I'm not a huge sewer, but I do know how thanks to my mom and three years of Home Ec in junior high!   But, since we have fabric now, I decided to dust off my sewing machine before Halloween this year (it usually gets used once a year to make Halloween costumes!), and make a Christmas Ornament.  And, have my girls who attended my downline meeting the other night make one too!


The instructions for this little beauty are included in the instruction booklet when you purchase this pack of fabric.  However, I used different dies for my decoration!  I know, big surprise...Lisa didn't exactly follow the directions!!!  I'm totally an "instructions are just a guideline" kind of girl!!!

I used the new Scallop Squares die for both the background and the tree on my ornament.  The ribbon is Early Espresso wide Grosgrain.  Did you notice the button?  Ok, here's a closer look...


I absolutely LOVE the huge buttons that coordinate with the fabric.  Goosebumps!  The button is Crumb Cake (which makes me even happier!!) and is just hand sewen on with some Linen Thread and then the Linen Thread is tied in a bow.

LOVE IT!!!   I think I will be making more of these for our Christmas tree this year!

Well, I really need to go to bed...it's way past late!  Have an inspired day!

Tuesday, September 7, 2010

Love

Despite making all those favours for my cousin's wedding, at the last minute, I came up with a super cool present idea.


I have a "thing" for frame art!  When I found this frame, fireworks went off in my head and I knew I had to get it for them.  I instantly had an idea and I'm excited that it came out exactly how I pictured it when I first saw the frame!

Here's a close up of what I did with the frame.


In my vision, they will put bride and groom pictures on either side of the love!

And, in true Lisa fashion, I had to make the card to match!  Actually I just loved how the frame turned out and I already had all the supplies out!!!


One last thing about the project...Silver Foli Smooch Spritz looks GORGEOUS on Basic Gray cardstock.  Try it...you'll love it!

And, now a couple pictures from the wedding...

Me and my 3 handsome dates for the event.  Kevin couldn't get the time off work, so he wasn't able to join us!


The favours were set out at a Candy Bar, which my children thought was the best thing ever (besides the slurpee machines and the fresh popcorn during the cocktail hour...which were both endless!).  Here's my mom supervising the kids at the candy bar.  Taylor and Carter are kind of hiding behind the table decor on the right side of the picture.


Seriously, their eyes were as wide as saucers when they found out they could pick a box and FILL it with whatever kind of candy they wanted as many times as they wanted (or twice because that's all I let them!!!).

Have an inspired day!

Monday, September 6, 2010

Finally Fancied Out

As promised, today I have one last Fancy Favour project for you.  If you don't need this die after this last week, you need to go back and look at these projects!  Trust me...you  need this die!!!

Ok, enough chit chat.  Here it is...

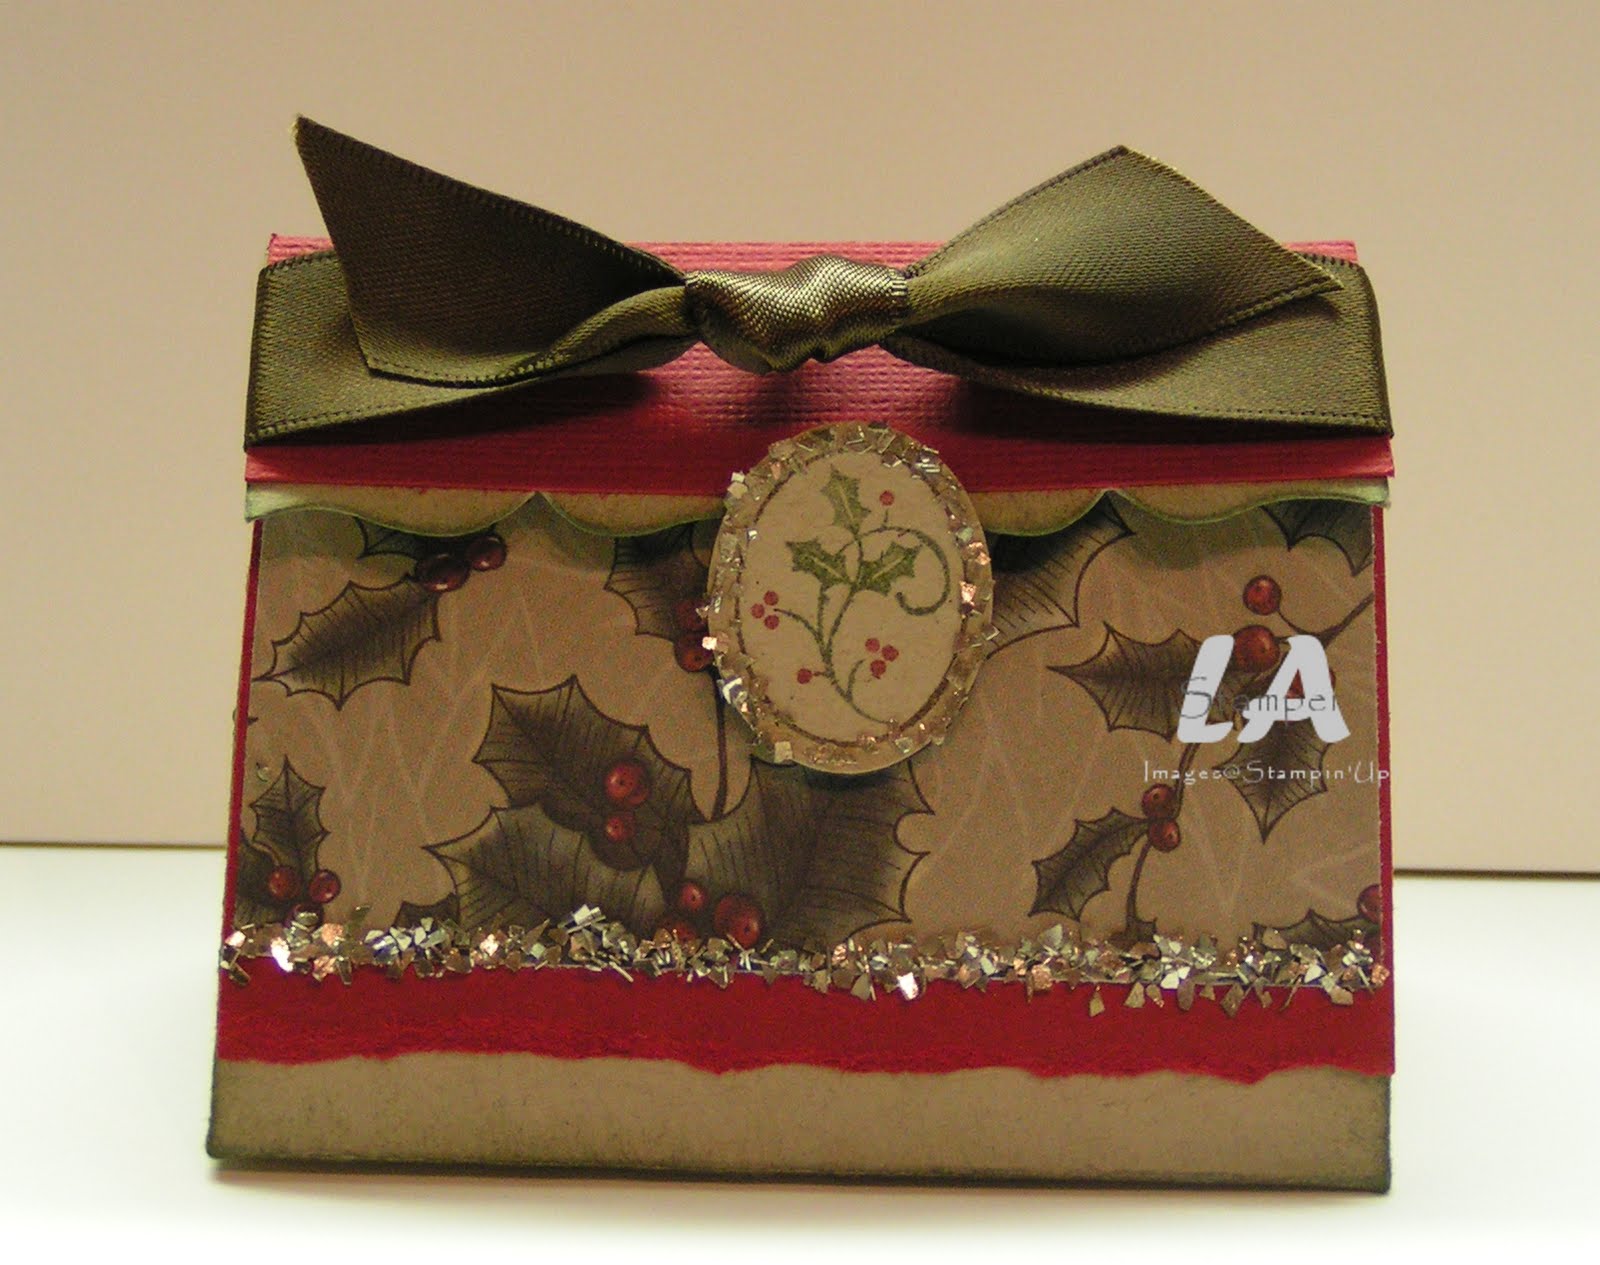
This is the one that the girls in the class made.  It is FABULOUS with all the new Holiday Mini stuff on it...the gorgeous new DSP, the silver glass glitter, the new tag set and the fantastic new little oval punch!  I will say that the ribbon is Early Espresso Satin ribbon...it kind of looks like Always Artichoke in this picture for some reason.

Here's a side view.


Ooohhh, it gives me goosebumps!!!  Ok, so just because I know you will be asking, here's a picture of the parts you need to cut off of the die cut to make this box.


You need to score across the whole box 1 inch from the fancy edge, then cut along your score line as shown in the picture.

I was so excited about this project (and I had an extra already cut to show you how to cut it!), that I made another one!


This one gives me goosebumps too!  Here's a side view...


Isn't is FABULOUS?!?!?!  I used the halloween DSP from the Idea Book & Catalogue.  Get this...IT'S FLOCKED!!!  You seriously can't help but touch it!  I also made a ruffle with the Waffle Paper in the Holiday Mini, and the new BAT PUNCH!  Can you tell I'm super excited about these products!!!  I speckled the box before I embellished it with the Color Spritzer Tool and a Basic Black Stampin' Write marker, and all the edges of the box were sponged with Basic Black.

On both boxes, the flap stays closed by tucking it behind something.  On the Christmas one it tucks behind the oval and on the Halloween one is tucked behind the bat.  Or should I say bats!  I layered two bats together for this feature and the top on is bent a little so it looks like it's flying.  I also put some fine glitter around the top bat.  When I was pretty much done, I smooched the box with the Silver Foil Smooth Spritz.

Well, that's all she wrote people!  I'm putting my Fancy Favour Die away for a little while now!

Have an inspired day!

Keep It Simple

There are a couple of stamps types that I tend to struggle with a bit.  One of them is the kind of stamp I used on my card for this post.  So, I was excited when I saw the latest Clean & Simple sketch and that one of the samples had used this type of stamp.  I instantly knew exactly what I was going to do for this card!

Supplies:  For All You Do & Fabulous Phrases stamp sets; Rose Red, Elegant Eggplant & Baja Breeze classic ink; Whisper White & Baja Breeze cardstock; Pearls

My card measures 3x6.  I started with a piece of Whisper White and had full intentions on just having the Whisper White base, but it didn't look finished, so I trimmed a bit off of two of the sides and mounted the whole card on a 3x6 piece of Baja Breeze.

And, to finish it off I added...are you ready for this...PEARLS!!!  I told you that you would be seeing them a lot in the next little while!!!


Each stamped square has three pearls on it as flower centers.  The pearls are the perfect little finishing touch to this card!

So, I think I'm one of only a few people who have a hard time with Baja Breeze!  There are certaily a LOT of people out there who were SUPER excited to have it back... Baja Breeze is a take it or leave it color for me!  So, how did I come up with this color combination?  Well, I didn't!  I used my trusty new Color Coach!


Have an inspired day!