Saturday, October 30, 2010

Candy Corn Anyone?

One last Halloween project!  Remember the witch hats from this post?  Well, at that class we got to talking about what else we could make the triangle boxes into and candy corn was one of the ideas.  Check it out...


So cute and so easy!!!  I started with a Whisper White piece of cardstock and layered some Daffodil Delight and Pumpkin Pie on it.  It's finished off with a Happy Halloween (from Teeny Tiny Wishes) stamped in Basic Black and a piece of Whisper White grosgrain ribbon to keep it shut!

These are so quick and easy and I was surprised at how much stuff they actually hold!  I am working on some Christmas ones, so keep watching my Countdown to Christmas and in the next couple weeks I will be posting them!

Have an inspired day!


Friday, October 29, 2010

Countdown to Christmas-Week 5

Hello!  I've been busy making mummies...three little mummies to be exact!  I will be sure to post a picture after Halloween so you can see how stinkin' cute they are!!!  I'm finding it hard to flip back and forth between two holidays right now and can't wait until Halloween is over and I can just focus on Christmas creations!!!

Today I'm sharing a fabulous Christmas shaker card.  I loved this card so much that I had my stamp clubs do it this month...they loved it too!


Isn't it fabulous?!?  The base of the card is Real Red followed by a Crumb Cake layer and then an Early Espresso layer which was embossed with the Finial Press embossing folder.  The main image area of the card is where the shaker is.  I used some of the Champagne Glass Glitter for the shaker part.  To make the hole for the shaker, I first stamped an ornament and then punched it out.  That ornament is the one on the left hand side which is blinged up with some FABULOUS pearls!

So, would you like to see a tutorial for shaker cards?  Leave me a comment and let me know!

Have an inspired day!


Wednesday, October 27, 2010

G is for...

...gift and Gaven!  Some friends of ours had their fourth boy (yikes!) way back in August.  So exciting!  We haven't been able to get together since he was born, until tonight.  So, I've had this little project waiting to be posted (I didn't want them to see it before I gave it to them!).


I covered a paint can with some Soft Suede textured cardstock and some of the Elegant Soiree DSP.  The Soft Suede was stamped with the sweet little puppy from the Every Little Bit set with Soft Suede ink.  I chose that little puppy because I don't really have any "baby" sets and it reminds me of the "Snips & snails..." rhyme!


I finished off the can with some Very Vanilla grosgrain ribbon.  And, since the wee one was named Gaven, I stuck g's around the can.  Each of the g's is from a chipboard set (some of which are retired) and I colored them with my Stampin' Write Markers in colors that coordinate with the DSP (Baja Breeze, Soft Suede, Crumb Cake & Basic Gray).

Here's a look at the lid...


I used the Designer Label punch in Soft Suede and stamped little g's all over it.  The puppy was stamped on Very Vanilla and then matted with Baja Breeze.  So cute! I *heart* that little puppy!

One sleeper rolled up fits nicely in the can.

Of course, I had to make a coordinating card.


It's pretty self-explanatory and is basically the same as the can except for this...


Those itty bitty safety pins in the Vintage Trinkets are the perfect accent for baby cards and projects!

I'll be back tomorrow with Week 5 of my Countdown to Christmas.  Have an inspired day!


Tuesday, October 26, 2010

Merry Treats

Ladies and gentlemen, my name is Lisa and I am apparently addicted to slippers...


There are so many that when I asked Sawyer to take them up to my room tonight he couldn't carry them all!


In my defence, a certain little chocolate colored puppy named Oliver steals them and hides them (see the lonely pink Oilers one in the first picture) and then I can't find them...so I buy a new pair and then end up finding the old ones!


I know...he's cute.  But, don't be fooled by the cuteness...he has a serioius slipper stealing problem!!!  Kevin made me promise not to buy any more slippers.  sigh

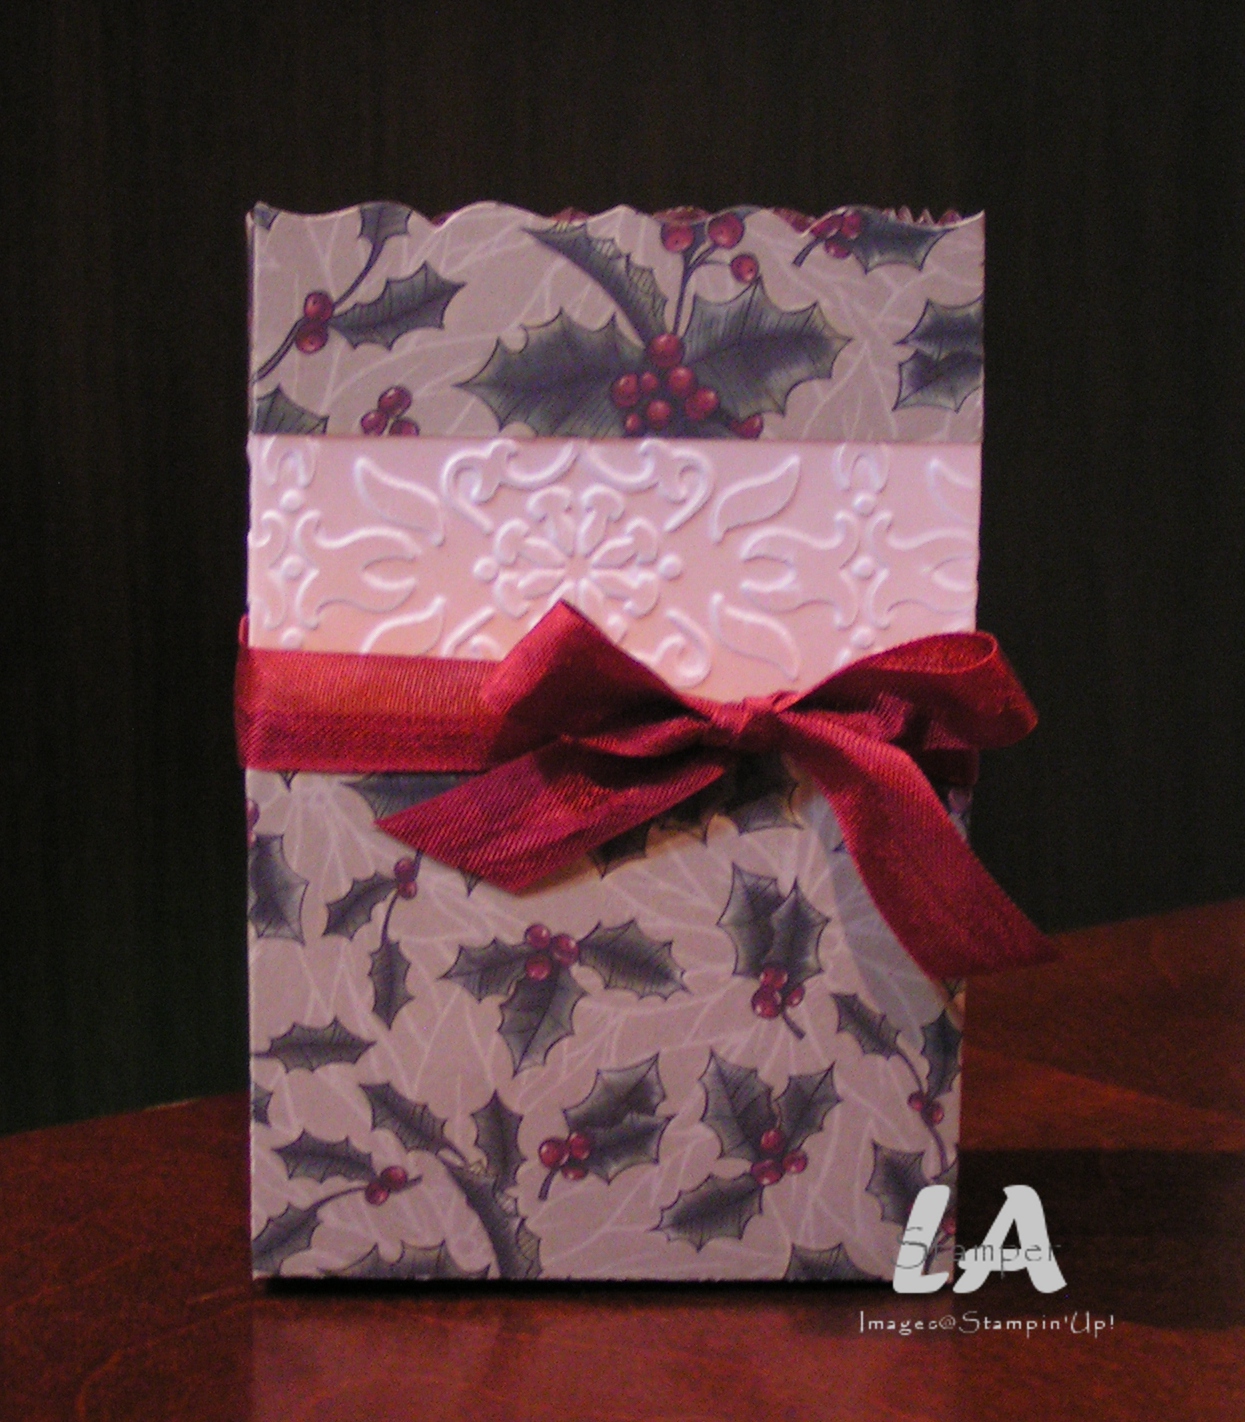
Ok, on to some stamping!  I have a super cute project that my stamp clubs did this month to share with you.  Check it out.


It's an Always Artichoke box cut from the new Candy Wrapper die.  The sides were decorated with some of the Deck the Halls DSP and it's finished off with some fabulous crochet trim (you need this...I didn't think I needed the crochet trim when I first saw it, but was I wrong!  In fact, I've gone through two rolls of it already!!!).  To  make the box like this, you want to cut along the score lines to make flaps and fold them up to make a bottom for your box.  The top is done as per the directions that come with the die (yes, there's directions!).  You pretty much fold on all the score lines really good and then you push down and twist the top and it will stay shut (the instructions explain it much better than that).  If you've folded along all the score lines really good, this step will be easy.


The little tag is done with the Tiny Tags set and the Jewellery Tag punch.  First I stamped the dotted outline with Always Artichoke, then the "merry" with Cherry Cobbler.  Now, this is perhaps the most important step when using this punch...BEFORE you punch the tag out, you want to punch the little hole.  Trust me people, this is waaaaaay easier than trying to punch the little hole after the little tag is punched out!  The edges of the tag were sponged with Always Artichoke ink.

When my stamp clubs did this project, they tied the tag on around the knot with some Linen Thread.  But, when I was cleaning up, I came across my Vintage Trinkets and thought the little safety pin would be cute.  I was right...I love it!

There's a special treat inside this cute little box.


As you can see, they don't last long in our house.  Now, you can only get them at Christmas and this package was from last Christmas so I'm really hoping that they will be out again...soon!

I can totally see this project done for all kinds of occasions.  Can you imagine how cute they would be as wedding favours?  You coudl put anything small in them...chocolates, nuts, gummies, hard candies, earrings, a bracelet, a necklace, cash...I could go on and on!  Ooooh, I bet one of our Simply Adorned charms would fit nicely in it (maybe the 1x1 1/4 one...or a smaller one!).  Cute!!!  They would also make great little place settings for your holiday table or any other occasion.  So fun!!!

That's all for today!  Have an inspired day.


Monday, October 25, 2010

When Stay-At-Home-Moms Get Bored...

First of all, I should say that I am RARELY bored at home!  But sometimes when you're at home with a bunch of toddlers, you get a little loopy, or should I say craving adult contact!


Bwahahaha!!!!  I thought it was HILARIOUS...Kevin was not impressed.  And check out how good I backed into the garage...I'm totally straight and on my side (it's a whole don't cross the line thing)!  I even had the perfect amount of space to open the back of the van and unload the groceries right into the freezer.


It's still there and now the boys tell Kevin almost daily not to park there because it's a two away zone!!!!!  Yep, they're rubbing salt in the wound and I love it.   I'm almost scared to leave him home alone now...you never know what he will write on my side.  Or he could park sideways (yes, he would totally do that!) or something and I wouldn't be able to park in the garage.  Maybe he'll take the chalk away.  During the summer the kids did funky poses and I traced their shadows.  Kev came home and said the driveway looked like a crime scene.  That's two chalk strikes...

Hmmmm...I think I need to go sweep the garage floor...

I'll be back tomorrow with some stamping!  Have an inspired day.


Saturday, October 23, 2010

Countdown to Christmas-Week 4

I have a super fun project to share with you this week for my Countdown to Christmas. 


Now, I can't take credit for this idea...I've seen a lot of these floating around the web!  Most of the ones I've seen have had punched shapes out of them to let the light through, but I decided to add a whole strip of vellum.  Can you guess what it is yet?

Ok, I will stop teasing and show you my Christmas Luminary!


Isn't it fabulous!  I made it with the Deck the Halls DSP and the Fancy Favor die.  I know, I said I wasn't going to use it for a while, but I can't help myself!!!  This die is so much more than just a favor box and I keep seeing and thinking up ideas for it.

Let's get to how I made it.  After I cut the Fancy Favor out, I cut it at 1 inch from the top.  I added a strip of Cardstock Vellum that I embossed with the Vintage Wallpaper embossing Folder.  It is glued to the two pieces of the Fancy Favor, ultimately making it taller.  Then I just folded and glued it together like normal.  To finish it off, I tied a piece of Cherry Cobbler Seam Binding around it and tied an awesome bow (first try...*wink*)!

It looks great with one of those battery powered tea lights.

Have an inspired day!

Tuesday, October 19, 2010

The ABCs

Amazing cards, Beautiful packaging and Cherished gifts.  These are the ABCs of a perfect handmade holiday and for a limited time you can purchase some FANTASTIC bundles to help you create the perfect handmade holiday.


Here are the details...

Vintage Christmas Card Bundle
Bells & Boughs Set and Deck the Halls Designer Series Paper
Wood Mount (124067) $29.96; Clear Mount (124068) $24.36

Contempo Christmas Card Bundle
Contempo Christmas Set and Jolly Holiday Designer Series Paper
Wood Mount (124071) $25.96; Clear Mount (124072) $21.96

Tags til Christmas Bundle
Tags til Christmas Set and Decorative Label Punch
Wood Mount (124077) $49.52; Clear Mount (124078) $41.52

Gift Packaging Bundle
Gifted Set and Mini Lunch Sacks
Wood Mount (124083) $31.92; Clear Mount (124084) $24.72

Simply Adorned Gift Bundle
Charming Set, Simply Adorned 1" x 1-1/4" Charm, and Simply Adorned 24" Chain
124076 $52.32 (no clear mount option)

Frame Gift Bundle
Definitely Decorative Chunky Frame and Small Chocolate Chip Dotted Flourish Décor Elements
124075  $23.12

Check out all the details by clicking the link on the right or stop by my online store!

Have an inspired day!

Monday, October 18, 2010

A Little Update

Hello!  Did you notice my new background and header?  I finally installed My Digital Studio on my new laptop as well as re-downloaded all my digital downloads and of course, got a few new ones! *wink*  So, I thought it was time for a little update using some of my new digital toys!

I absolutely love the Autumn Spice DSP in the mini and I was so excited to see that it was avilable as a Digital Download too.  So I set to work, and got a little help from a friend and this is what I ended up with!  So what do you think of the new look?

Have an inspired day!

Christmas Card Swap

Evey second month I get together with some of the girls in my downline and do a shoebox swap.  I love doing this kind of swap with my girls...we each prep a project to the point where it will only take about 10-15 minutes to complete.  Then we bring the supplies needed to complete the projects in a shoebox (or some other kind of container similar to a shoebox) and we all stamp the night away!  This month our theme was Christmas cards. 

By Melissa...


You can't tell in the picture, but the whole card was sprayed with a mixture of Shimmer Paint and rubbing alcohol.  It's so shimmery in real life...Janine, you would love it!!!

By Heather...


I think Heather has convinced me that I need this set!!!

By Lindyl...


By Sunita...


By Sherri...

I called this one the sexy card becuase of the black Raven Lace Trim (aka...Lingere Lace).  See, it's not just for Halloween!

That's all for today.  Have an inspired day!


Sunday, October 17, 2010

Sweet & Simple Thanks

I'm really liking the So Many Thanks set.  It's one of the A La Carte sets this year and is also the stamp that all the participants at World Card Day got this year.  I will show you the project they did a little later this week, but tonight I have a sweet card to show you.  This was the card we had for a make & take at the craft sale yesterday.


Sorry, the picture is not the greatest...I really need to start remembering to take my pictures during day light hours!

The card base is Crumb Cake with a piece of Baja Breeze DSP (from the Subtles DSP Stack) along the side.  I sponged around the edge of the card with Crumb Cake ink and around the DSP with some Baja Breeze ink.


The main image was inked with Crumb Cake, but before I stamped it I colored the big Thanks in the middle with an Early Espresso marker.  Once it was stamped, I colored the little hearts in with a Baja Breeze marker.  The image was stamped on a piece of Very Vanilla cardstock which was sponged with Baja Breeze ink and matted with Early Espresso cardstock.  It was stuck onto the card with some Stampin' Dimensionals.  The whole thing is finished off with a heart shaped Bitty Button which was backed with a Baja Breeze punched heart and topped with a little Early Espresso Taffeta knot.

Have an inspired day!


Saturday, October 16, 2010

Happy Thanksgiving

Today I'm at a craft sale meeting new friends and booking some workshops!  I don't have any stamping stuff to share today, so I thought I would share our Thanksgiving weekend with you.

Canadian Thanksgiving was last Monday, which meant a long weekend!!!!  We had a great weekend with my parents who came down for the occasion.


As you can see, I have a child who loves to be the center of attention!!!!  Check out this turkey...


Oooooh...it was so good.  Kevin injected it with a butter and herb concoction.  Honestly, my mouth is watering as I type this!

One of our traditions at Thanksgiving is the dessert.  Kevin and I are not really fans of Pumpkin Pie.   It's a texture thing...at least for me it is...becuase I still love the taste of pumpkin.  So a few years back I came across a recipe for Pumpkin Cake and gave it a try.  It is the BEST cake.  So it's now our tradition to have Pumpkin Cake every year at Thanksgiving...and I only make it at Thanksgiving (much to my family's dismay!).  Check it out...but be warned that you may drool on your keyboard!


I know...I warned you!!!!!

I will be back tomorrow with a simple Christmas card to share.  Have an inspired day!


Friday, October 15, 2010

World Card Day Projects...Part 1

As promised, I'm going to share the projects everyone made at our World Card Day event a couple weeks ago.  We divided up all our projects by theme, and one of the sets of cards we did was a birthday theme.  Heather designed these cards.  We all will be making the cards we designed for the event for each other, and she is the first to have the samples done!


I will be sharing the rest of the projects as we get them finished up!  Have an inspired day!

Thursday, October 14, 2010

Clearance Rack Blitz

Time is running out on the HUGE Clearance Rack Blitz.  Have you visited the Clearance Rack in my online store yet to take advantage of the HUGE savings?


Click on over to my online store and check it out.  You definitely don't want to miss out on these prices, because after October 18 these prices will be gone!

Have an inspired day!

Countdown to Christmas-Week 3

I'm so excited about the project I have to share with you today.  I started it way back at the beginning of September and demoed a part of it at the Mini Convention I attended.  I told the girls to imagine it finished because I didn't have all my supplies in time to finish it for the Mini Convention.  Well, it's done and I absolutely love how it turned out!


So, here's a little history about how it came together.  I was shopping at my local craft store for some Halloween stuff when I came across some candles and this fab stand on clearance.  An idea immediately popped into my  head and I couldn't resist!

Each of the candles is wrapped with a piece of textured Cherry Cobbler cardstock.  Over top the cardstock is a piece of the Newsprint DSP which was distressed with the Distressing Essentials Kit.  Then I tied a piece of Cherry Cobbler Seam Binding around each of the candles.  You can see that I also tied three little jingle bells around the middle of the bow.  To finish it off, each of the candles was smooched with the Gold Glow Smooch Spray.


I also came across a package of little ornaments that totally went with my theme...and, you guessed it, I couldn't resist!!!!!  I finished off my project by filling in the spaces around the candles on the stand with the little ornaments.


And, there you have it!  Don't you just love this?  Leave me a comment and let me know what you think!!!  Watch for another fab Christmas project next Thursday.

Have an inspired day!


Countdown to Christmas-Week 2

ETA:  The wonders of technology never cease to amaze me!  I thought I had set this to post last Thrusday, but when I went to start my posts for the next few days I noticed that it hadn't posted!  So, today you get a two for one Countdown to Christmas...

Dasher is dancing this week in my Countdown to Christmas!


The card itself is Real Red with a Sahara Sand layer on it.  The Sahara Sand layer was embossed with my Big Shot and the Petals-A-Plenty embossing folder to give it some texture.  It is also sponged around the edge with Early Espresso ink.  Dasher is stamped on a piece of Very Vanilla which was also sponged around the edge with Early Espresso ink.

I added a piece of Striped Early Espresso ribbon and tied an Old Olive button around it with some linen thread.  I love putting buttons on this way, becuase there's no adhesive on the button, and it makes the ribbon bunch a bit...which is cute!  I also like that I can slide my button around on the ribbon if I need more space for my focal image.


The Merry Christmas is from the Teeny Tiny Wishes set...I *heart* this set!

Well, that's all for today.  I will have another fabulous Christmas project for you next Thursday.

Have an inspired day!