Friday, December 31, 2010

Love is in the air...

I'm so done with Christmas stuff and so happy to move on to the next holiday...Valentine's Day!


Last night I did a Shoebox Swap with some of my downline.  I think I've talked about these swaps before and how fun they are!  We always have a theme and this time around is was Love.  I'll share all the projects from the swap in the coming days...or weeks!  Today, I'm going to share the card I designed!


I'm not going to give you a list of supplies for this one...there's 4 stamp sets alone!  I will tell you that I used Regal Rose, Basic Gray and Very Vanilla.  I chose one of the new Valentine's sets you can find in the Occasions Mini (the xoxoxox, Hugs & Kisses and small heart images are all from that set).

There's a lot going on with this card.  I couldn't stop adding layers of stamping, paper, embellishments...ya know!?!

I do want to make sure you see the dimension and the piece of Hodge Podge Hardware.


The little heart is punched out and then popped up with a Stampin' Dimensional.  And, that hardware!!!  Oh, the hardware!  It was too perfect when I originally put it on the card, so I roughed it up a bit with a sanding block.  It takes a bit of muscle, but it sands nicely.  I love the look of the raw metal peeking through the vanilla finish.

Have an inspired day and Happy New Year!

Thursday, December 30, 2010

Photo Blocks

I have a new obsession...Photo Blocks!


So cute!  Here's what you need to make these little beauties.


You can find the blocks in the Definitely Decorative Catalogue.  They come in a pack of 4 and have so many possibilities!  Here's more shots of the winter one I did.


Did you notice the white edge around the pictures?  I'll wait while you go look again!!!  That's done with the white StazOn pad.  You just gently rub the ink pad around the edges of the pictures.  It's the "Direct to Paper" technique, only on pictures.  You need to use the StazOn ink to do this on pictures.  The Classic and Craft ink will smudge and won't dry on the pictures.

There are only pictures around the four sides.  The top and bottom are covered with Night of Navy cardstock which was stamped with the snowflake from Jolly Bingo Bits (with Night of Navy ink).  Because the top is out there in the open, I embellished it a little!  I used the mittens from Jolly Bingo Bits, Marina Mist cardstock and ink, Night of Navy ink, Whisper White cardstock and some circle punches.  Here's a closer look at the top.


The snowflakes are punched from Whisper White cardstock and hung off the block with some Whisper White narrow Taffeta Ribbon.

I made another one with a soccer theme to showcase some of my kiddos' soccer pictures.


And a closer look at the top (the bottom is done the same way).


I'm lovin' these!  My Scrappy Hour Club did these the other night at our workshop and they were lovin' them too!  These blocks a fun and different way to "scrapbook"!  Check out Sherri's blog to see her gorgeous creation with her wedding pictures.  It is stunning!

I totally think I'm going to do a block for each of my kids and then stack them on the mantle or something.  They would make a great gift too!  I happen to know a certain grandma who would probably love to have something like this on her desk!

That's all for today.  Have an inspired day!

Not so Matchy Matchy!

I'm working on an update to my header and background.  You can see the background is done...not so much for the header! 

The background was done with My Digital Studio.  It's a Bashful Blue Polka Dot DSP background.  I then punched a Whisper White snowflake, added a Basic Gray Corduroy Button and then a Real Red Polka Dot brad in the middle of the snowflake.  To make it easy to make lots of snowflakes, I grouped the snowflake, button and brad together and then copied and pasted all over my background paper.  Just like real stamping!

Stay tuned for a new header soon!!!  Hmmm...and a new little signature!!!

Tuesday, December 28, 2010

Friends

Well, did you think I dropped off the face of the Earth?  I kinda felt like I had.  Remember when my family was sick a couple weeks ago?  I thought I was lucky and wasn't going to get it.  Surprise!  I got it...bad.  And, have been sick for a week...I mean really sick...like lost 15 lbs and now my pants are too loose sick.  But, I'm better now and ready to get back into the swing of things (I will go slow Sherri, I promise!).

We had a good Christmas.  Kevin had to work, but my family came down and we had a nice visit.  It's easier to be sick when your mom is here!!!  Kevin was able to come home a few times during Christmas day to open presents and eat with us.  The kids were WIRED and had a great time.  I think the hilight is when I convinced my dad that Beer Bellies were sensual during a game we were playing.  For the record, I DON'T think beer bellies are sensual, but I got the point!!!!!  And, the game "Apples to Apples" is pretty fun!


I don't really have much non Christmas stuff stamped, but I do have one card that my stamp clubs did last week.  It's a friend card and uses the DSP from the special right now.

Here's the whole card.


It's a pretty simple, but cute card.  They needed a simple and fast project to round out the evening of ornament making!  You can see the info on the special to the right...just click on the link.

One more thing before I go for today.  Ollie and Penny have become great friends!  The play (the kids call it Puppy Ultimate Fighter), chase each other, and snuggle.  Ollie is the boss over everything but the toys, which she has control over!  She has definitely become a member of the family!


Have an inspired day!


Sunday, December 19, 2010

Penny

"A penny for your thoughts?"

My dad sometimes calls me Penny because my "check engine" light has been on in my van for-evah (it's a really expensive not really useful sensor...according to the mechanic...that we don't want to fix!).  If you're a Big Bang Theory Fan you'll totally know what I'm talking about here!

"A penny saved, is a penny earned."   -Ben Franklin

Did you know the Canadian government is debating getting rid of our penny?  Apparently it costs 1 1/2 cents to make each one and since they're only worth 1 cent, we're losing money.  Makes "cents" to me!!!!  Ha, ha, ha!!!  Although I'm not quite sure how that will all work when I'm shopping.

The Canadian penny has a smooth edge.  But from 1982-1996 it was made 12-sided to help the visually impaired distinguish it from other coins.

Each of my kids has a penny from the year they were born...as well as one of all the other coins that were in circulation that year.

In the 2008 Olympics, there were two athletes named Penny.  The both competed in sailing.  One was from Great Britain and the other from South Africa.

The Canadian penny has a maple leaf branch on one side and Queen Elizabeth II on the other.

If you google penny, you get 50,700,000 results!

Penny Marshall is a famous penny, but her real name is Carole Penny Marshall.

Currently, the Canadian penny weighs 2.35 g and is 19.03mm in diameter.  It is 94% steel, 1.5% nickel and 4.5% copper plated zinc.

The Penny Coffee House...they have good treats!

When I was a kid, I had a penny collection.  I still have it...and I have pennies from the 20s and 30s in it!  I remember going through piles of pennies at my grandparent's house to find old pennies to complete my collection!

Penny is the Scavo's daughter in Desperate Housewives.  Sometimes I can totally relate to Lynette...even though she's a fictitious character!

I think Penny is short for Penelope.

Lucky penny!!!

When you say penny over and over again it starts to sound funny!

I don't know anyone named 
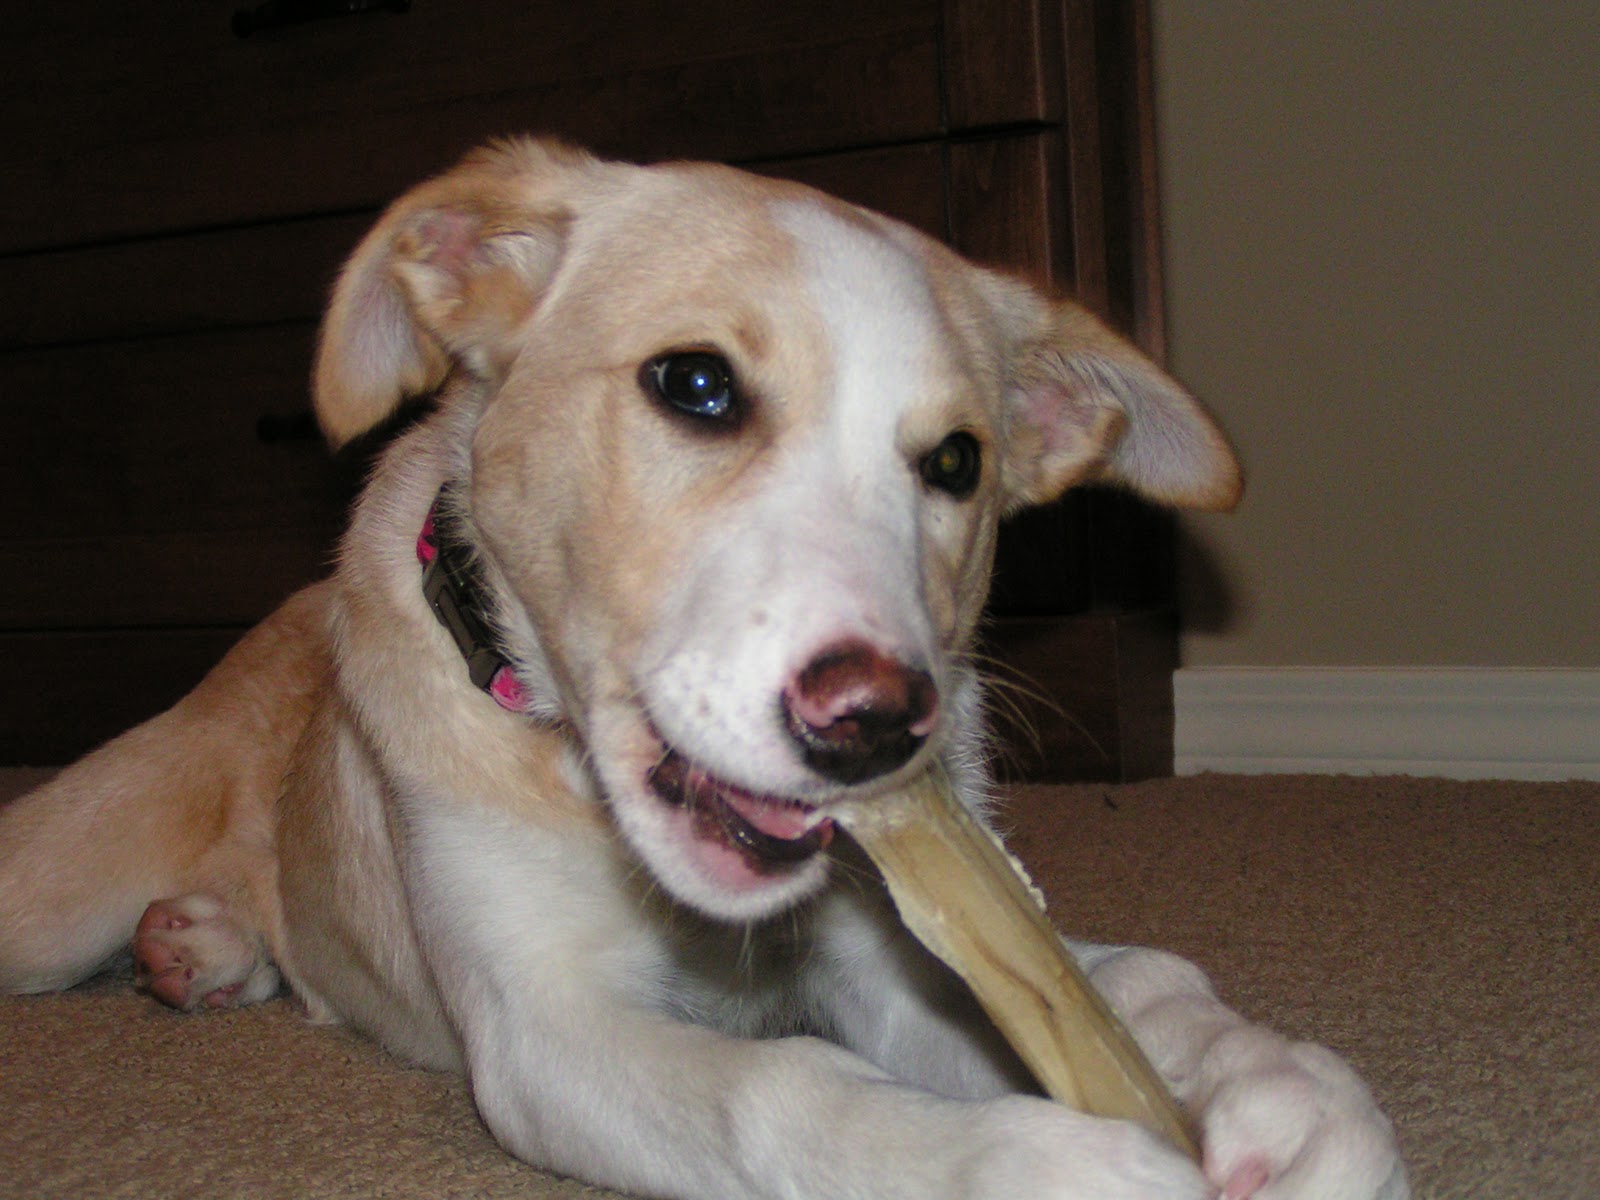
Penny (that I can think of)...until now.  Meet Penny!


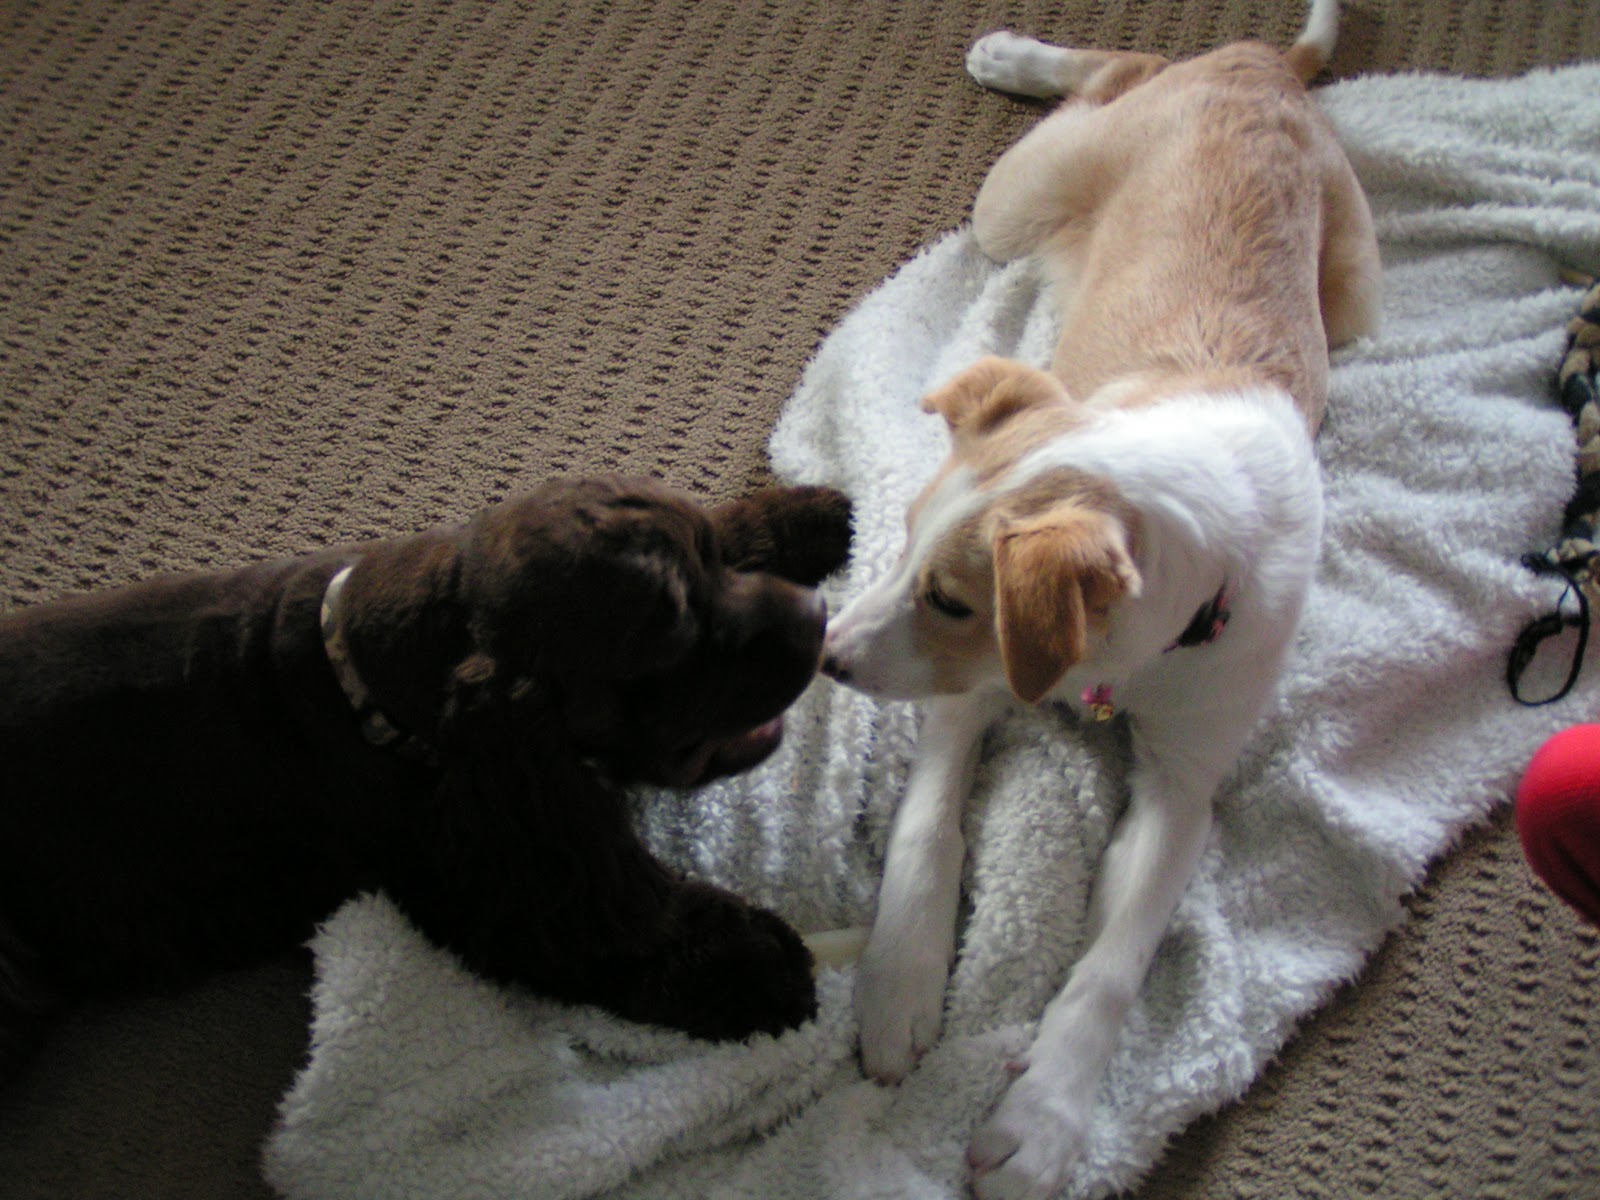
Since Bailey died, we've been missing having two dogs.  We still really miss her and think Ollie does too.  We knew we would get another dog eventually and decided we didn't want to wait as long as we did when we introduced Ollie into our family.  And, we know that Cockers do better when they have a friend (a furry friend).

Originally, the plan was to get another puppy when Sawyer was in Grade 1...two and a half years from now.  But the other day Kevin texted me and said he wanted to get another dog.  We talked about getting a shelter dog...but only if we could find the "right dog".  We decided to go have a look, and found the sweetest little thing!  We all fell in love!


We're not sure what exactly she is, but the best guess is that she's a Smooth Collie Cross (crossed with what...we're not sure and neither is the vet!).  We think she's around 5 months old.  She's so sweet and mild mannered and I think her and Ollie are becoming great friends!


So, that's what's new in our house!  I will be back tomorrow with some stamping.  Have an inspired day!

Friday, December 17, 2010

Payin' It Forward

It all started when my alarm didn't go off...I was thankful for the neighbor's yappy little weiner dog because he woke us up at 7:15!  The kids all slept in too and as a result it was more hectic than usual getting them dressed, fed, teeth brushed, and getting them out the door to school.  But, I was super mom that morning and we were doing great...even getting into the van earlier than normal.  And then it all came crashing down.  Someone didn't close their van door all the way the night before, which mean the interior lights were on ALL night...can you see where I'm going with this?  Yep! Dead van.  Argh!  Actually I mumbled a few other choice words under my breath (the kids were right there and I had to be somewhat of a good example...if they hadn't been there I probably would have had a fit!).  Ok...think fast!  Called the school to tell them we were running late and then called Kevin with my fingers crossed that he wasn't busy on a call and could come home to help me out.  Yahoo!  He wasn't busy and said he would be right home.

So he got to the house in about 5 minutes (he must have been close!) and backed into the driveway.  Then, using super human strength, we I pushed the van out of the garage (while he steered) so that the cables could reach between his police car and the van.  Why is the battery always on the wrong side in these situations?!?  Success...van boosted, Kevin raced off  and I got the kids to school only 10 minutes late (I won't get into the stuff I had to take to the school after I dropped them off because it was forgotten in the rush to get out of the house).

So, I was grumping because the day started so crappy and I decided that I deserved a Chai Latte from Starbucks to make my day a little better.  I had errands to run anyway and we were going right past Starbucks, so why not?  There was a long line in the drive through, but it was cold and I didn't want to go in, so I waited.  And guess what happened when I got to the window?  The person ahead of me (a total stranger) PAID FOR MY CHAI  LATTE!!!!!  I was floored!  I've NEVER had that happen before and boy did it make my mood better in a hurry.  In fact, I still smile when I think about it.  That total stranger absolutely made my day...and my week!  That total stranger renewed my faith in people (after the rudeness I've experienced in the stores lately).  A simple little random act of kindness had a huge effect on me...more of an effect than I thought it could.  Which got me thinking.  The essence of Stampin' Up! is touching people's lives through creativity.  An unexpected little note to someone or a sweet handmade card has the power to "lift a spirit, brighten a day, lift a load and remind someone that they are loved" (that's a Shelli quote!).  Cards and especially hand made cards, are not just little pieces of paper, they tell someone that you care about them and they can really pack a punch!  So, I've decided that in the new year, I'm going to send out more cards, especially thank you cards, to let people know that I appreciate them and care about them.

Now that you've read through all of that, I'm going to share a card...a thank you card!  This is for the person who paid for my order the other day.  You're probably not reading this, but on the off chance that you are, thank you.  I appreciate your kindness.


And, I've already paid it forward.  I didn't pay for someone's order in a drive through, but I did plug the parking meter for the person next to me at City Hall the other day.  Their time was up...and it sucks to get a parking ticket (especially at Christmas), so I helped them out.

Do something kind for someone today!  You never know the impact it will have on them.

Have an inspired day!

Countdown to Christmas-Week 12

Wow!  Santa will be coming in ONE WEEK!!!!  I can't believe it's almost Christmas.  This will be the last of my Countdown to Christmas posts, but I do have a few other Christmas ideas that I will share over the next week...but I'm so ready to move on to other themed projects!

So, I started this countdown with a gift bag and I'm gonna end it with one too!


I have a boat load of Holly & Jolly Rub ons...I had a plan, that I didn't end up doing...so I thought they would work great for gift packaging.  And, I needed one more gift bag for teacher gifts. 

This project started with a simple Kraft gift bag that I found in my cupboard (stuck in a box of envelopes?!?).  I thought the tree border was perfect along the bottom of the bag and once that was on, I set out to make a focal point on the bag.


I started with a scrap of Very Vanilla cardstock, applied the "Merry" rub on and sponged around the edge with Old Olive ink.  Then I added a strip of Old Olive that was punched with the Scallop Edge punch (can you believe it was in my scraps like that...score!).  I added yet another rub on to the Old Olive piece before I tied some Cherry Cobbler Seam Binding around it.  The ribbon was lookin' a bit blah, so I took one row of the Old Olive dots rub on and applied it directly to the ribbon.  The whole thing was then matted on a piece of Cherry Cobbler cardstock.  Bag is done...love it...and it only took me about 20 minutes start to finish!

Of course, it needed a card to go with it and I happened to have this card sitting on my desk from the Army Wives stamp camp I did a few weeks ago.


The simplicity of this card is awesome!


The tree was made just like the tree in this project using the 2 1/2 inch circle punch.


The ribbon is stuck on with a piece of Sticky Strip and gathered like Kimberly Van Diepen (love her!) showed on her Halloween cone ornaments.  Super easy way to gather ribbon on a card and I *heart* how not perfect it is...kinda whimsical!

So, do you wanna know what was inside the bags?  My sweet little boys choseMidnight Pomegranate Body Wash, Lotion and Hand Sanitizer from Bath and Body Works for their teachers!  It was so cute how they smelled every bottle and finally settled on the pomegranate one because it was "the perfect one for their teachers".  So cute!  Someday they will make good boyfriends!!!

Have an inspired day!

Wednesday, December 15, 2010

Par-tay!

A couple weeks ago I hosted a Holiday party for my downline.  We had so much fun!

Our evening started with Sherri singing Superman Grace and then we had a wonderful potluck supper.  It was yummy!


Then our evening continued with some games and, of course, stamping!  I had a special project for my girls to do.


They were all surprised and excited about their project.  I love the way it all came together and I know they will all proudly display their framed project in their craft areas!

We finished off the evening with another game.  The most fun game of the night!  We paired up and had to stamp a card each only using one hand...one person was the right hand and the other was the left hand.  It was hilarious and all the cards turned out perfectly!  We had some good laughs with this game...FYI, Stampin' Up! ink pads can be opened with only one hand!!!


We had a blast and hopefully next year more people will be able to make it.

Have an inspired day!

Sunday, December 12, 2010

Simplest Card Ev-ah!

Today I have a 5 minute card for you!  Literally 5 minutes!!!!  I think it took me longer to take out and put away my supplies than it did to actually make the card!


I used the Fresh Cuts Notes, put a Designer Flower Brad in the middle of the flower and stuck a piece of Pawsitively Prints II DSP behind the card front.

And, since it literally took me 5 minutes, I decided to jazz it up a bit when I was done!  I added some sponging around the edge of the card and stamped a sentiment with the Short & Sweet set.  I chose Poppy Parade ink to do this.


Simple, cute and easily mass producible!  The perfect combination for Simple Card Sunday!  I'm thinkin' I need to keep more of the Fresh Cuts cards on hand for those times when I need a super quick card.


One quick little tip when you're making these cards.  You want to choose DSP that doesn't have a lot of white in the pattern or the pattern and the flower seem to get lost.  You also want to choose a pattern that is smaller, so you can see more of it in the flower petals.  It's a super easy card that is easy to jazz up.  Don't you think it would be cute with a colored brad or button in the middle of the flower.  And, you could even stick some pearls or rhinestones in the middle of your brad or button to jazz it up even more! 

If you give it a try, leave a comment and link to yours so I can see it!!!

Have an inspired day!

Friday, December 10, 2010

Razzleberry Snowflakes

I was checking out the blogs that I follow last week and came across Kristine's projects with a really unorthadox Christmas color scheme.  I loved it, so I decided to give it a try with some snowflakes!


The colors are Rich Razzleberry, Pear Pizzazz and Tempting Turquoise.  I love the way this turned out and I really love this color combination!  I did add some sparkle to the card...


It's a bit hard to see in the picture, but I sprayed the snowflake layer (including the ribbon and Tempting Turquoise layer) with Champagne Shimmer Paint mixed with rubbing alcohol and water.  It's so shimmery in real life.

So what do you think of these colors together?

Have an inspired day!

Thursday, December 9, 2010

Countdown to Christmas-Week 11

So, why is it that kids always get puking sick in the middle of the night?  And, why did I marry someone who runs the other way when people start puking?!?!?


Tuesday night was Sawyer, last night was Taylor and Carter is complaining that he's not feeling good.  I have a feeling that I will be up all night with him tonight!

I'm sure you didn't stop by for a discussion on bodily functions, so how about we get to some stamping!  Today I'm going to share a fun ornament idea.


Last weekend I did crafts at a Girl Guide camp with Sherri.  We had so much fun with the girls and this is one of the projects they did.  It was super cute to see how all the little gingerbread house ornaments looked different at the end of the afternoon!

We started with some Soft Suede cardstock and the Mini Milk Carton Die.  The roof is a piece of Soft Suede cardstock that was embossed with the Square Lattice embossing folder.


Ca-ute!  You can see that we just poked a hole and put some Linen Thread through so it would hang.  You can also see that we accented the house with the Tasteful Trim Die and Whisper White cardstock.  Here's a little trick for you...stick some of the Big Shot Adhesive Sheets to a strip of cardstock before you cut it.  Then when you're ready to sick it down, you just peel the backing off and voila, it's already sticky!

The door is also super cute!  It's a piece of Cherry Cobbler cardstock and we used one of the black rhinestones from the Holiday Mini for the door knob!


You can see in all the pictures that we used stamped images from the Jolly Bingo Bits set around the house.  We used the little gingerbread man (stamped with Soft Suede), the candy cane (stamped with Cherry Cobbler) and the wreath (stamped with Old Olive and then the berries were colored in with a Cherry Cobbler marker).

Here's a shot of the whole project hanging on my tree!


Have an inspired day!

Sunday, December 5, 2010

Simple Wreath

Today for Simple Card Sunday I have a great card that was one of the cards at my last Christmas Card class last week.  I was inspired by a few different card layouts I've seen on the web.


I finally inked up the wreath image from the Northern Hearts Hostess set in the mini!  Until now, I had only used the snowflakes from the set!  I guess you could say the wreath was calling me!!!!


The card base is Cherry Cobbler which I embossed with the Perfect Polka Dots Embossing Folder.  I then rounded two of the corners.  The main image is stamped on Whisper White cardstock which was matted with Crumb Cake cardstock.  I inked up the wreath with Old Olive ink and then colored the string with an Early Espresso marker and some of the berries with a Cherry Cobbler marker. 

Sometimes I like to put what you would normally put on the inside of the card (the verse) on the front and then inside stamp the sentiment...in this case Merry Christmas!  The words are from the Christmas Greeting set and were stamped with Early Espresso ink.  I also lightly (very lightly) sponged the edges of the Whisper White cardstock with Early Espresso.

I'm lovin' the way this card turned out and even with the embossing and use of markers, I still finished in 15 minutes (not including clean up this time!!!).

Have an inspired day!