I am always excited about Stampin' Up!'s retiring product lists. Out with the old means in with the new...and the new is always fun! Every year there is always a few products that I mourn the loss of and this year, one of those products is my bloved Two Tags die. I use this die for so many projects...I will definitely miss it!
This month my stamp clubs used it to make a fun little box.
And, here's a side view...
It's really a pretty easy project. You make a box and then glue a scalloped tag to the front and back. The box is made from a 3 3/4 x 3 3/4" piece of cardstock scored at 1" on all 4 sides. You then need to cut like we always do so that you can fold it into a box.
I used the Best of Butterflies set for this project and stamped the tags as well as made a butterfly tag embellish the box.
We made some paper shreds by cutting some Soft Suede cardstock into thin strips, crimping and scrunching it and then putting it into the bottom of the box and then we added 2 Hershey Nuggets that were covered with Baja Breeze DSP. I think a bottle of nail polish would fit nicely into this box if you wanted to give it as a party favor or a fun little something for a special girl in your life!
Have an inspired day!
Showing posts with label Favours. Show all posts
Wednesday, May 22, 2013
Thursday, April 26, 2012
Where, Oh Where Has Lisa Been?
Hello all! Were you starting to wonder where I was? It's been a busy week preparing for upcoming shows, work around the house and getting ready for the big Stampin' Up! Incentive Trip to Disney World!
Like I said, I was prepping for upcoming shows. Last weekend I participated in the local Children's Festival. Sherri and I were busy making stuff for our display, but we had the most fun with play dough! We featured the Sweet Pressed Cookie Stamps at the Children's Festival and we let the kids play with them with play dough!
That's me playing play dough just as the doors were opening! I learnt a few things that day...
1. Mixing thousands of kids with cotton candy, ice cream, cupcakes and loads of candy results in a LOT of VERY sticky fingers! We were smart and had lots of play dough to switch out throughout the day and at the end of the day it went in the garbage!!!!
2. Rolling, kneading and stamping play dough for 6-7 hours is a GREAT workout for your hands and forearms!!! My hands and forearms were sore the next day!
3. Sweet Pressed Cookie Stamps are super popular! Thanks to all the people who bought cookie stamps from me on Saturday.
We will be at the Diva Show this Friday (Fritz Sick Center, 5-9pm) with a little different display...no play dough for the grown ups! Stop by and see us if you can!
A couple weeks ago, Kevin and I started the big job of fixing the landscaping in our front yard. Really, we should have done it right 3 years ago when we first did it, but we didn't and it's been bugging us ever since. I guess that's what happens when you are dealing with back surgeries, moving and little kids! Here's a few before and after pictures.
We dug out the flower beds and removed the top soil and some of the clay we have for soil here until we were about 6-8 inches down...we filled the truck about 5 times! Once that was done, we filled it in with bark mulch. We chose that because it repels weeds (yahoo!) and retains moisture, which is important in the summer when it's so dry here! And, because it's so deep, they guarantee it won't blow away...another big plus in Lethbridge!
We are so happy with how it looks now and can't wait for our plants to get bigger! There's buds on all the trees and shrubs and the flowering plants have also started sprouting. A little rain and some nice sunny days and it will all be greened up...hopefully by the time we get back from Disney! And then we are going to tackle the back yard and staining the fence, front steps and decks...oh, and I have to plant my garden! Busy spring for us!
But, you probably stopped by to see some stamping, right? Well, one of the other things I have been busy with is making table tags for the Diva Show. These are cute little somethings that identify which vendor is at which table. Since it's a Diva Show and we just got a super cute purse die, Sherri and I decided it would be perfect to make some purses.
We made about 80 of them! The show coordinator requested pink, so we used up our Blushing Bride stuff (because it's retiring) and then had to use some Pretty In Pink and Pink Pirouette to get them all done! They are pretty basic. We cut the purse out of cardstock and stamped it with Soft Suede ink using the rose bunch stamp from the Elements of Style set. A little ribbon for a handle (attached with some brads) and a fun flower accent finished off with a pearl just makes them so cute! We then attached a little banner with each vendor name.
I am absolutely in love with all of them! They're gonna look super cute on the tables! Don't forget to stop by and say hi tomorrow night. We will be at the Fritz Sick Center from 5-9...and admission is FREE!!!!
That's all for today! Have an inspired day!
Like I said, I was prepping for upcoming shows. Last weekend I participated in the local Children's Festival. Sherri and I were busy making stuff for our display, but we had the most fun with play dough! We featured the Sweet Pressed Cookie Stamps at the Children's Festival and we let the kids play with them with play dough!
That's me playing play dough just as the doors were opening! I learnt a few things that day...
1. Mixing thousands of kids with cotton candy, ice cream, cupcakes and loads of candy results in a LOT of VERY sticky fingers! We were smart and had lots of play dough to switch out throughout the day and at the end of the day it went in the garbage!!!!
2. Rolling, kneading and stamping play dough for 6-7 hours is a GREAT workout for your hands and forearms!!! My hands and forearms were sore the next day!
3. Sweet Pressed Cookie Stamps are super popular! Thanks to all the people who bought cookie stamps from me on Saturday.
We will be at the Diva Show this Friday (Fritz Sick Center, 5-9pm) with a little different display...no play dough for the grown ups! Stop by and see us if you can!
A couple weeks ago, Kevin and I started the big job of fixing the landscaping in our front yard. Really, we should have done it right 3 years ago when we first did it, but we didn't and it's been bugging us ever since. I guess that's what happens when you are dealing with back surgeries, moving and little kids! Here's a few before and after pictures.
| Before |
| After |
| After...I still have a little spot to plant whatever kind of flowers I want each year. |
| After |
We are so happy with how it looks now and can't wait for our plants to get bigger! There's buds on all the trees and shrubs and the flowering plants have also started sprouting. A little rain and some nice sunny days and it will all be greened up...hopefully by the time we get back from Disney! And then we are going to tackle the back yard and staining the fence, front steps and decks...oh, and I have to plant my garden! Busy spring for us!
But, you probably stopped by to see some stamping, right? Well, one of the other things I have been busy with is making table tags for the Diva Show. These are cute little somethings that identify which vendor is at which table. Since it's a Diva Show and we just got a super cute purse die, Sherri and I decided it would be perfect to make some purses.
We made about 80 of them! The show coordinator requested pink, so we used up our Blushing Bride stuff (because it's retiring) and then had to use some Pretty In Pink and Pink Pirouette to get them all done! They are pretty basic. We cut the purse out of cardstock and stamped it with Soft Suede ink using the rose bunch stamp from the Elements of Style set. A little ribbon for a handle (attached with some brads) and a fun flower accent finished off with a pearl just makes them so cute! We then attached a little banner with each vendor name.
I am absolutely in love with all of them! They're gonna look super cute on the tables! Don't forget to stop by and say hi tomorrow night. We will be at the Fritz Sick Center from 5-9...and admission is FREE!!!!
That's all for today! Have an inspired day!
Thursday, January 19, 2012
Sweet Heart
Yesterday I showed you a super cute peek-a-boo card and today I'm going to show you what I did with the one full heart I cut out for yesterday's card.
I made a little pouch to hold Hershey Nuggets. You can see the heart on there as well as some other punched embellishments I did. The pouch is made from a 2x6 piece of cardstock which was scored at 2 1/2 & 3 1/2 inches (decorate, bring edges together and tie with a ribbon to keep it shut).
I love the nugget wrapper! It's a piece of the First Edition DSP and then a sweet little red heart which I punched using the Owl Punch. So simple and so cute!
Have an inspired day!
Monday, January 2, 2012
Wintery Treats
The 1x8 Cello Bags in the Holiday Mini are perfect for making quick and fun treats. Check out my wintery one...
In real life this is waaaay more sparkly...darn taking pictures at night!!!! I filled my cello bag with York Mint pieces (I found them in the States last time I was down shopping...haven't seen them in Canada). As soon as I saw them I had to have them because this project popped into my head!!! Once the bag was full, I made a wrap around for it. I used a piece of Night of Navy cardstock which I embossed with the Snow Burst Embossing Folder. It is folded around the bag. I embellished with a punched piece (round tab punch) which I stamped with a silver "enjoy" (used the Platinum Shimmer Paint for this ) and a snowflake which I punched from a piece of the Silver Glimmer Paper (seriously...it's like a sheet of diamonds!!!). The whole thing is finished off with a piece of Night of Navy Grosgrain ribbon.
I used quite a few products from the Holiday Mini for this project...1x8 Cello Bags, Snow Burst Embossing Folder and Silver Glimmer Paper. Get 'em while you can people...the Holiday Mini is done tomorrow!!! Contact me to order your "must haves" ASAP.
Have an inspired day!
Wednesday, December 14, 2011
A Christmas Purse
Last month I did a super fun Christmas purse with my clubs (one of my clubs made them and the other got them in a swap!). I got the idea from my friend Becky and you can find super instructions on her blog here.
Here is my take on it...
It's done with the super versatile Top Note die (is there anything you can't make with this die?!?!?!). I embellished my purse by stamping "merry" across the front (from the Pennant Parade stamp set), and making a fun flower (5 Petal Flower punch). In the middle of my flower I used a small flower punched with the Itty Bitty Punch Pack and finished it off with a Real Red Glimmer Brad.
I was excited to find these for candy for this project.
I love eating these at Easter and was excited to find them at Christmas...in Christmas colors to boot (Garden Green, Real Red and Whisper White...because I know Hershey's made them those colors just for SU Demonstrators!!!). But, I think they should rename them for Christmas because eggs have nothing to do with Christmas. Perhaps "Holly & Mistletoe" or "Christmas Berries" would be more appropriate Hershey's...just sayin'!!!!
Have an inspired day!
Wednesday, June 15, 2011
Birthday Chocolate
I have another sneak peek for you today...this time some hostess product.
I made a Box #2 in Concord Crush and stamped a Happy Birthday from the new Happiest Birthday Wishes hostess set. I am lovin' this set...it's a GREAT birthday set, that I know is going to be a popular one! I made a belly band with the new Cheerful Treat hostess DSP...again, lovin' this DSP and I know it will be popular too!!!
The stamped image is another one from the Happiest Birthday Wishes set. It was colored with markers (Concord Crush, Lucky Limeade...a new In Color!..., Melon Mambo and Basic Gray), stamped on Whisper White and punched out with the widest oval punch. It is layered with a piece of Melon Mambo that I cut with my Big Shot and one of the dies from the Lots of Tags sizzlits set (you need this set of sizzlits...it's so versatile!). You'll notice that I embellished with two little Pretty In Pink brads and some Pretty In Pink Grosgrain ribbon. This little medallion is put on the belly band with some Stampin' Dimensionals.
So, ya wanna know what's inside my pretty little box? Here's a little teaser...tee, hee!!!
Ok, here's a better look...
I wrapped 12 little chocolates with DSP from the Cheerful Treat pack. Twelve chocolates fit in the box, so it's a great way to show off ALL the patterns from the DSP pack! And, because I know you're going to ask, the chocolates are from Costco. They're swiss milk chocolates and they come in a HUGE pack...I know, shocker!
So what do you think? Do you love this new DSP and birthday set as much as I do? If you do, you're going to want to book a workshop with me so you can get it FREE!!!
Have an inspired day!
Monday, November 22, 2010
Countdown to Christmas-Week 8
This week I have some fun Christmas gift packaging ideas for you. Before I show you the projects, I have to say that I can't take credit for these! All three of the projects I'm going to show were inspired by other crafters. Thanks for your inspiration ladies!
Each of the projects uses DSP from a different Christmas set. First off, I have a super fun and easy Christmas Tube made with Deck the Halls DSP.
I've seen a lot of these while surfing the web. This is just my take on the project! You start with a 6x6 piece of DSP and make it into a tube. You want to score 1/2 inch from the bottom (do this before making it into a tube!) and then make some cuts. The little tabs that you make will fold into each other and allow the tube to stick to the scallop circle on the bottom. I finished it off with some gold Waffle Paper and a fun tag.
Don't you love that Glass Glitter? It's the perfect touch to finish off the project!
The next is a Scallop Envelope box.
These little boxes have been around since we started carrying the Big Shot and Scallop Envelope Die! There are so many little boxes and baskets you can make just by joining a number of these envelopes together. This one uses 2 of the Scallop Envelopes. It was done in Garden Green and is embellished with some of the Candy Cane DSP. I *heart* those strings of mittens! It's finished off with a punched snowflake and a silver Glimmer Brad. I've said before that I'm so not a flashy, blingly kind of girl...but I love the Glimmer Brads! They add just the right amount of bling to finish a project off!
The third and final project this week is a fun little gift box. I got the measurements from Becky Roberts.
So fun! This is the perfect little box for a great little gift! I used Cherry Cobbler cardstock and embellished with Jolly Holiday DSP. The tag is from the Two Tags die and was stamped with the poinsettia from Jolly Bingo Bits...the perfect little Christmas set!
I did a fun little trick with the ribbon! Rather than wrap it around the box, I cut some slits in either side of the lid and fed the ribbon through before tying a bow. This way, you can take the lid on and off easily and not have to wreck the awesome bow!!!
That's all for today! Have an inspired day!
Tuesday, October 26, 2010
Merry Treats
Ladies and gentlemen, my name is Lisa and I am apparently addicted to slippers...
There are so many that when I asked Sawyer to take them up to my room tonight he couldn't carry them all!
In my defence, a certain little chocolate colored puppy named Oliver steals them and hides them (see the lonely pink Oilers one in the first picture) and then I can't find them...so I buy a new pair and then end up finding the old ones!
I know...he's cute. But, don't be fooled by the cuteness...he has a serioius slipper stealing problem!!! Kevin made me promise not to buy any more slippers. sigh
Ok, on to some stamping! I have a super cute project that my stamp clubs did this month to share with you. Check it out.
It's an Always Artichoke box cut from the new Candy Wrapper die. The sides were decorated with some of the Deck the Halls DSP and it's finished off with some fabulous crochet trim (you need this...I didn't think I needed the crochet trim when I first saw it, but was I wrong! In fact, I've gone through two rolls of it already!!!). To make the box like this, you want to cut along the score lines to make flaps and fold them up to make a bottom for your box. The top is done as per the directions that come with the die (yes, there's directions!). You pretty much fold on all the score lines really good and then you push down and twist the top and it will stay shut (the instructions explain it much better than that). If you've folded along all the score lines really good, this step will be easy.
The little tag is done with the Tiny Tags set and the Jewellery Tag punch. First I stamped the dotted outline with Always Artichoke, then the "merry" with Cherry Cobbler. Now, this is perhaps the most important step when using this punch...BEFORE you punch the tag out, you want to punch the little hole. Trust me people, this is waaaaaay easier than trying to punch the little hole after the little tag is punched out! The edges of the tag were sponged with Always Artichoke ink.
When my stamp clubs did this project, they tied the tag on around the knot with some Linen Thread. But, when I was cleaning up, I came across my Vintage Trinkets and thought the little safety pin would be cute. I was right...I love it!
There's a special treat inside this cute little box.
As you can see, they don't last long in our house. Now, you can only get them at Christmas and this package was from last Christmas so I'm really hoping that they will be out again...soon!
I can totally see this project done for all kinds of occasions. Can you imagine how cute they would be as wedding favours? You coudl put anything small in them...chocolates, nuts, gummies, hard candies, earrings, a bracelet, a necklace, cash...I could go on and on! Ooooh, I bet one of our Simply Adorned charms would fit nicely in it (maybe the 1x1 1/4 one...or a smaller one!). Cute!!! They would also make great little place settings for your holiday table or any other occasion. So fun!!!
That's all for today! Have an inspired day.
Friday, October 8, 2010
Over the Top Spooky
Today I have another treat holder to share with you. This one is made with the new Candy Wrapper die in the Holiday Mini. It's a bit over the top, because I just couldn't stop adding stuff, but you could definitely simplify it to mass produce if you wanted.
I know...OMG!!!!! So, I started with a half sheet of Basic Gray cardstock, cut it with the Candy Wrapper die and then embossed it with the Spider Web embossing Folder. I will say that at this point it was cute, but I decided to make it extra special to give to someone extra special!
I gently rubbed wome White craft ink over the embossed web to give it some dimension. Then I smooched it with Silver Foil Smooch and finally spritzed it with my Basic Black Marker and the Color Spritzer Tool. The ends of it are tied shut with some Rich Razzleberry Satin Ribbon and there's a piece of Raven Lace Trim (aka Lingere Lace *wink*) that I placed in the knot (it's not really tied, and can be pulled out if I want).
So, again, at this point it's cute...even cuter than before...but I still thought it needed a little something else!
I punched out a bat (love the Bitty Bat punch!) and then punched around it with the Wide Oval (so the bat is in the middle of the oval). This piece is smooched, again with the Silver Foil which creates a fun effect on the Basic Black cardstock. Then I punched an oval out of the Wicked Fun DSP so that the "spooky" would show through the oval shape and stuck it behind the bat. The whole thing is put on a Decorative Label punched piece with Stampin' Dimensionals. It was punched out of Rich Razzleberry and sponged around the edges with Rich Razzleberry ink. That whole piece is also attached to the box with more Stampin' Dimensionals.
Wow! Yep, it's over the top for sure, but I love it. It's definintely not a mass producable project, but it works for someone special!
Have an inspired day!
Monday, September 6, 2010
Finally Fancied Out
As promised, today I have one last Fancy Favour project for you. If you don't need this die after this last week, you need to go back and look at these projects! Trust me...you need this die!!!
Ok, enough chit chat. Here it is...
This is the one that the girls in the class made. It is FABULOUS with all the new Holiday Mini stuff on it...the gorgeous new DSP, the silver glass glitter, the new tag set and the fantastic new little oval punch! I will say that the ribbon is Early Espresso Satin ribbon...it kind of looks like Always Artichoke in this picture for some reason.
Here's a side view.
Ooohhh, it gives me goosebumps!!! Ok, so just because I know you will be asking, here's a picture of the parts you need to cut off of the die cut to make this box.
You need to score across the whole box 1 inch from the fancy edge, then cut along your score line as shown in the picture.
I was so excited about this project (and I had an extra already cut to show you how to cut it!), that I made another one!
This one gives me goosebumps too! Here's a side view...
Isn't is FABULOUS?!?!?! I used the halloween DSP from the Idea Book & Catalogue. Get this...IT'S FLOCKED!!! You seriously can't help but touch it! I also made a ruffle with the Waffle Paper in the Holiday Mini, and the new BAT PUNCH! Can you tell I'm super excited about these products!!! I speckled the box before I embellished it with the Color Spritzer Tool and a Basic Black Stampin' Write marker, and all the edges of the box were sponged with Basic Black.
On both boxes, the flap stays closed by tucking it behind something. On the Christmas one it tucks behind the oval and on the Halloween one is tucked behind the bat. Or should I say bats! I layered two bats together for this feature and the top on is bent a little so it looks like it's flying. I also put some fine glitter around the top bat. When I was pretty much done, I smooched the box with the Silver Foil Smooth Spritz.
Well, that's all she wrote people! I'm putting my Fancy Favour Die away for a little while now!
Have an inspired day!
Friday, September 3, 2010
Fancy Pouch
This is my second last Fancy Favour project...I've saved the best for last and I will share it on Monday. Today, the project is a great little pouch perfect for holding a little gift for someone special.
Here's my color combination for this project...Crumb Cake, Cherry Cobbler & Old Olive.
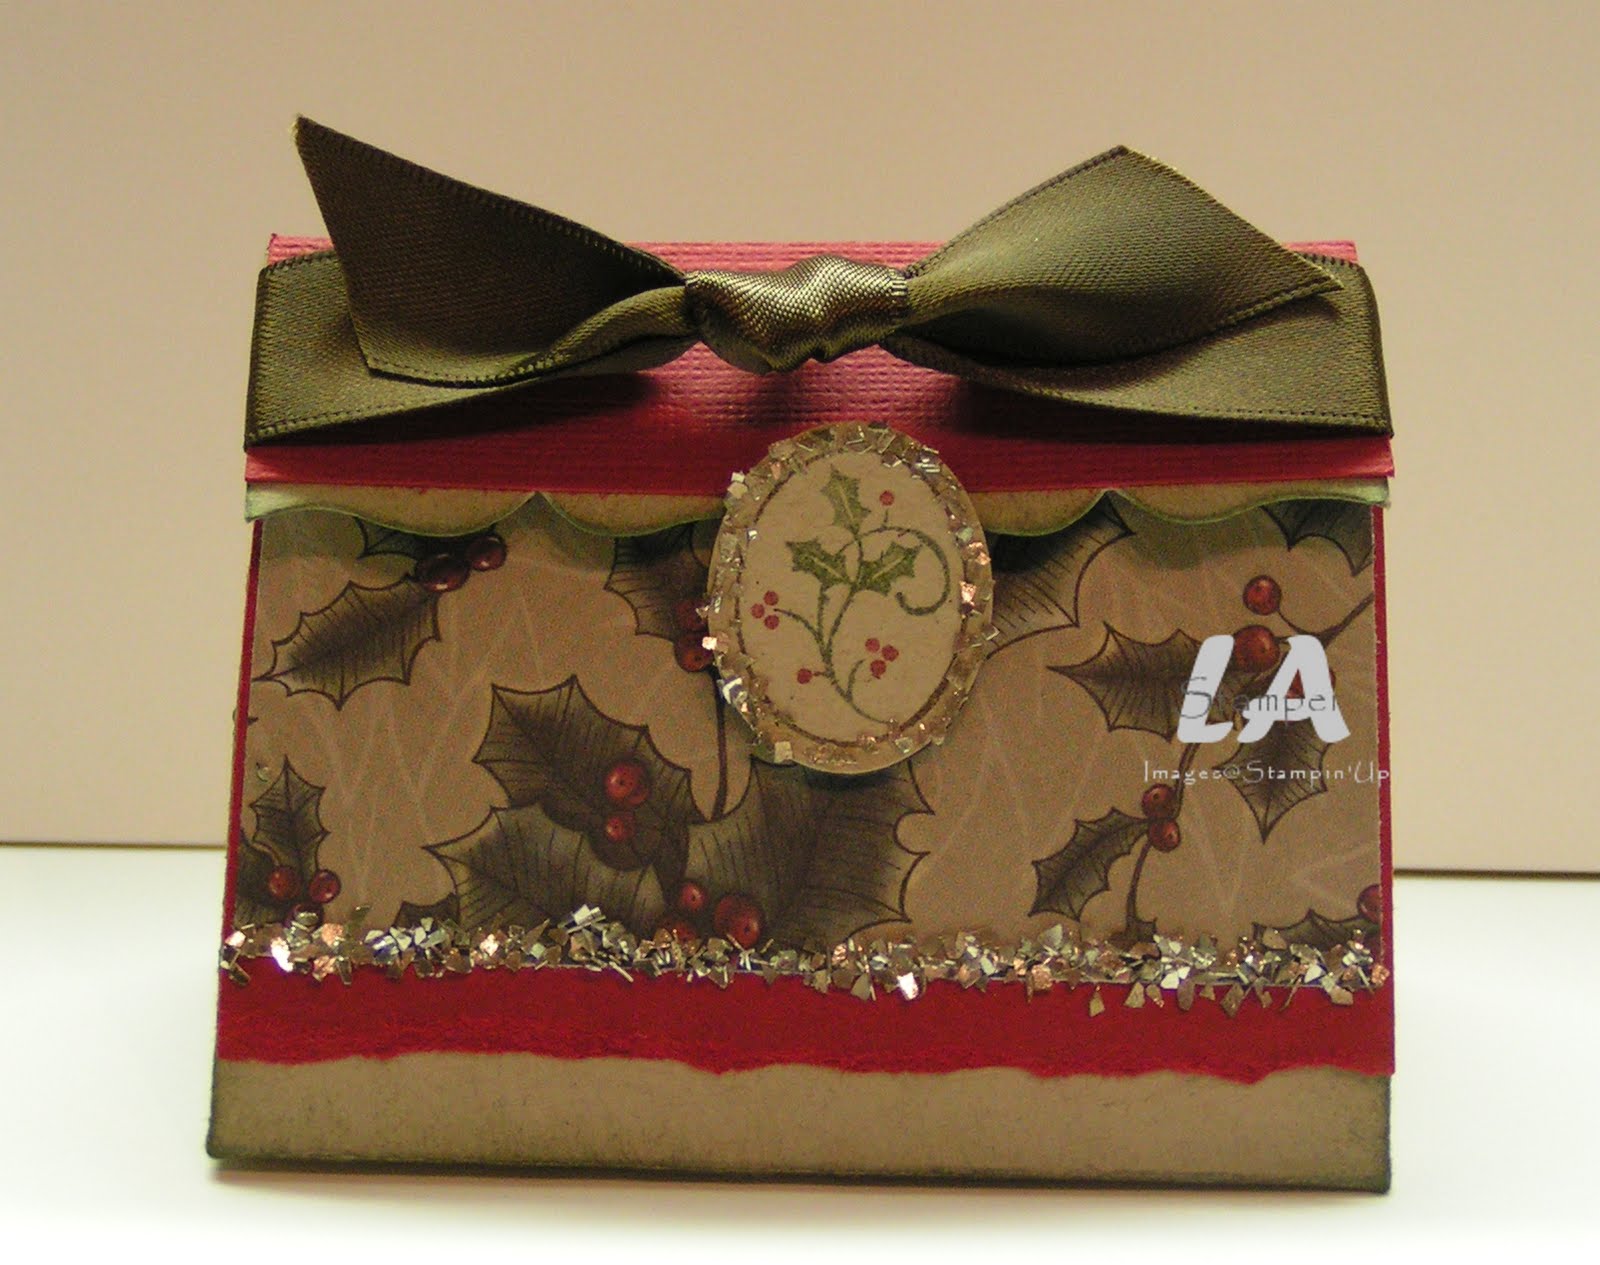
And, here's the project!
Isn't it YUMMY!!! I made a little pouch from the Fancy Favour die! Now, I can't take credit for this idea...I saw it somewhere a long time ago. The pouch is Crumb Cake cardstock stamped with the apple image from Tart & Tangy with Crumb Cake ink. And, it holds a packet of Apple Cider mix. A perfect little something for someone during the crisp days of fall. This pouch could hold a packet of Hot Chocolate, some tea bags or you could do a really fun one with a packet of Kool-Aid.
I've been using my Vintage Wallpaper Embossing Folder a LOT lately, my Square Lattice one has been feeling a bit neglected! So I used it to emboss a strip of Cherry Cobbler cardstock for the belly band around the pouch. I wrapped a piece of Striped Old Olive Ribbon around that and instead of tieing it, I scrunched it in the middle with a piece of Linen Thread through a Crumb Cake Button. This is a great way to get the look of a knot without the bulk...especially with the wider ribbons!
It's finished off with the apple image from the Apple Blossoms Level 2 Hostess Set stamped with Old Olive on Crumb Cake cardstock. I cut it out and stuck it on with a Stampin' Dimensional.
And, sonce I know you're wanting to know how to make these fun little pouches, I've done a tutorial for you!
You'll want to cut some pieces off of your Fancy Favour after you cut it out like this.
Now's the time to stamp your pouch if you so desire! It's much easier to stamp it now than after it's all put together...I speak from experience here people!!!! *wink* After you've stamped it, you want to glue part of one of the flaps and the bottom flap like this...
And, then you stick it together to form the pouch itself!
Fun, eh? Well, when I made this one, I got a bit carried away and made another! And, I just have to share it with you! It's like a 2-for-1 post!
So CA-UTE!!! The pouch is Early Espresso with a Marina Mist DSP belly band. I stamped with the Word Play set directly on the the DSP with Marina Mist and then over top that with Early Espresso to get a shadow effect. You'll notice a litle scallop along the top...that's half of a punched Scallop Square. Don't throw away the other half though! I'm gonig to show you where I used it in a bit!
The little mug is from the Every Little Bit set. It was stamped with Early Espresso ink on Watercolor Paper and then watercolored with Marina Mist and Cajun craze ink. It's punched out with the new oval punch (which you can find in the Holiday Mini) and then sponged around the edge with Cajun Craze ink.
Are you curious about what I put in this pouch? Well, have a look!
A cute little card! you can now see where I used that other half of that Scalloped Square. I used the same general idea as the pouch. One of the mugs is hilighted by coloring it and there's a little thank you (from Teeny Tiny Wishes) stamped with Early Espresso ink. To finish it off, I did a row of piercing.
But, this is not just any card...
...it's made to hold a gift card. And, not just any gift card, it's a Tim Card...shhhh, don't tell my husband I stole his from his wallet for the picture. I'll have to remember to put it back before my coffee-a-holic goes back to work tomorrow!!! My card measures 2 7/8 x 3 1/2 (which means I had to cut a 2 7/8 x 7 1/2 piece of cardstock). The little 1 inch strip I cut off my cardstock to get my card size I used to make a little pocket to hold the gift card.
Well, that's all I have for today! I have one more Fancy Favor project to show you, but I will wait until Monday to show it. Tomorrow I have a Scrapbook Saturday layout to share and I will have a super fantastic card for Simple Card Sunday on Sunday for you. Remember, I've saved the BEST Fancy Favour project for last, so you'll definitely want to stop back on Monday to have a look!
Have an inspired day!
Subscribe to:
Comments (Atom)


