Tuesday, September 28, 2010

Fabulous Corn Chowder

Today I'm going to share a recipe!  The girls that have come to my Soup & Stamps night for the last couple of years have been asking and asking for me to share my recipe for corn chowder.  So, here it is!  Now, a I've said before, I don't really measure when I cook, but I can tell you the steps and give you approximate amounts!  Becasue I know you're wondering...Soup & Stamps will happen during SAB again.

Here are the ingredients you will need.


Step one is to wash, peel and dice your potatoes.  I used 6 medium russets this time!  Once that's done, put them in a large pot and just cover them with water.  You want to cook them until they're almost done.


While the potatoes are cooking, dice up a medium onion.  Once it's diced, put it in a mocrowave safe container with some butter (a tablespoon) and microwave the onions until they're translucent.  This usually takes bewteen 2-3 minutes, but I give it a stir every minute.


When the potatoes are almost done, add the onions to them and then you want to pour some milk into the pot (don't drain the potatoes, just add the milk).  Add as much as you want.  In the end, if you like your soup thicker, you can thicken it with some flour.

Once you've added your milk, you're ready to add the corn.  I use corn that I've blanched and cut off the cob.  I package the corn in 4 cup amounts, so I've added 4 cups of niblets and one can of cream style corn.  If you don't have fresh or frozen corn, you can add about 2 medium cans of niblets corn and 1 can of cream style corn.


After you've added the corn, add salt and white pepper to taste (I used white pepper because I think black pepper looks kind of like bugs in the soup!).  If you want, you can also add some garlic powder (I often do!).  You need to bring it up to a boil and then reduce the heat and let it simmer until the corn is cooked.  Stir often and heep the heat low so it doesn't scorch on the bottom.

When it's almost done, add some bacon bits.  I make my own, which is why you see a whole pack of bacon in my ingredient picture.  I don't use a whole pack of bacon bits, just a handful.

I like to serve it with a sprinkle of grated cheese and some cheese biscuits (see this post for the Cheese Biscuit recipe I use).


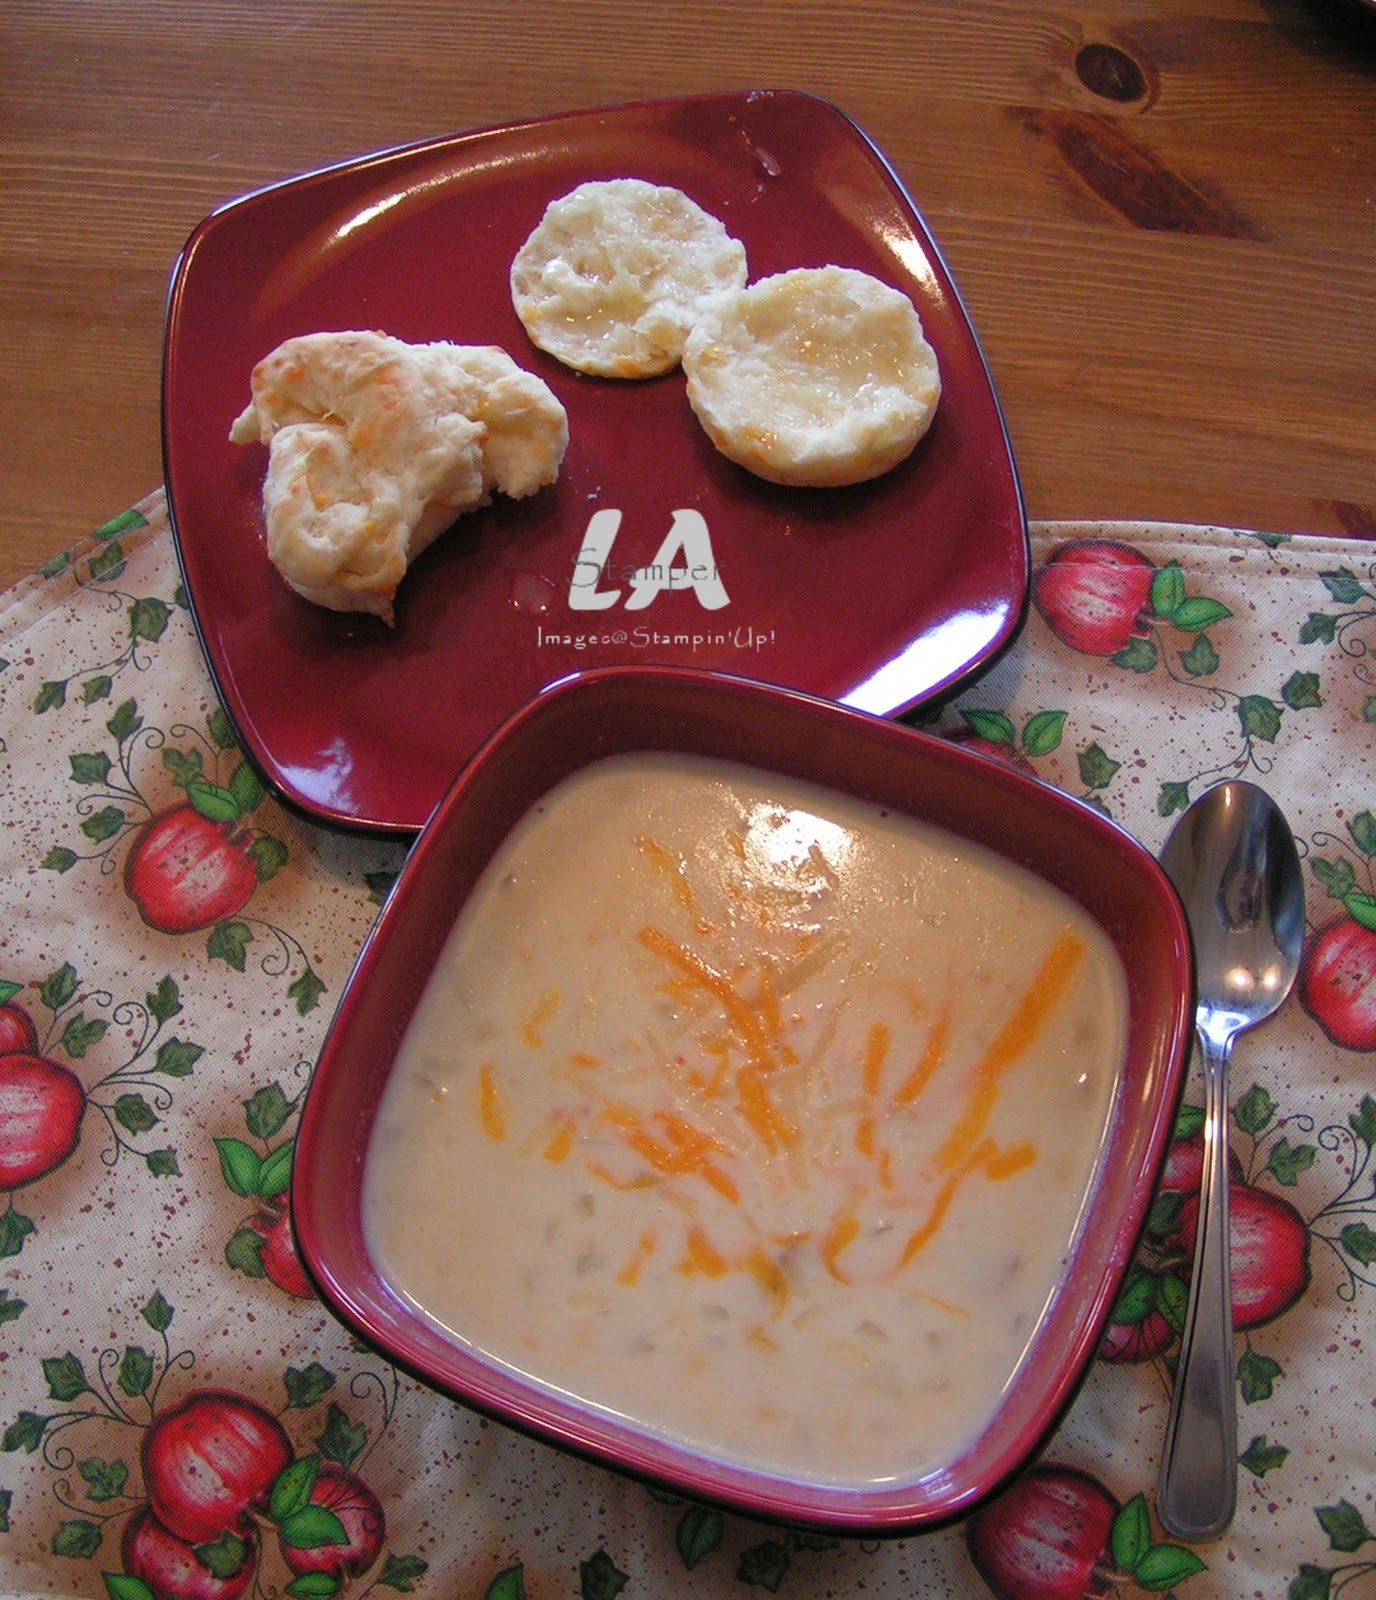
The kids call this "Mom's Fabulous corn Chowder" and whenever I make it they almost lick their bowls.  They probably do when I'm not home!!!

I do find that this soup freezes well and it's the perfect meal for a dreary day!

Enjoy!


Monday, September 27, 2010

Something Fishy

At the Mini Convention I attended a few weeks ago, we had the cutest centerpiece on the food table.  I took a mental picture and when I got home I made one!


I found this glass container at my local craft store and just applied one of the images from the Spooky Things Decor Elements to it.  I put some glass beads in the bottom and tied some ribbon around it.  And, then...added some fish!!!!


Isn't that awesome!  I had to get three, becuase my three boys were fish shopping with me.  It looks so cool up on my shelf in my halloween display!

Have an inspired day!

Sunday, September 26, 2010

Simple Christmas

Happy Sunday!  My weekend has absolutely flown by and I can't believe it's Sunday night already.  I really think that all weekends should be 3 days!!!

Last Thursday, I did a workshop for Janet and we had a BLAST!!!  Tonight I'm going to share one of the cards I did for Janet's workshop.


I started with a 6x6 piece of textured Crumb Cake cardstock.  I added a piece of Early Espresso and then layered a stamped image from the Tags Till Christmas set.  I inked the image with Cherry Cobbler ink and then took off the Cherry Cobbler on the Dec. 25 and colored it with an Old Olive marker.  To get the ink off, I dampened a Q-Tip and rubbed it over the portion of the stamp that I wanted to change the color of.  The image is stamped on a piece of Naturals Ivory cardstock and then it's punched out with the new Extra Large Decorative Label punch in the Holiday Mini.


To finish if off, I added a piece of Old Olvie cardstock that I cut out with the new Taseful Trim die and a Cherry Cobbler button tied with a piece of Linen Thread.  ***TIP:  Tie the Linen Thread through the button, stick it to the card with a Mini Glue Dot and then tie the bow.  It's much easier than trying to tie the bow with the button in mid air!!!***

Here's the best part.  I took the same supplies and turned my card into a 6x6 scrapbook page.


This little 6x6 page can be a page on it's own in a cute little 6x6 album, or you can easily add it to a larger layout.

Well, that's all for today!  Have an inspired day!

Friday, September 24, 2010

Trick or Treat


Brent Steele showed some fabulous Halloween ideas at Convention this year.  One of the ones that I really loved was the Trick or Treat pumpkins.


I chose to use only one pumpkin, because they're a bit pricey!  I just purchased the largest white foam pumpkin I could find at my local craft store and applied some of the Spooky Things Decor Elements to it.  I did cut apart the words and place them they way I wanted on the pumpkin.  To embellish, I used a package of the Black Flourish Designer Jewels.  I also cut some of them apart and applied them so they would fit the way I wanted.

Around the bottom on my shelf is a piece of Raven Lace Trim.

So spooky!

Have an inspired day!

Wednesday, September 22, 2010

Eek!

We have some fantastic halloween products in the Idea Book & Catalogue, Holiday Mini and the Definitely Decorative brochure right now.

Today I'm going to show you a super cool project with the Spooky Bats Decor Element.


EEK!  I love it!!!!  I purchased a fall garland from my local craft store, spray painted it black and tied some ribbons in it.  Then I wrapped it around this fabulous container I found on clearance at that same craft store.  I applied the Spooky Bats Decor Element directly to the glass, poured some halloween glass beads into the bottom and stuck an awesome green candle in it.  As an aside, it's REALLY hard to find a good green candle!  I think I bought 3 before I found the "right" one!

To add some visual interest, I punched some bats from the Wicked Fun DSP and stuck them on some wire with Dimensionals (I sandwiched the wire between 2 bats).  So fun!  The eek was also purchased from my local craft store and I added some bats to it as well.  Here's some close ups...


So fun!

Have an inspired day!

Tuesday, September 21, 2010

Queen for a Day

I promised to share about the meeting I went to a couple weekends ago in Millet.  It was so fun!  I got to spend time with some of my team that I see often and more importantly got to spend time with team members that I don't see very often!  We had a blast cataching up and stamping!

I got to be Queen for a Day at the meeting!  Now, I wasn't the only queen, there was a small group of us who got recognized for sales during the summer.


This is me and my upline Christy!  I loved my Queen sash and was sad to have to give it back at the end of the meeting!

We played some fun games after lunch.  They were Minute To Win It games and I was a helper for one of them.  My prize was a game prop...a DSP covered can of pop!


Good times!  We had 4 make & takes that day and a special bonus make & take which was a ribbon wreath.  The ribbon wreath also made a great crown...as modelled by Sherri!


I can say that the friends I have made through Stampin'  Up! are some of my most cherished and best friends!  We always have a blast together and pick right up where we left off if we haven't seen each other for a while.

If you are looking for a fun group of people to hang out with, some extra money each month, a discount on stampin' supplies or a business, you'll want to contact me about joining my team!  Stampin' Up! has a place for everyone and is truly a fantastic company to work with.  Not to mention, as a demonstrator, you get to come to fun events like this one!!!

Have an inspired day!

Bleached!

I absolutely love the new Just Believe set and was thrilled to get it at Convention this year.  There are so many ways to use this set!

At my stamp clubs this month, we did bleaching and used the Just Believe set to make a gorgeous card.


I just love the way the main image turned out!  Bleaching is a super easy technique.  You just need to make yourself a little "bleach pad" with a plastic lid, some paper towel and some bleach.  Your paper towel should be damp, but not dripping.  Once you have that done, you are ready to stamp and you just use your bleach pad like a regular stamp pad.  The cardstock colors will bleach out to different colors, so be sure to do a little test on some scrap so you know what colors to put on your card.  Also, you want to clean your stamp really well when you're done.

That's it for today!  Have an inspired day!

Monday, September 20, 2010

Autumn

So, what's your favorite season?  Mine is a toss up between Fall and Spring!  I love the crispness in the air during fall.  I love the smell of fall and all the beautiful colors!  But, spring is great because things start to grow again and color comes back after a long dreary winter.

I've just finished up my Mantle Message classes.  Phew, it's been a fun year of these classes, but I'm glad to move on!!!  The last one we did was Autumn.


Isn't it purty?  There is SO much texture in this project it's almost ridiculous!


Each of the coasters was covered with the Early Espresso Waffle Paper.  This paper comes in a two pack with Basic Black...stay tuned for some ideas for the black!

The letters were cut from the cork sheets, and I cut a boat load of leaves from Cherry Cobbler, Cajun Craze, More Mustard, Old Olive and Autumn Spice DSP.  Each of the leaves was scrunched and sponged before being stuck on.


I LOVE how this one turned out...and it looks AWESOME on my mantle!!!

Although the Mantle Message classes are officially done, I haven't posted all of them.  So, watch for the ones I haven't posted to show up in the next few weeks.  And, I have one surprise one that I did last week for a display, which I will share soon!

Have an inspired day!

Saturday, September 18, 2010

Take a Note

Today for Scrapbook Saturday, I don't have a layout to share, I have a fun project with a tutorial!


I altered some notebooks for my downline members who attended the Mini Convention last weekend.  As I was making them, I thought that they would be a great project for a scrapbooker to record favorite quotes or information about events/pictures for journalling purposes.


Each one of the notebooks was personalized with the girl's names.  I was at the event early to help witht he set up, so I set all their notebooks out at their seats as a surprise when they came in.  If I would have remembered my camera, I would have taken a picture of how cute they looked out on the table!

I used the Greenhouse Gala DSP for the top two pieces of the cover and the bottom is Peach Parfait textured cardstock.  The Early Espresso scallop piece was cut with the new Tasteful Trim die in the Holiday Mini...FYI, you're gonna be seeing a LOT of this die in the next little while!!!


Their names were cut out of Early Espresso cardstock with the Timeless Type Alphabet.  Then I accented their names with a punched Daffodil Delight flower (I used the Itty Bitty Shapes Punch Pack).  The leaves are Pear Pizzazz and they are just the 4 petal flower shape from the punch pack.  The centers were punched with the Crop-A-Dile from Early Espresso cardstock. 

I also altered a pen for each them.


The pens are Pentel RSVP pens.  I unscrewed the bottoms and rolled a piece of DSP around the ink part of the pen then slid it back into the pen and screwed the bottom back on.

I love how these turned out!

So, here's a little tutorial for the notebooks.

The first and most important step is to put an elastic around the notebook (and DON'T take the elastic off until you're finished the book!).


Once you've done that, you want to take a pair of pliers and gently bend the top of the coil so that you can uncoil it.  This is why the elastic is important...it will hold your pages together while the coil is off.


If you've bent the coil correctly, the book will uncoil really easily.  Once you have the coil out, you want to gently slide the cover out from under the elastic.  Make sure the elastic stays around the rest of the book...trust me, it's stressful to put everything back together if that elastic comes off!!!


Once you have your cover off, you can embellish it however you want.  When it's all embellished, you want to flip it over and punch out the little circles so you can put the coil back in.


Wind the coil back in and when it's all the way in, get your pliers out again and gently bend the end back into place.


Once you've done that, you can take the elastic off and you're finished!


I did all 10 of them one evening while watching TV with Kevin.  When I started he said, "What, Hilroy isn't good enough for your girls?".  To which I replied (you have to read this with a snotty, sarcastic sort of tone!), "Ah, NO.  Hilroy isn't pretty enough for my girls."  Really, after 8 years of me stamping he knows better!!!  Anyway, when I had them done he commented that they were pretty cool and that they did look much nicer than when I started!!!  Don't tell him I said this, but I think he's a bit jealous because the notebooks supplied for him for work are pretty plain and boring!!! 

Well, that's all for today!  Have an inspired day and we'll talk tomorrow when I share a super fun simple card!


Friday, September 17, 2010

More Snow

Ok, so it's not snowing here, but it sure feels like it's going to!  Ack!!!  It's dreary and raining and I've caught my annual "The Kids Are Back in School and Have Brought Home School Germs" cold.  It's been sitting in my chest just waiting for the right time to attach since Sunday and wowzers, yesterday was the day!!!  Nasty.

Here's the second card from my Holiday Headstart class last week.


The base of my card is Sahara Sand embossed with the new snowflake embossing folder.  I *heart* this embossing folder!

Now, this card is only stamped with Shimmer Paint.  It's so shimmery, it's almost blinding!  The Merry Christmas is stamped with Frost White Shimmer Paint, and the vellum snowflake is sponged with it too.  The snowflake was cut with the new Decorative Strip in the mini.  I *heart* this too!!!

The Baja Breeze is stamped with little snowflakes from the Serene Snowflakes and Champagne Mist Shimmer Paint, then it's sponged around the edge with Baja Breeze ink.

Add some White Satin ribbon and you're finished!  Oh, wait, I almost forgot the RHINESTONE!!!  There's a little dot of glue in the middle of the snowflake and the rhinestone is there to hid the glue...and becuase I couldn't resist.

Have an inspired day!

Sunday, September 12, 2010

Simple Medallion Wreath

Hello!  I've been away all weekend at a group meeting in Millet, and while we're home now, I'm exhausted!  I forgot my camera, but some of my girls are going to email me some of their pictures so I can share some of the fun we had!

In the meantime, here's my simple card for today!  I didn't come up with this idea...I saw it while blog surfing a while back.  I saved the picture of it, but there's no watermark on it so I don't know who to give credit to.  If this is your idea...thanks!  I love it and so did the girls at my Holiday Headstart class last week!


Love it!!!  It's a super simple card, but has a HUGE impact!

That's all for today, have an inspired day!

Friday, September 10, 2010

Fabric Baby!

Have you seen the new Holiday Mini?  If you haven't, you need to check it out online and then contact me to get your very own copy.  I guarantee it will become your best friend for the next 4 months and will become dog eared and very loved.  You will GASP everytime you turn the page...I will admit, I did!!!

So, I was most surprised by the fabric in the mini.  Surprised and delighted actually!  This fabric is FABULOUS.  You get three designs per package and quite a bit of each design.  There's also an instruction booklet that comes with it, which is also FABULOUS!!!

Ok, so I'm not a huge sewer, but I do know how thanks to my mom and three years of Home Ec in junior high!   But, since we have fabric now, I decided to dust off my sewing machine before Halloween this year (it usually gets used once a year to make Halloween costumes!), and make a Christmas Ornament.  And, have my girls who attended my downline meeting the other night make one too!


The instructions for this little beauty are included in the instruction booklet when you purchase this pack of fabric.  However, I used different dies for my decoration!  I know, big surprise...Lisa didn't exactly follow the directions!!!  I'm totally an "instructions are just a guideline" kind of girl!!!

I used the new Scallop Squares die for both the background and the tree on my ornament.  The ribbon is Early Espresso wide Grosgrain.  Did you notice the button?  Ok, here's a closer look...


I absolutely LOVE the huge buttons that coordinate with the fabric.  Goosebumps!  The button is Crumb Cake (which makes me even happier!!) and is just hand sewen on with some Linen Thread and then the Linen Thread is tied in a bow.

LOVE IT!!!   I think I will be making more of these for our Christmas tree this year!

Well, I really need to go to bed...it's way past late!  Have an inspired day!