Showing posts with label Recipes. Show all posts

Thursday, January 29, 2015

Best. Day. Ever!

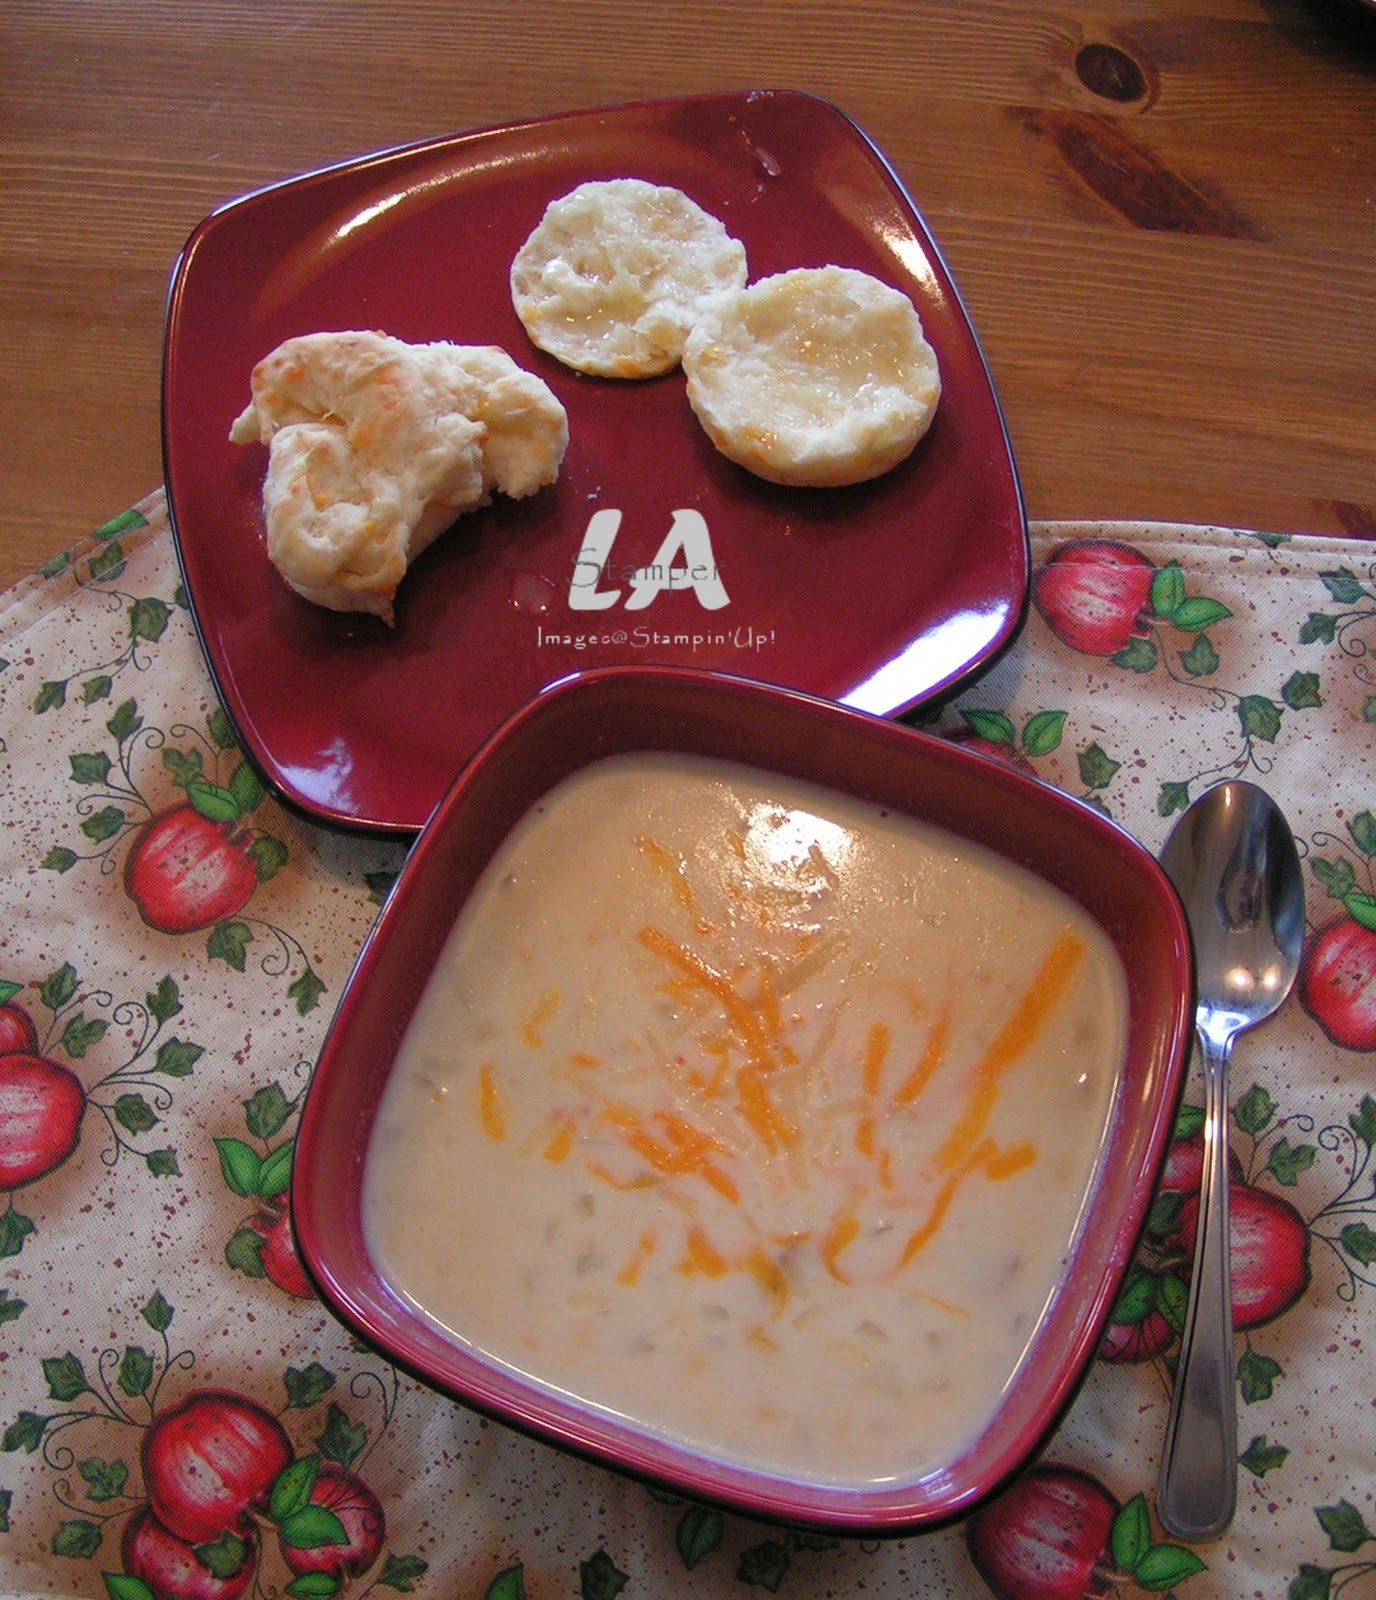
I held my annual Soup & Stamps night last weekend and it was a BLAST!  I made 2 big pots of soup (Corn Chowder & Taco Soup) and a double batch of biscuits to enjoy.  At Soup & Stamps, you can eat as much as you want and I think most of us enjoyed a bowl of each soup!  The dinner conversation was fantastic and we wrapped up our dinner with some delicious cake.  Then, it was stampin' time!


Because Soup & Stamps is a kick off to SAB, the stampin' project featured some of the fab SAB products...the Best. Day. Ever stamp set and the Best Year Ever DSP.

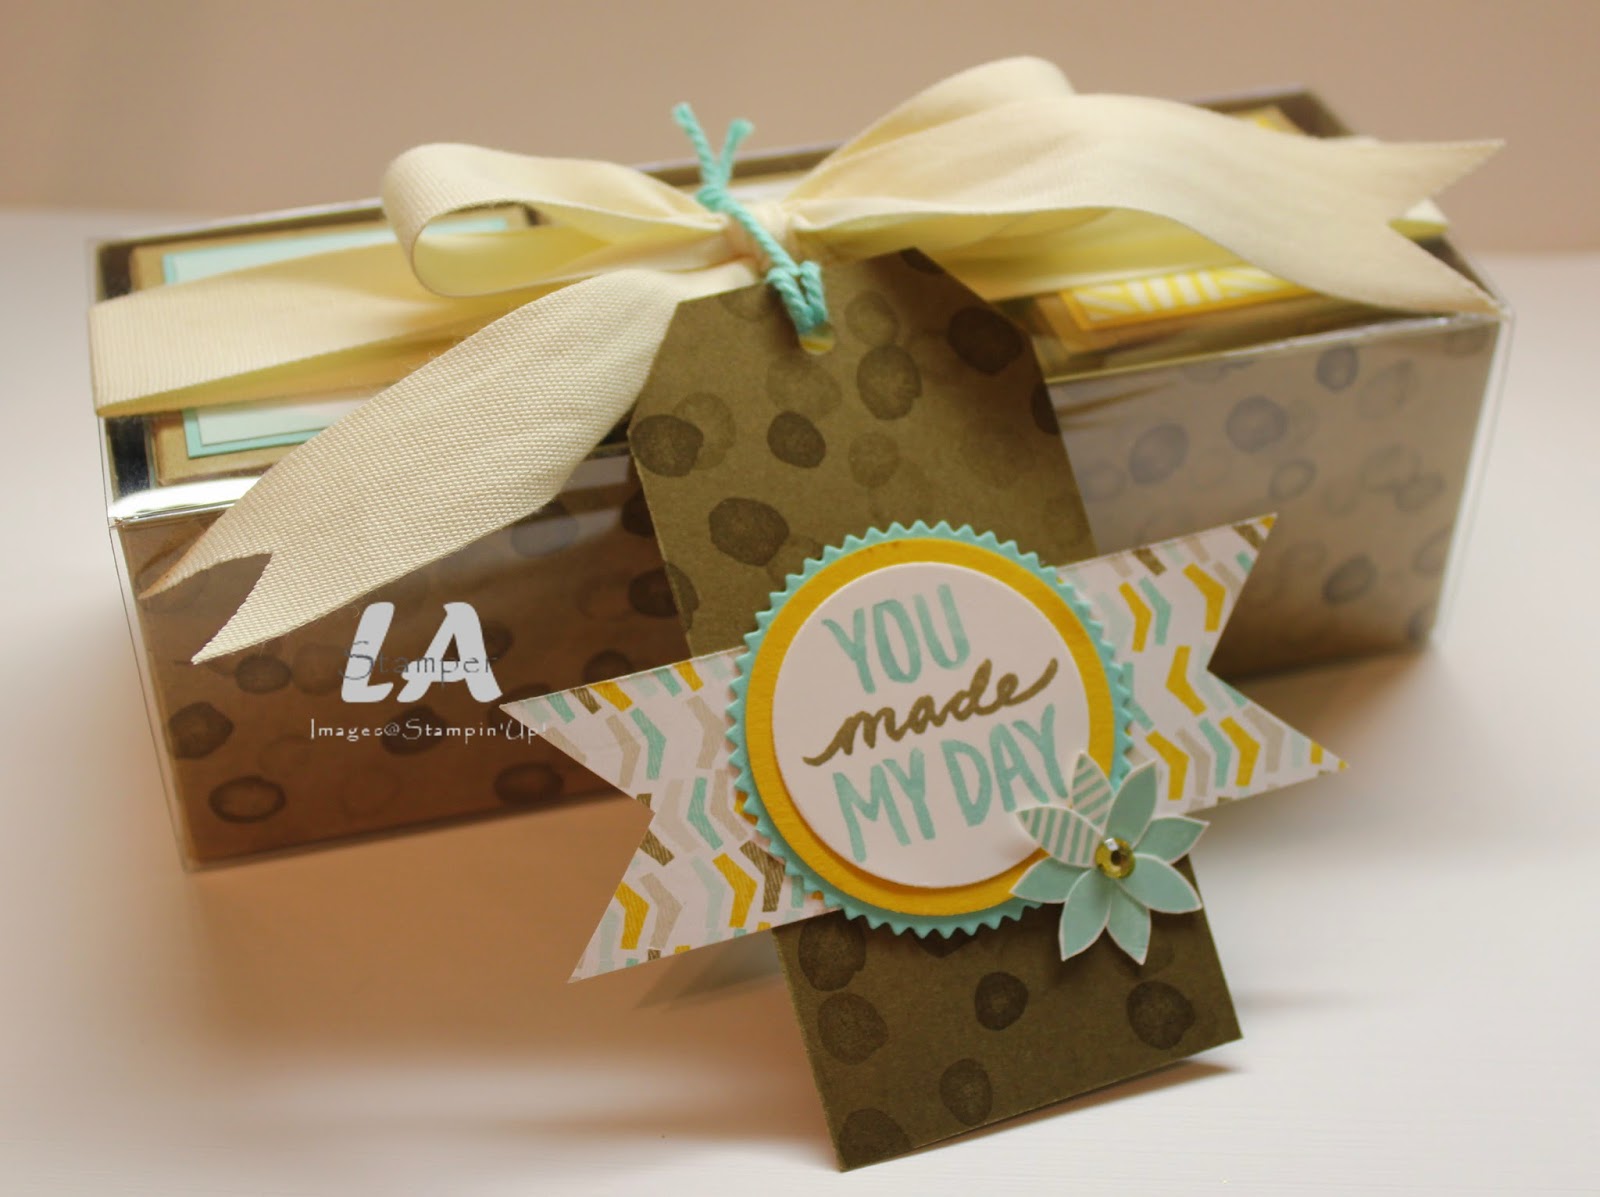
I was inspired by a project my friend Becky made at Christmas time.  I loved the way she put small boxes into one of the Tag-A-Bag Gift Boxes and when I realized that 3 of the Tiny Treat Boxes fit inside the Tag-A-Bag box, I knew what the project was going to be!


Super cute, isn't it!  I love how easy it is to dress up our boxes with a little stamping and some DSP!

The tag is tied on to the sleeve of the Tag-A-Bag box so you don't have to untie it all to get into the treats!  You just slide the sleeve off and all the prettiness stays right where you want it to!  We finished it off with a fun and simple tag.


Did you notice the yellow rhinestone on the tag?  That is done by coloring a regular old rhinestone with BLENDABILITIES!!!!!  Yes, you can use your Blendabilities to color rhinestones (although you want to be careful that the rough surface of the rhinestone doesn't cause the tip of the Blendabilities to fray).  And, don't forget you can get the Blendabilities as free SAB items when you place a $60 order (before shipping and tax)!  Check out the SAB brochure for more details!

Are you Canadian and need a Stampin' Up! demonstrator?  I would love to help you out!  Contact me and I can get some catalogs to you or if you're local you can join some of my classes.

Have an inspired day!


Thursday, October 9, 2014

Coffee & Cards

Hi Stampers!  In September I started a new kind of class, Coffee & Cards!  This is a monthly class which I offer in a morning or evening session.  We get together, make 3 simple cards and enjoy some delicious baked goods with coffee, tea or apple cider!

Here's the line up of cards everyone did in September!


And our delicious baked good to enjoy was Spice Cake!  I used my tried and true recipe that I turn to every fall or whenever I get a craving for Spice Cake!  I have shared the recipe on my LA Stamper Cooks blog, and you can find it here.


It was a great class and I can't wait for the October one!  If you're local you can join us for Coffee & Cards on Tuesday, October 14 from 9:30-11am or 7:30-9pm!  Contact me to RSVP!

Have an inspired day!


Tuesday, October 11, 2011

Pumpkins!

Did you know that Stampin' Up! has come out with a line of cookie stamps? I'm super excited about this product and can see a LOT of stamped cookies in my future! The set of cookie stamps comes with a wooden handle and three interchangeable silicon stamps. The stamps are a jack-o-lantern face, a snowflake and a heart...perfect for this time of year! And, let me tell you, they are SO FUN to use!


Aren't those the cutest little cookies!  I used my new cookie stamps and one of my favorite sugar cookie recipes.  Usually my sugar cookies aren't orange, but this time I added some orange food coloring to the dough so they would look more like pumpkins.  What do you think?

I decided to package them in a cute little package so you could see a fun way to give them as a gift.  I put my cookies in one of our large cello bags and made a cute little topper.


I started with a Lucky Limeade base and then layered on a Concord Crush piece which I embossed with the Spider Web embossing folder.  To make it kind of pop even more, I gently rubbed my Whisper White sponge over it.  My pumpkin is stamped on Naturals White cardstock with Black StazOn ink.  Then the fun started!  I went over the lines with my Pumpkin Pie marker and then used my favorite new product to color it in.  I used the new Dazzling Details (found in the Holiday Mini) and added a few drops of Pumpkin Pie ink to it before applying it with a dry Aqua Painter.  In real life, it sparkles and is fantastic!

And, because I know I'm gonna get requests, here is the recipe I used.

Cream Cheese Sugar Cookies
1 pkg (8oz)  Cream Cheese
1 cup Butter or Margarine (softened)
2/3 cup Sugar
1/4 tsp Vanilla
2 cups Flour

Beat the Cream Cheese, Butter, Sugar and Vanilla until smooth.  Add the flour and mix until well blended.  Refrigerate for a few hours or overnight.  Roll out dough to 1/4 inch in thickness and cut out shapes*.  Bake at 350 for 12-15 minutes.  Cool and enjoy!

**These cookies don't expand when baked so you can put lots on your cookie sheet and have them pretty close together.  They are really good with Buttercream frosting!

*I found that it was easiest with the cookie stamps to roll the dough into a log shape, chill and slice it before stamping.  I got 36 cookies when I sliced it...but some of my slices were a little on the thick side!!!

And, today I'm going to leave you with a fun pumpkin picture of my family from this weekend and our visit to the corn maze.


The looks on the boy's faces make me laugh...but at least they were all looking at the camera!! Have an inspired day!


Monday, January 3, 2011

Tick, Tock...

...check out my clock!


I absolutely love the picture on page 21 of the Definitely Decorative catalogue.  I love the way the mirror looks hung over the Medallion Decor Element.  I had the perfect place to put a Medallion, but I didn't want a mirror, so I went on a hunt for the perfect clock.  And, I found one when we went down to Kalispell in November (I can't remember if I got it at Costco or Target).

The Medallion I used was the Large, Chocolate one (121843).  It went up fairly easily, but becuase of where I put it, I needed a tall helper to make sure the seams lined up correctly.  Enter Kevin!  He's a great "Decor Elements Hanger Upper"!!!

Now, check out what I made the other day...


Santa brought me a Bread Maker this year and I was super excited!  We've made about 5 loaves of bread and then I had to try Cinnamon Buns!  The recipe is from here and I frosted them with a basic Cream Cheese Frosting.  They were sooooo good...notice I said "were"...they didn't last long!  The recipe is a keeper (but I will double the filling next time, and put less in the pan so they have more room to rise and expand during baking) and my family can't wait for me to make more!

Have an inspired day!

Tuesday, September 28, 2010

Fabulous Corn Chowder

Today I'm going to share a recipe!  The girls that have come to my Soup & Stamps night for the last couple of years have been asking and asking for me to share my recipe for corn chowder.  So, here it is!  Now, a I've said before, I don't really measure when I cook, but I can tell you the steps and give you approximate amounts!  Becasue I know you're wondering...Soup & Stamps will happen during SAB again.

Here are the ingredients you will need.


Step one is to wash, peel and dice your potatoes.  I used 6 medium russets this time!  Once that's done, put them in a large pot and just cover them with water.  You want to cook them until they're almost done.


While the potatoes are cooking, dice up a medium onion.  Once it's diced, put it in a mocrowave safe container with some butter (a tablespoon) and microwave the onions until they're translucent.  This usually takes bewteen 2-3 minutes, but I give it a stir every minute.


When the potatoes are almost done, add the onions to them and then you want to pour some milk into the pot (don't drain the potatoes, just add the milk).  Add as much as you want.  In the end, if you like your soup thicker, you can thicken it with some flour.

Once you've added your milk, you're ready to add the corn.  I use corn that I've blanched and cut off the cob.  I package the corn in 4 cup amounts, so I've added 4 cups of niblets and one can of cream style corn.  If you don't have fresh or frozen corn, you can add about 2 medium cans of niblets corn and 1 can of cream style corn.


After you've added the corn, add salt and white pepper to taste (I used white pepper because I think black pepper looks kind of like bugs in the soup!).  If you want, you can also add some garlic powder (I often do!).  You need to bring it up to a boil and then reduce the heat and let it simmer until the corn is cooked.  Stir often and heep the heat low so it doesn't scorch on the bottom.

When it's almost done, add some bacon bits.  I make my own, which is why you see a whole pack of bacon in my ingredient picture.  I don't use a whole pack of bacon bits, just a handful.

I like to serve it with a sprinkle of grated cheese and some cheese biscuits (see this post for the Cheese Biscuit recipe I use).


The kids call this "Mom's Fabulous corn Chowder" and whenever I make it they almost lick their bowls.  They probably do when I'm not home!!!

I do find that this soup freezes well and it's the perfect meal for a dreary day!

Enjoy!


Wednesday, April 14, 2010

Soup Day

This is a loooong post...so buckle up and enjoy the ride!

I absolutely LOVE to make soup!  Today was a soup day for a couple of reasons...my husband BBQ'd the BEST flank steak on Sunday and there was leftovers to use up, a friend of mine just got discharged from the hospital after surgery and I wanted to make her and her family a dinner, and I woke up to 15 cm (that's about 12 inches) of heavy, wet, slushy snow and no power this morning.  Yep, it was a soup day!  Not only did I make the best soup, I also made an awesome card to share with you!

So, here's the card...


I bet you're wondering what set I used...right?   Well, it's a new set from the Summer Mini called "Elements of Style".  You can see this set in the mini soon...if you're one of my regular customers your mini is on it's way to your mailbox soon!  If you don't get one of these cattys in your mailbox, you'll want to contact me to get a copy (Canadians only)!

It's a gorgeous set and part of the Shelli's Signature line.  Shelli gave each of us at Leadership (in Phoenix in January) the set for FREE!!!!  Can you believe it!?!  It was really exciting and funny to watch 1000 women get so excited to receive free stamps and start to dance...in unison!  Priceless!

Anyway, I wasn't sure about this set at first because it's not my usual style and I probably wouldn't have ordered it.  But, since Shelli gave it to me, I figured I should give it some special attention and ink!  I stamped the gorgeous flower image on Naturals White cardstock with black StazOn ink.  Then I watercolored it with Pretty In Pink, Old Olive, So Saffron and Soft Suede classic inks.  It was super pretty when I was done, but it looked too perfect...so I scrunched it up (a lot!), smoothed it out and rubbed some Soft Suede ink all over the image with a sponge.  I also sponged around the edges.  The result was so pretty, soft and vinatge looking.


I used Pretty In Pink Taffeta Ribbon, and Vintage Brads for embellishments.  The ribbon was a bit too bright against the rest of the card, so I gently rubbed Soft Suede ink on it.  Check out that bow...*wink*!


It's hard to see in the picture, but I stamped the swirl image from the set with Pretty In Pink (stamped off once on scrap) all over the kraft background of the card.  The result was soft and subtle...and exactly the look I was going for!  The sentiment is from Teeny Tiny Wishes (since it's for my friend who just got out of the hospital, I thought a get well card was appropriate).  I sponged Soft Suede ink around the edges of all the pieces of cardstock I used.  I had to tone down that pink a bit!  Once I had the whole card together, I used my Color Spritzer Tool and a Soft Suede marker to splatter it.  Very vinatgey, don't you think?

Ok, on to the soup!  In addition to the card for my friend, I'm taking her some yummy soup and cheddar biscuits tomorrow for supper.  Soup always makes me feel better and it's so nice to be surprised with supper, so I hope it will do the same for both her and her family!

I made the best Beef, Vegetable and Barley soup.  Now, I don't really follow a recipe when I make soup, but I'm going to share how I made it....sorry no specific measurements!

Here's the cast of characters...


Celery (I used three sticks), onion (I used the whole onion), Pearl Barley (the whole bag), Frozen Mixed Veggies (the whole bag), a large can of diced tomatoes (I used the whole thing, juice and all), two containers of Vegetable Stock and two containers of Beef Stock.  And, finally that mouth watering flank steak my husband made on the weekend.  Can you believe we BBQ'd on Sunday and two days later it was snowing!?!

So, I chopped up the celery and onion and threw it in the pot with the all the stock.  Then I added some spices...


Pepper, Salt, Garlic Powder, Dried Basil, Dried Dill, Epicure Beef & Steak seasoning, Epicure Beef Boullion and Dried Parsley.  I added each spice to taste.  The Boullion was added as per the package instructions, mixed with water becuase I needed more stock...I made a LOT of soup!

After I added the spices, I added the can of tomatoes, and the barley and let it boil until the barley was almost cooked.  Then I threw in the frozen veggies and let it cook a bit more, and last I added the beef.  YUM!

Fresh made buns are great with soup, but I don't make buns very often, so tonight we had Cheddar Biscuits.  I've been using this recipe since high school (I learned it in Grade 10 Foods!) and it always turns out and my familiy LOVES them.  I think I could make them in my sleep!  Here's the recipe.

Baking Powder Biscuits

2 cups flour (I use a mixture of Whole Wheat and All Purpose Flour)
1 tbsp baking powder
1/2 tsp salt
1 tsp sugar
1/2 cup firm shortening (I use butter)
3/4 cup cold milk (approximately)
1/2 cup grated old or sharp cheddar

Mix the dry ingredients and the cheese together in a large bowl.  Cut in the shortening until you have a crumbley mixture.  Add enough milk until a ball of dough forms around the spoon.  Now it's time to take your jewellery off and get your hands dirty!  Turn the dough out onto a floured surface and knead about 10 times.  Don't overwork the dough or you will have tough biscuits!  Roll it out to about 1/2 inch think and cut your biscuits out.


As you can see, I use a highly technical tool to cut my biscuits out!!!  Don't mock it till you try it!

After you've cut them out, bake them at 400 for about 15-20 minutes.  They will be slightly golden when you take them out.  Cool a bit and then enjoy!


And here's my supper...


It was soooo yummy and the perfect meal for a day like today.  Just looking at that picture makes me want another bowl!  I hope my friend and her family enjoy it as much as we did tonight!

Have an inspired day!

Thursday, March 4, 2010

What's Cookin'?

Happy Thursday!  Tonight is a good TV night, so you need a quick and easy supper for your family...right?  Well, have I got a great idea for you!  Two words...Cheeseburger Pie.


Yum!  I promise it's easy and good!  And, I'll share the recipe (from Jean Pare's "The Cheese Book") at the end of this post.

I think this would be a great meal to bring to someone who just had a baby, bought a new house, is recovering from surgery or just because!  It's filling and satisfying and has a little bit of a bite (depending what kind of salsa you use).  I always pair it with something green, like a salad, peas or green beans.


As you can see, I paired it with a simple salad when our family had this meal a couple days ago.  The salad is Green Leaf Lettuce, Cucumber (quartered and sliced thin) and a couple Green Onions chopped up.  Then I mix a couple tablespoons of some sort of dill dressing (Dilly Dip or Cucumber Dill dressing) in with everything and give it a good toss.  Quick, easy and a big hit at our house!

And, now that I have your mouth watering, here's the recipe for the Cheeseburger Pie.


Cheeseburger Pie

Crust
1 1/2 cups Flour
2 tsp Baking Powder
1 tsp Sugar
1/2 tsp Salt
1/2-3/4 cup Milk

Filling
1 1/2 lbs Lean Ground Beef
1/2 cup Onion (finely chopped)
2 cups Grated Cheese (I use the already grated Tex Mex cheese from Kraft)
3/4 cup Salsa
1 tsp Dried Oregano
1/2 tsp Dried Basil
1 tsp Salt
1/4 tsp Pepper

Combine the dry ingredients for the crust.  Gradually add in enough milk so a soft dough forms.  Knead 8 times on a lightly floured surface and roll out to fit a 9 inch pie plate.  Press the dough into a greased pie plate.

Scramble fry the ground beef and onion until no pink remains.  Drain off excess grease.  Add 1 cup of the cheese and the rest of the ingredients.  Stir and scoop into the crust.

Sprinkle the remaining 1 cup of cheese on top.  Bake at 350 for about 30-35 minutes (if you bake it too long, the crust will get hard, so watch that you don't overbake it).


Go ahead and get started...your family is hungry!  Or, make a quick thank you, thinking of you, congratulations or get well card and take a batch of this to a special friend.  If you give it a try, leave me a comment and let me know how it turns out.

Enjoy and have an inspired day!

Thursday, February 18, 2010

A Little Bit of YUM!

Most people know that I love to stamp, but what you don't know is that I also love to cook...especially for other people!  So, today, I'm going to share a little bit of yum with you!


Doesn't it look good?  I wish I could share the smell with you because it smells absolutely heavenly!!!!!  Here's a close look (just to make your mouth water even more!)...


It's ridiculously easy!  Here's how you can make it.

1 can of Pie Filling (any flavour...I used Blueberry this time)
1 cake mix (any flavour...I used french vanilla)
1/2 cup butter (cut into slices or pieces...about 16 pieces)
1 cup Brown Sugar
1/2 cup chopped pecans

Spread the pie filling on the bottom of your pan.  Then sprinkle the cake mix over top.  Cut up the butter into pieces and then put it over the cake mix.  Next, sprinkle the brown sugar over the butter and top with chopped pecans.

Bake at 350 for about 40 minutes or until the top is golden.

Serve warm with vanilla ice cream...or whipped cream...whatever you're in the mood for!

The best thing is that you can change up the flavours each time you make it!  You can add coconut rather than pecans or you can even add chopped walnuts.  If you don't want to use pie filling, you can use a large can of fruit.  I've made it before with canned peach slices...just dump them in, juice and all (but cut the peaches up a bit so they're easier to eat).

Enjoy!  Leave me a comment and let me know what you think when you make it!
Have an inspiring day!  I'll be back tomorrow with a great project.

Thursday, October 29, 2009

The Third Week of Christmas: Mmmmmm!

So, you're all probably wondering if I dropped off the face of the Earth! I'm still here and lets just say I can totally understand why that guy took hostages at the WCB offices in Edmonton last week...and I'm not even the one in the family who is hurt and dealing with them!


In any case, let's get on with the Christmas projects! I have The Third Week project for you today and then will post the Fourth Week project in the next couple days to get caught up. Thanks for bearing with me!


Today, I'm going to show you how I turned this...


Into this...
Step 1 is to empty the can and have a little snack! LOL!! It's important to keep your energy up during those late night stamping sessions!!

Ok, so I got out my package of Merry Moments DSP, chose a pattern and cut it to 8 1/2 x 10. I sponged the top and bottom edges with Chocolate Chip classic ink and wrapped it around the can using Sticky Strip to secure it. Now it's time for the fun part...EMBELLISHING!!!!! I cut a strip of Chocolate Chip cardstock and wrapped it around the can, securing it with Sticky Strip. I then cut a strip of coordinating DSP and secured it around the strip of cardstock, again securing it with Sticky Strip.

The label was made with Very Vanilla cardstock. I used the Sweet Season stamp set and colored the image I wanted with Old Olive, Chocolate Chip & Real Red Stampin' Write Markers. I used a label holder from the Styled Vanilla Hodgepodge Hardware set and bent it around the can.


**TIP: Bend the label holder around the can near the bottom of the can. This is becuase the can is actually cardboard and can possible bend or break if you put too much pressure on it. It's much more stable around the bottom where the cardboard meets the metal bottom.**


After stamping, I punched it out with the Designer Label Punch and glued the cardstock into the label holder. The whole thing is attached to a piece of the yummy Real Red Polka Dot Ribbon (I flipped the ribbon over and used the no polka dots side). I *heart* that ribbon! Then I tied the ribbon around the strip of DSP. Cute, eh?

Now the lid. I took a piece of another print from the Merry Moments DSP and spritzed it with Stampin' Mist. I would have used water, but was feeling a bit lazy and just grabbed what was in front of me! After spritzing the DSP, I put it over the can and put the lid on, then gently gathered the DSP up over the lid and tied a piece of Double-Stitched Chocolate Chip Ribbon around it to keep it in place. The cool thing is that when the paper is damp you can bend and mold it the way you want it and it will dry in that position. You have to be very careful though, because when the DSP is damp it tears easily.


Now that I've shown you the project, you're probably wondering what to put in it. Well, how about these...

YUMMY!! I figured it's the season of cookie exchanges and giving and who wouldn't love to get some yummy cookies in a container like this? If you use one of those scoops from Pampered Chef (that look like ice cream scoops, but you can get them in different sizes) for your cookies they will all come out the same size. I used the middle sized one for my cookies. Anyway, you can create a stack of cookies and put them into a tall cello bag (so they don't taste like Pringles!), they will just slide right into your fancy tin.


Mmmmmm! Now that I've made you drool all over your keyboard and crave cookies, I will share the recipe! It's the Original Nestle Tollhouse Chocolate Chip Cookie recipe. I use it all the time and my cookies never last longer than a couple days...I guess that means they're good!


As always, if you want to order any of the supplies I used for this project, you can on my website or you can email me your order (sorry, Canadians only). Until next time my friends...