Hi Stampers! Mason Jars are all the rage right now and there are so many ways you can use them. In August, at my Stamp & Share with my downline, we decorated some mason jars in a super fun way!
Step 1: You want your jar to be CLEAN! Because we were decorating the inside of our jars, we swirled some rubbing alcohol around the inside of the jar and then poured it out.
Step 2: Pour some Mod Podge and some ink refill into the bottom of the jar. You need about a toonie sized blob of Mod Podge. The amount of ink refill you use depends on how saturated you want your color...lots of ink results in a darker color, a little ink results in lighter color.
Step3: Set your jar upside down to drain out the excess Mod Podge/Ink Refill. Here's what ours looked like draining.
We covered a sheet pan with some parchment paper, paper towel and then set the jars on popsicle sticks to drain.
Step 4: After all the excess stuff has drained out of your jars, you need to bake them. Put your oven on warm (or a low temperature) and bake upside down for about 10-15 minutes. We took them off the popsicle sticks and removed the paper towel for baking so they just sat on the parchment.
Step 5: Turn them right side up and bake for an additional 20-30 minutes or until all the streaks are gone. This is what ours looked like just out of the oven.
Step 6: Embellish!
You can see we used some Color Me Autumn DSP to make a fall flower with a gold button in the middle. We also tied some Old Olive Baker's Twine and Autumn Wooden Elements around the top of the jars. Super cute!
These jars are not washable (other than wiping the outside with a damp cloth) and also not suitable to hold food because of the way we altered them on the inside.
You can find the products we used to embellish our jars in my online store. Head on over there and place your order for some great fall stuff today! And, if you like what you see, are Canadian and need a Stampin' Up! Demonstrator please contact me. I would love to send you a catalog and help you unleash your inner creativity!
Have an inspired day!
Showing posts with label Home Decor. Show all posts
Thursday, September 25, 2014
Thursday, August 28, 2014
Frightful Wreath
Hi Stampers! It's here, it's here, it's here...the Holiday Catalog is LIVE today and you can finally order all of the awesome new products in it! Today I have a spooktacular project to share with you!
I am in love with this wreath and can't wait to hang it up!
This spooky project is a kit in the Holiday Catalog! I've made mine a little different than the instructions (no surprise, right?!?!?!). You can find this kit on page 36 of the Holiday Catalog or in my online store here.
And, here's the best part! I'm offering this project as a private class. All you have to do is find a minimum of 4 friends and choose a date! It's $40 per person and after I receive payment for everyone attending, I order the kits. Then on the date we choose, I show up at your place kits in hand (or you come to me) and we craft the afternoon or evening away! Sounds like fun doesn't it? So, don't delay! I have limited dates available in September and October for you to have a spooktacular wreath class with your friends. Contact me today to book your date!
Have an inspired (and spooktacular) day!
I am in love with this wreath and can't wait to hang it up!
This spooky project is a kit in the Holiday Catalog! I've made mine a little different than the instructions (no surprise, right?!?!?!). You can find this kit on page 36 of the Holiday Catalog or in my online store here.
And, here's the best part! I'm offering this project as a private class. All you have to do is find a minimum of 4 friends and choose a date! It's $40 per person and after I receive payment for everyone attending, I order the kits. Then on the date we choose, I show up at your place kits in hand (or you come to me) and we craft the afternoon or evening away! Sounds like fun doesn't it? So, don't delay! I have limited dates available in September and October for you to have a spooktacular wreath class with your friends. Contact me today to book your date!
Have an inspired (and spooktacular) day!
Thursday, July 10, 2014
Mossy Meadow Mini Canvas
A few weeks ago I held my Inspired by Ink Stamp & Share. It's a day where I get together with my girls on my team and we stamp, we share, we laugh, we eat....I could go on, but you get the idea! It really is a great day....even though this last time it was POURING rain!
Like I mentioned, we stamp and part of our day consists of make & takes. This time around we did an In Color mini canvas for one of our make & takes.
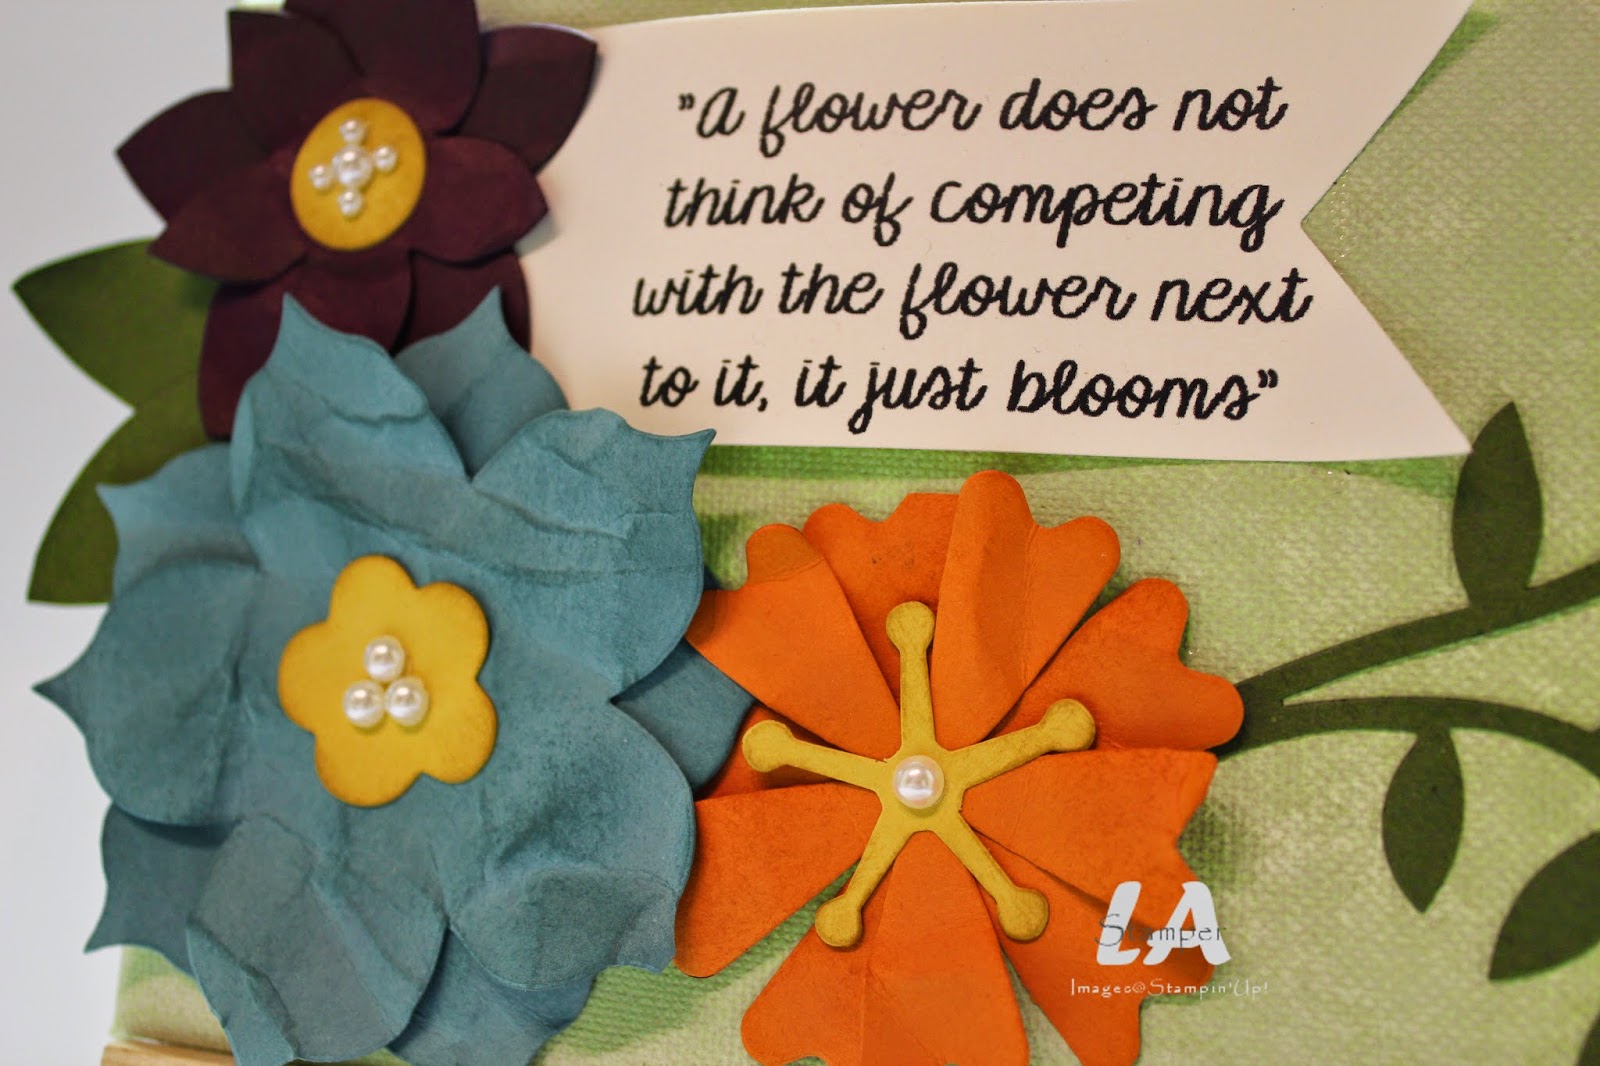
We started by spritzing the canvas with a mixture of Mossy Meadow ink and water (mixed together in a Stampin' Spritzer). Then we cut out flowers using all of the new In Colors and the new Floral Frenzy die. A little scrunching, sponging and layering and voila!
The quote was done in MDS and then printed on Very Vanilla cardstock. It was cut out with the Banner Framelits and then stuck on.
I chose this particular quote for a very specific reason. I think of all the people on my team as flowers. Even though we all do the same business, we don't compete with each other, rather we cheer each other on and work together so everyone blooms!
You can find all the stampin' supplies needed to make this little gem of a project in my online store. Head over there with the shopping list and place your order today!
Shopping List
Ink: Mossy Meadow, Lost Lagoon, Tangelo Twist, Blackberry Bliss, Hello Honey
Cardstock: Mossy Meadow, Lost Lagoon, Tangelo Twist, Blackberry Bliss, Hello Honey, Very Vanilla
Accessories: Pearls
Tools: Big Shot, Flower Frenzy Bigz die, Banners Framelits, Stampin' Sponges, Stampin' Spritzers
Other: Mini Canvas from my local Dollarama
Have an inspired day!
Tuesday, June 17, 2014
Hello, My name is Blackberry Bliss
Hello! My name is Blackberry Bliss and I am one of the new Stampin' Up! In Colors this year. I am a rich, deep and juicy purple that will make you think of delicious blackberries in summer! I am much deeper and have a different undertone than my friend Rich Razzleberry. And, I am a much richer purple than my friend Elegant Eggplant.
Check out this super fun paper flower Blackberry Bliss!
And, here's a video so you can make a beautiful Blackberry Bliss flower too!
I look great paired with yellow tones like Hello Honey, Crushed Curry and Daffodil Delight. I also look great paired with a good neutral like Sahara Sand. And, of course, you can pair me with blues and greens to get a good mellow feel for your projects!
Here are the items offered in Blackberry Bliss (you can find all these items in my online store):
Check out this super fun paper flower Blackberry Bliss!
And, here's a video so you can make a beautiful Blackberry Bliss flower too!
I look great paired with yellow tones like Hello Honey, Crushed Curry and Daffodil Delight. I also look great paired with a good neutral like Sahara Sand. And, of course, you can pair me with blues and greens to get a good mellow feel for your projects!
Here are the items offered in Blackberry Bliss (you can find all these items in my online store):
- 8 1/2 x 11 Cardstock (133675)
- 12x12 Cardstock *assorted pack only* (133680)
- Cut & Ready Card Bases *assorted pack only* (136661)
- Designer Series Paper *assorted stack only* (133705)
- Ink (pad-133642; refill 133648)
- Stampin' Write Marker *assorted pack only* (133654)
- Stitched Satin Ribbon (133668)
- Printed Clothespins *assorted pack* (133630)
Friday, November 2, 2012
Parade of Ornaments-Day 2
Well, after a few attempts of filming my video without kids screaming and fighting in the background, I gave up yesterday and decided to give it a go today. And, you will be happy to know I was successful!
Today I'm going to show you how to make the inner decorative piece for the paperbag ornament I showed last week and also show you another way to use this technique.
Here is the ornament for this week.
You can see a brown one and a green one hanging on my little tree! They are so super easy and in the video I tell you some different ways to use this particular ornament. Without further adieu, here is the video!
That's it for today! Have an inspired day!
Today I'm going to show you how to make the inner decorative piece for the paperbag ornament I showed last week and also show you another way to use this technique.
Here is the ornament for this week.
You can see a brown one and a green one hanging on my little tree! They are so super easy and in the video I tell you some different ways to use this particular ornament. Without further adieu, here is the video!
That's it for today! Have an inspired day!
Wednesday, October 24, 2012
Parade of Ornaments-Day 1
Hi everyone! I've been busy creating ornaments the last little while and I'm thrilled to start sharing them with you! I will be posting one ornament a week for the next few weeks. And, here's the best part...each ornament will have a VIDEO with it for you!!!! Can I hear a cheer for fun how-to videos?!?!?!?!
Ok, on to today's ornament! I learned how to do these last June and have had it filed away in my brain since then knowing that I would share closer to Christmas! My Stamp Clubs made these this month and lets just say they were thrilled!
Sadly this is the only picture I have of it right now! Sherri and I do have some on our Christmas display for craft fairs, so please stop by and see us at the Diva Show this Friday (Fritz Sick Center, 5-9pm, free admission)...it looks way better on our display! And, when I'm done the ornament series, I will take some pictures and show you where I've put all the ornaments I've made (right now it's way to early to decorate for Christmas though!).
You're probably thinking it looks complicated and time consuming, right? Let me reassure you, it's not! The instruction video is 5 and a half minutes long and in that time I show you how to do it start to finish...to make the basic ornament it will take you about 10-15 minutes. It's the super fun embellishment in the middle that will take some time to assemble! Here's a close up of the center embellishments.
I used the Ornament Framelits for this...SO FUN!!! I will have video next week explaining how I did those...so check back next week for that. And, now, the video! Enjoy!
So what did you think? You can make these, they are so easy...go forth and get some paper bags and start creating people!!! My paper bags were purchased from Creative Packaging. I have also seen them at my local craft store in a rainbow of colors and you could use plain old lunch bags that you can get at the grocery store. Remember, the bigger your bag, the bigger your ornament.
Don't forget to take advantage of the fantastic bundle this month with the Ornament Keepsakes set, Framelits and Candlelight Christmas DSP. Who wouldn't want the free paper piercing set???? More info is on the Specials Page and you can order from the online store to make it nice and easy for you! And, I have a stamp club as well as a scrapbook club starting in November. If you would like a fun crafting night out and make super projects like this one, please contact me for more information!
Have an inspired day!
Ok, on to today's ornament! I learned how to do these last June and have had it filed away in my brain since then knowing that I would share closer to Christmas! My Stamp Clubs made these this month and lets just say they were thrilled!
Sadly this is the only picture I have of it right now! Sherri and I do have some on our Christmas display for craft fairs, so please stop by and see us at the Diva Show this Friday (Fritz Sick Center, 5-9pm, free admission)...it looks way better on our display! And, when I'm done the ornament series, I will take some pictures and show you where I've put all the ornaments I've made (right now it's way to early to decorate for Christmas though!).
You're probably thinking it looks complicated and time consuming, right? Let me reassure you, it's not! The instruction video is 5 and a half minutes long and in that time I show you how to do it start to finish...to make the basic ornament it will take you about 10-15 minutes. It's the super fun embellishment in the middle that will take some time to assemble! Here's a close up of the center embellishments.
I used the Ornament Framelits for this...SO FUN!!! I will have video next week explaining how I did those...so check back next week for that. And, now, the video! Enjoy!
So what did you think? You can make these, they are so easy...go forth and get some paper bags and start creating people!!! My paper bags were purchased from Creative Packaging. I have also seen them at my local craft store in a rainbow of colors and you could use plain old lunch bags that you can get at the grocery store. Remember, the bigger your bag, the bigger your ornament.
Don't forget to take advantage of the fantastic bundle this month with the Ornament Keepsakes set, Framelits and Candlelight Christmas DSP. Who wouldn't want the free paper piercing set???? More info is on the Specials Page and you can order from the online store to make it nice and easy for you! And, I have a stamp club as well as a scrapbook club starting in November. If you would like a fun crafting night out and make super projects like this one, please contact me for more information!
Have an inspired day!
Friday, July 6, 2012
Pinwheels!
Everything old is new again! I remember making pinwheels as a kid and now I'm seeing them everywhere again. Inspired by this fad and seeing them everywhere, I decided to make a pinwheel wreath...and I am LOVING how it turned out!!!
I started with a wire wreath form. I chose wire becuase it was flat on the back so the wreath would sit flat against my door. I chose the Old Olive polka dot patterned fabric from the new Essentials Designer Fabric pack and tore it into 2 inch strips which I wrapped around my wreath form. Each strip of fabric is knotted together.
My pinwheels are made from the World Spectacular Designer Paper and each one is backed with an embossed coordinating piece of cardstock. They are secured in the center with brads and then hot glued onto wooden dowels. The finished pinwheels were then hot glued onto the wreath.
I finshed the whole thing off with a banner which I stamped on with the Notable Alphabet.
This is definitely not an outdoor wreath. It definitely wouldn't stand up to the elements, so I've hung it on my office door...where the only wind is from kids and dogs running by! So what do you think? Do you love it as much as I do?!?!?
Have an inspired day!
Friday, June 8, 2012
Bloom
I'm so excited to share my project today! I think it's a perfect summery home decor piece.
Banners are all the rage right now. I'm seeing them everywhere and for any occasion and all different shapes. I used a pretty traditional banner shape and it says bloom. With it's rich color scheme, it's perfect for summer. It's a little bit rustic, a little bit fancy, and a whole lot pretty!
And here's a look at it hanging on my mantle...
So, how would you like to make one to hang at your house? I'm offering this project as a class on Monday, June 11 @ 7:30. Cost is $30 which includes EVERYTHING you need to make it (including a full pack of pearls/participant!). I have two spaces left, so if you're interested in coming for a fun evening of crafting let me know!
Have an inspired day!
Banners are all the rage right now. I'm seeing them everywhere and for any occasion and all different shapes. I used a pretty traditional banner shape and it says bloom. With it's rich color scheme, it's perfect for summer. It's a little bit rustic, a little bit fancy, and a whole lot pretty!
And here's a look at it hanging on my mantle...
So, how would you like to make one to hang at your house? I'm offering this project as a class on Monday, June 11 @ 7:30. Cost is $30 which includes EVERYTHING you need to make it (including a full pack of pearls/participant!). I have two spaces left, so if you're interested in coming for a fun evening of crafting let me know!
Have an inspired day!
Wednesday, September 28, 2011
Pumpkins
Last week I had my final class in my Festive Frames series. We did a fall themed frame and my word this time was pumpkin!
I started with a Bravo Burgundy background. And, I have a little tip for you! One of the benefits of our Clear Mount stamps is that you can quickly and easily make your own background stamps.
I used one of my larger size blocks (Block E) and arranged three of the leaf stamps from the Gently Falling set on the block. Now rather than having to stamp all three individually, I could just stamp all three at the same time and the end result is a beautiful background!
All of my squares are Crumb Cake sponged with Soft Suede ink. I stamped some little acorns on the squares that have letters on them. The acorn is another stamp from the Gently Falling set and the letters were cut from Soft Suede cardstock with my beloved Big Shot!!!
Here's a closer look at some of the other fun elements in the project.
I had loads of fun at this class and am thrilled with the final product!
Do you love those leaves on the background? I am offering a Gently Falling Stamp Camp at the end of October. At the class, you will receive the Gently Falling stamp set and make 4 cards (each with a different technique)! You can see all the details on my Classes & Events page. Please contact me to reserve your spot!
If you would like to see the whole series of Festive Frames, you can look here (Jingle), here (Freezin'), here (Spring) and here (Summer).
Have an inspired day!
I started with a Bravo Burgundy background. And, I have a little tip for you! One of the benefits of our Clear Mount stamps is that you can quickly and easily make your own background stamps.
I used one of my larger size blocks (Block E) and arranged three of the leaf stamps from the Gently Falling set on the block. Now rather than having to stamp all three individually, I could just stamp all three at the same time and the end result is a beautiful background!
All of my squares are Crumb Cake sponged with Soft Suede ink. I stamped some little acorns on the squares that have letters on them. The acorn is another stamp from the Gently Falling set and the letters were cut from Soft Suede cardstock with my beloved Big Shot!!!
Here's a closer look at some of the other fun elements in the project.
| Scarecrow is made from a variety of punches. The "straw" is bits of linen thread. |
I had loads of fun at this class and am thrilled with the final product!
Do you love those leaves on the background? I am offering a Gently Falling Stamp Camp at the end of October. At the class, you will receive the Gently Falling stamp set and make 4 cards (each with a different technique)! You can see all the details on my Classes & Events page. Please contact me to reserve your spot!
If you would like to see the whole series of Festive Frames, you can look here (Jingle), here (Freezin'), here (Spring) and here (Summer).
Have an inspired day!
Tuesday, June 21, 2011
Happy Summer!
Yahoo! Today is the first day of summer...and it's a BEAUTIFUL day! The sun is shining, the birds are chirping and I can hear the frogs at the pond. The only downside is the mosquitos right now...they are vicious and blood thirsty. It needs to get super hot so they all die!
In honour of the first day of summer, I thought I would share the summer frame I did for a recent class.
It is so bright, fun and summery! Are you wondering what color my background and letters are? I used the new Island Indigo. It's like a lighter, richer version of Not Quite Navy. I love it! My letters are on Sahara Sand cardstock and the fun summery elements are on a variety of bright polka dot DSP. I used the Patterns Stack DSP for this in Melon Mambo, Tangerine Tango, Daffodil Delight, Old Olive and Elegant Eggplant.
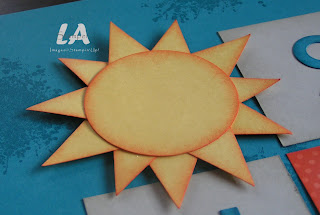
What's a summer frame without a sun?!?! I used Daffodil Delight sponged with Tangerine Tango to make my sun. The middle is the 2 1/2" Circle Punch and the rays were punched with the new Pennant Punch...lovin' that punch!!!
More summer stuff...watermelon (YUM!), grape popsicles (YUM!) and a beach ball (Fun!). All are made with punches. The watermelon is the 1 3/4" circle and the seeds were made with the new Triple Layer Blossom Punch. They are the little pieces that get punched out from the middles of the flower petals...perfect watermelon seeds, don't ya think? The popsicle is a Tag punch with a Word Window for the stick. Did you notice the bite? I love the bite...even though I never bite my popsicles! The bite was made with the Scallop Oval punch. And, the beach ball is some more circle punches.
FLIP FLOP SEASON is here!!!! Summer isn't complete without flip flops, so we had to have a pair of those included in the frame! My flip flops are Tangerine Tango with Daffodil Delight ribbon to make the part that goes over your foot. If you look really close, you can see they have a little bit of a design on them. That was done with a new jumbo wheel called Starburst. It's a great wheel for backgrounds and, like most of our wheels, it coordinates with a great stamp set!
Who wants lemonade?!?!?!? This little beauty is my favorite part of this project!!! I've seen lemonade cards floating around the web for a few years now, but had never tried it my self...until now! The cup is made from Cardsock Vellum which was sponged with Daffodil Delight. Then I folded in the two long sides and glued them down so that the middle popped up a bit forming a glass shape. Before I glued it down, I ran a bit of glue along the top and dipped it into Dazzling Diamonds glitter...the perfect sugared rim! My little lemon is a circle punch (3/4" in Daffodil Delight) which was embellished with more of those watermelon seeds...only this time I punched them from So Saffron cardstock. Perfect lemon segments, don't you think? The whole thing is completed with a bendy straw which I trimmed down to fit into my cup. It's the perfect touch...and is making me want a glass of lemonade!
Here it is hanging in my front entry...
There you have it! Happy first day of summer...hopefully the weather is super summery where you live and you can get out and enjoy it!
Have an inspired day!
In honour of the first day of summer, I thought I would share the summer frame I did for a recent class.
It is so bright, fun and summery! Are you wondering what color my background and letters are? I used the new Island Indigo. It's like a lighter, richer version of Not Quite Navy. I love it! My letters are on Sahara Sand cardstock and the fun summery elements are on a variety of bright polka dot DSP. I used the Patterns Stack DSP for this in Melon Mambo, Tangerine Tango, Daffodil Delight, Old Olive and Elegant Eggplant.
What's a summer frame without a sun?!?! I used Daffodil Delight sponged with Tangerine Tango to make my sun. The middle is the 2 1/2" Circle Punch and the rays were punched with the new Pennant Punch...lovin' that punch!!!
More summer stuff...watermelon (YUM!), grape popsicles (YUM!) and a beach ball (Fun!). All are made with punches. The watermelon is the 1 3/4" circle and the seeds were made with the new Triple Layer Blossom Punch. They are the little pieces that get punched out from the middles of the flower petals...perfect watermelon seeds, don't ya think? The popsicle is a Tag punch with a Word Window for the stick. Did you notice the bite? I love the bite...even though I never bite my popsicles! The bite was made with the Scallop Oval punch. And, the beach ball is some more circle punches.
FLIP FLOP SEASON is here!!!! Summer isn't complete without flip flops, so we had to have a pair of those included in the frame! My flip flops are Tangerine Tango with Daffodil Delight ribbon to make the part that goes over your foot. If you look really close, you can see they have a little bit of a design on them. That was done with a new jumbo wheel called Starburst. It's a great wheel for backgrounds and, like most of our wheels, it coordinates with a great stamp set!
Who wants lemonade?!?!?!? This little beauty is my favorite part of this project!!! I've seen lemonade cards floating around the web for a few years now, but had never tried it my self...until now! The cup is made from Cardsock Vellum which was sponged with Daffodil Delight. Then I folded in the two long sides and glued them down so that the middle popped up a bit forming a glass shape. Before I glued it down, I ran a bit of glue along the top and dipped it into Dazzling Diamonds glitter...the perfect sugared rim! My little lemon is a circle punch (3/4" in Daffodil Delight) which was embellished with more of those watermelon seeds...only this time I punched them from So Saffron cardstock. Perfect lemon segments, don't you think? The whole thing is completed with a bendy straw which I trimmed down to fit into my cup. It's the perfect touch...and is making me want a glass of lemonade!
Here it is hanging in my front entry...
There you have it! Happy first day of summer...hopefully the weather is super summery where you live and you can get out and enjoy it!
Have an inspired day!
Tuesday, May 31, 2011
Fun with the Kids
Last Saturday I had a Stampin' Kids class, which I think was my favorite to date! The kids got to decorate a lamp and then make a door knob hanger with some Build-a-Bear stuff and their name on it. It was a great class and I know the kids had a blast!
The lamps started out as plain square lamps, which I found at Ikea. These lamps are fantastic...so easy to decorate with our vinyl and when you get sick of it, peel it off and put something different on! and, because they only have a 40W chandelier bulb in them, they don't get very hot. I used my Circles #2 die and various colors of our raw vinyl and cut polka dots for the kids. It was so easy for them to just peel and stick all over their lamps!
They also make a door hanger with their names on it. The base of these are chipboard coasters, which we covered with cardstock and Designer Papers.
The top coaster had their name on it, which I pre-cut with my Big Shot and the Go Go Boots alphabet dies.
The bottom coaster had a bear which I also pre-cut with my Big Shot and various Build-a-Bear dies.
So fun! Have an inspired day!
The lamps started out as plain square lamps, which I found at Ikea. These lamps are fantastic...so easy to decorate with our vinyl and when you get sick of it, peel it off and put something different on! and, because they only have a 40W chandelier bulb in them, they don't get very hot. I used my Circles #2 die and various colors of our raw vinyl and cut polka dots for the kids. It was so easy for them to just peel and stick all over their lamps!
They also make a door hanger with their names on it. The base of these are chipboard coasters, which we covered with cardstock and Designer Papers.
The top coaster had their name on it, which I pre-cut with my Big Shot and the Go Go Boots alphabet dies.
The bottom coaster had a bear which I also pre-cut with my Big Shot and various Build-a-Bear dies.
So fun! Have an inspired day!
Wednesday, January 26, 2011
Lovely Luminaries
Hello! I love, love, love the project I'm sharing today! I came across it on Jackie Topa's blog a while back and KNEW I had to make some of my own.
Aren't these the cutest little luminaries ever! They are super easy to make too! Here's the cast of characters...
A piece of medium window sheet, 4 of the largest Beveled Window Panes, some ribbon and a battery powered tea light.
The first step is to cut out a mini milk carton (minus the top "milk carton" part) from some Medium Window Sheet, crease all the score lines really good and fold it into a little box. Secure the side and the bottom with some Sticky Strip.
Once you've done that, you want to join your Beveled Window Panes together with some ribbon. I chose the Real Red Taffeta for this project. You want to loosely tie the four window panes together, like this...
You want to make sure they're loose, so you can slide them over the little box you just made! Once they're tied together and you've slid them over the little box, you can embellish and add a battery powered tea light inside.
I cut a piece of Cardstock Vellum for each side of my luminary (the cardstock vellum slides bewteen the window pane and the box...no adhesive, so it can be changed easily if I want). I embellished with heart shapes punched from the new Glimmer Paper. I love, love, love this paper. It's so sparkly and fun. And, the best part is that very little glitter comes off the paper when you're working with it...ya know, so your craft area doesn't look like Las Vegas threw up on it! After working with this paper, you can answer your door WITHOUT having glitter stuck all over you and the UPS guy thinking you're a crazed, glitter lovin' person who orders A LOT of Stampin' Up! stuff and is waaaaay too excited about it!!!!! ...not that I have EVER answered the door covered in glitter super excited about an order...*wink*
Anyway, I ended up making three total...
There ya go! Super cute and loads of fun. Give it a try and let me know how it turns out.
Have an inspired day!
Aren't these the cutest little luminaries ever! They are super easy to make too! Here's the cast of characters...
A piece of medium window sheet, 4 of the largest Beveled Window Panes, some ribbon and a battery powered tea light.
The first step is to cut out a mini milk carton (minus the top "milk carton" part) from some Medium Window Sheet, crease all the score lines really good and fold it into a little box. Secure the side and the bottom with some Sticky Strip.
Once you've done that, you want to join your Beveled Window Panes together with some ribbon. I chose the Real Red Taffeta for this project. You want to loosely tie the four window panes together, like this...
You want to make sure they're loose, so you can slide them over the little box you just made! Once they're tied together and you've slid them over the little box, you can embellish and add a battery powered tea light inside.
I cut a piece of Cardstock Vellum for each side of my luminary (the cardstock vellum slides bewteen the window pane and the box...no adhesive, so it can be changed easily if I want). I embellished with heart shapes punched from the new Glimmer Paper. I love, love, love this paper. It's so sparkly and fun. And, the best part is that very little glitter comes off the paper when you're working with it...ya know, so your craft area doesn't look like Las Vegas threw up on it! After working with this paper, you can answer your door WITHOUT having glitter stuck all over you and the UPS guy thinking you're a crazed, glitter lovin' person who orders A LOT of Stampin' Up! stuff and is waaaaay too excited about it!!!!! ...not that I have EVER answered the door covered in glitter super excited about an order...*wink*
Anyway, I ended up making three total...
There ya go! Super cute and loads of fun. Give it a try and let me know how it turns out.
Have an inspired day!
Subscribe to:
Posts (Atom)