Showing posts with label Sale-A-Bration. Show all posts

Thursday, January 29, 2015

Best. Day. Ever!

I held my annual Soup & Stamps night last weekend and it was a BLAST!  I made 2 big pots of soup (Corn Chowder & Taco Soup) and a double batch of biscuits to enjoy.  At Soup & Stamps, you can eat as much as you want and I think most of us enjoyed a bowl of each soup!  The dinner conversation was fantastic and we wrapped up our dinner with some delicious cake.  Then, it was stampin' time!


Because Soup & Stamps is a kick off to SAB, the stampin' project featured some of the fab SAB products...the Best. Day. Ever stamp set and the Best Year Ever DSP.

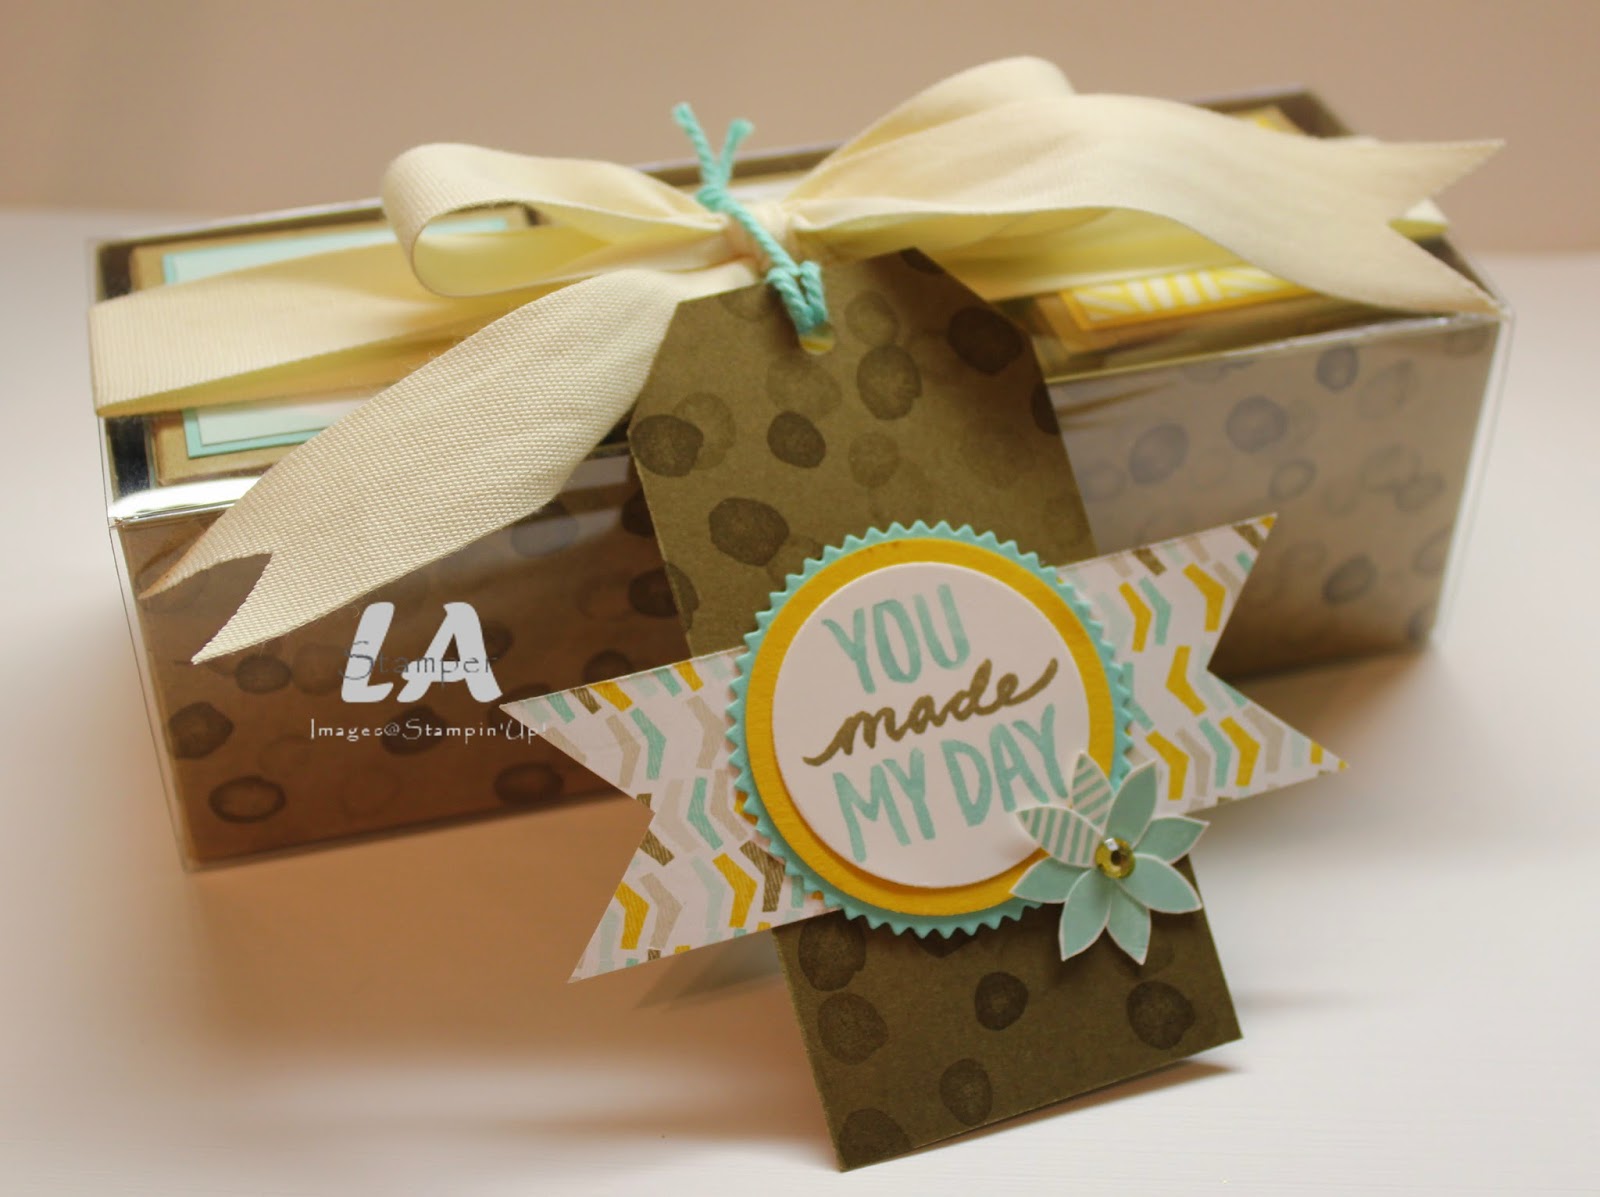
I was inspired by a project my friend Becky made at Christmas time.  I loved the way she put small boxes into one of the Tag-A-Bag Gift Boxes and when I realized that 3 of the Tiny Treat Boxes fit inside the Tag-A-Bag box, I knew what the project was going to be!


Super cute, isn't it!  I love how easy it is to dress up our boxes with a little stamping and some DSP!

The tag is tied on to the sleeve of the Tag-A-Bag box so you don't have to untie it all to get into the treats!  You just slide the sleeve off and all the prettiness stays right where you want it to!  We finished it off with a fun and simple tag.


Did you notice the yellow rhinestone on the tag?  That is done by coloring a regular old rhinestone with BLENDABILITIES!!!!!  Yes, you can use your Blendabilities to color rhinestones (although you want to be careful that the rough surface of the rhinestone doesn't cause the tip of the Blendabilities to fray).  And, don't forget you can get the Blendabilities as free SAB items when you place a $60 order (before shipping and tax)!  Check out the SAB brochure for more details!

Are you Canadian and need a Stampin' Up! demonstrator?  I would love to help you out!  Contact me and I can get some catalogs to you or if you're local you can join some of my classes.

Have an inspired day!


Tuesday, January 28, 2014

Sale-A-Bration, Soup & Stamps!


I just love that sentiment stamp!  It's part of the Yippee-Skippee set and I think it's a perfect way to sum up last Saturday when I held my annual Sale-A-Bration kick off...Soup & Stamps!  This is one of my favorite events to do!  I make 2 HUGE pots of soup (this year it was Creamy Tomato Tortellini & Beef Vegetable with Barley), some biscuits and delicious dessert.  My ladies are treated to supper and then we stamp! This event is always so much fun and this year was no exception.


Busy creating!
Mmmmm...fresh out of the oven (as people were arriving) cheese biscuits!
"Souper" yummy Texas Sheet Cake....I used Pioneer Woman's recipe!
Blueberry Lemon Bundt cake...the recipe for this one was from my Looneyspoons Collection cookbook (LOVE that cookbook!)

Can you believe I totally forgot to take pictures of the delicious soups?  You'll just have to take my word for it...they were yummy!

I bet you want to see the project everyone made, right?  I usually do a set of cards or a box and some cards at Soup & Stamps, but this year I decided to do something totally different and we did a mini album!  I actually used 5, yes 5, SAB products...Sweet Sorbet DSP, Petal Parade stamps, Banner Blast stamps, Banner punch, and the Decorative Dots embossing folder!  Of course, I had to throw in some Occasions Catalog products too...Basic Metal Buttons, Perfect Pennants stamps, Banners framelits, and the Angled Tag Topper punch!

The mini album starts with one piece of 12x12 cardstock which you score and cut to make your "pages".  It all folds up in to a small package.  The pictures show it as you would unfold it.....


It was loads of fun to make.  Here are a few of my favorite parts...


I love, love, love these little banners!  They are the perfect little accent for the corner of a page or card front.  And, I love that the coordinating punch punches out the stamped images without leaving a white border around them...small things like that make me happy!


This part makes me REALLY happy!  Do you recognize the metal buttons?  I used the one with the raised edge and realized that the small circle punch from the Itty Bitty Shapes Punch Pack fit right on there like it was meant to be!  Here's the part that made me squeal with delight.  A dimensional under each button and shazaam there was the perfect closure for the flap on this pocket!  Here's a little tip...put the dimensional on the button, then stick the tail of the Baker's Twine to the dimensional and then stick it down on the cardstock.  It seemed to work best that way for me!


This is my favorite stamp in the Perfect Pennants set!  And I just love it here with a little ruffled ribbon along the bottom!  So cute!  And, check out that Distressed Dots embossing action...LOVE it!

Lastly, I have the measurements for you so you can create one of these little beauties yourself!


You basically take a 12x12 piece of cardstock and score it at 2 3/8 and 7 1/4.  Then you turn it and score at 3 7/8, 4 1/8, 8 and 8 1/4.  You can see in the picture where you need to cut the skinny sections out.  Any of the flaps can be made into pockets or you can cut any of the flaps off to change up your album.

Have fun with this one!  I would love to see your version of this mini album!

Head on over to my online store (or contact me) to purchase the supplies you need to create one of these and earn some free SAB products!  Have an inspired day!


Sunday, January 19, 2014

Sweet Sorbet Simple Cards

I'm bringing back Simple Card Sunday!  I feel that it's important to send out cards to people, both for special occasions and just because.  And, with the busy lives we all lead, simple cards are the way to go!  Don't get me wrong, I love a card that I can get lost in...layers, stamping, embellishments and so on, but sometimes ya just need to do something quick and simple!

In my post last Thursday I showed you the box 'o cards I made for my grandma, with the promise that I would show you the cards today.  Well, here they are!  I did 10 cards total and to keep it simple I did 5 designs, 2 of each design.


And, there they all are!  I kept with the colors from the Sweet Sorbet DSP and used the Petal Parade stamp set as well as a variety of sentiments.  I think it took me less than an hour total to make all 10 cards...cute, easy and simple!

Don't forget that Sale-A-Bration starts at the end of the week.  With every $60 you purchase (before shipping & tax) you will qualify for a FREE SAB item...including the Petal Parade stamp set, the Sweet Sorbet DSP and the embossing folder I used on the last card pictured!  Start making your list so you're ready to order when SAB starts!

Have an inspired day!


Thursday, January 16, 2014

Sweet Sorbet Stationary Box

Last fall my grandma moved out of the house she has lived in for longer than I can remember and into a senior's lodge.  I was happy that she made the decision that it was time, but I know it was difficult for her.  And, I know it was difficult for all of us!  I have so many memories of going to visit her at that house when I was a kid and my own kids have memories of visiting her at that house.  I remember my parent's putting my brother and I on the Greyhound and we would ride the bus to go visit her (what a different world we live in now...I don't think I could do that with my boys!).  I remember her making us homemade french fries and she made the BEST donuts!  She had a swing in the backyard that my brother and I would play on for hours!  She would take us to the park and the Farmer's Market to see my other grandparents.  She would take us on walks and to the lake.  She would take us shopping and for dinner with her friends and relatives we didn't know!  But, most of all, she showered us with love.  While I'm sad she isn't in that house anymore, I'm thankful we got to visit with her this summer and that I will always have the memories...and that we will make new memories with her living in a different place!

So, after all that, you're probably wondering how that relates to stamping, right?  Well, I decided that she needed a special stamp with her name and new address and, of course, some cards to go with it so she could send notes to her friends.  And, I had to put all this in a special little box, 'cause that's what I do!


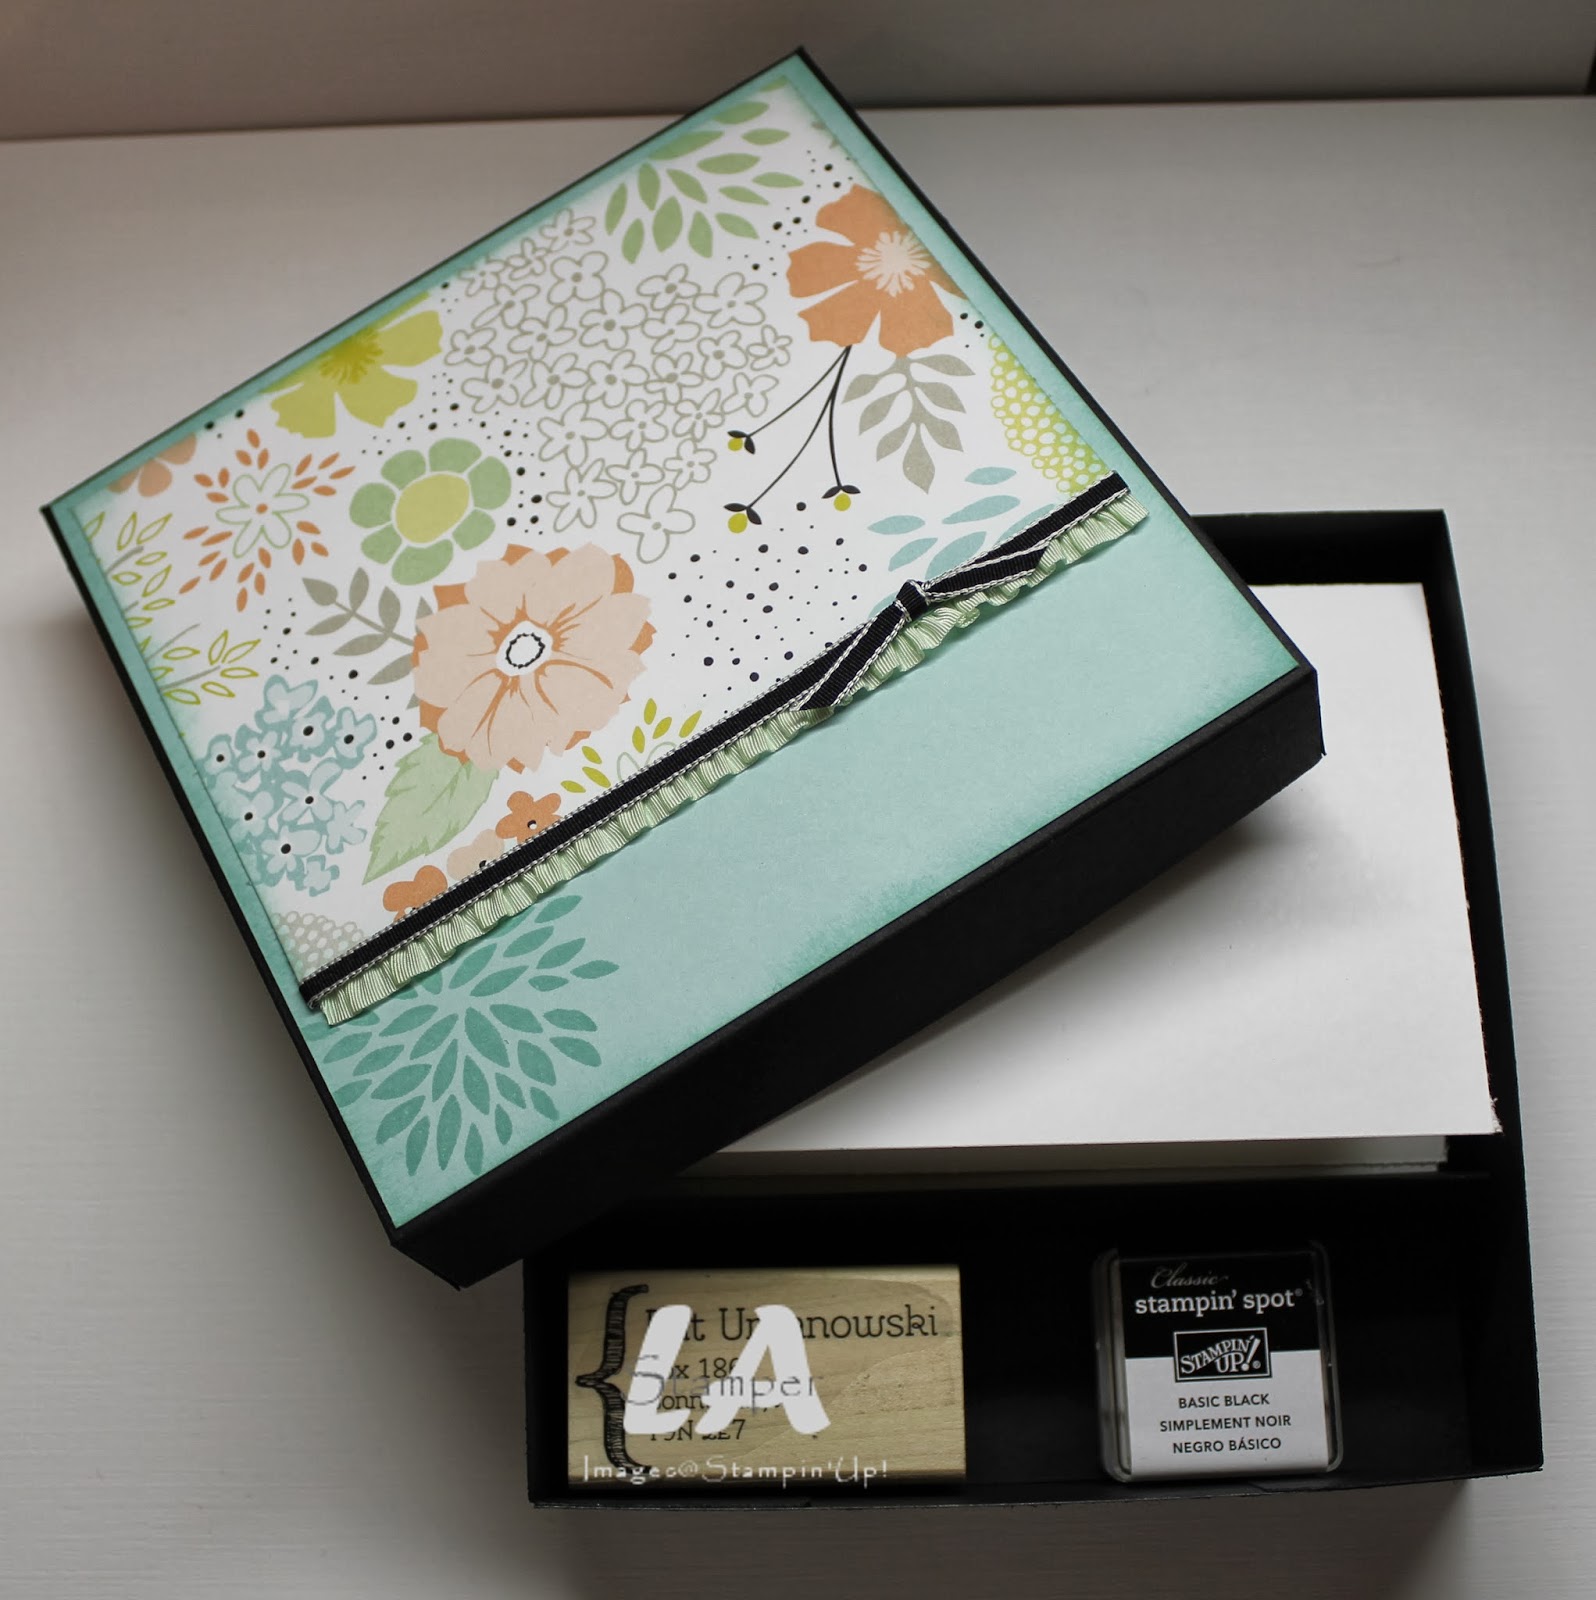
I used the Sweet Sorbet DSP which is one of the Sale-A-Bration items this year!  This is such fun DSP...I can't wait to use it on more projects!  I took my colors for this project right out of the DSP.  The box and lid are basic black.  I added a Pool Party layer which was sponged and stamped (with the new Petal Parade stamp which is one of the SAB items this year too!) with Pool Party ink.  Then I added a layer of the DSP and finished it off with some ribbon!

It's a super easy box to put together.  Here are the measurements as well as where you need to score.

Box Base:  8 1/2" x 8 1/2" (score 1 1/2" on each side)
Box Lid:  7 5/8" x 7 5/8" (score at 1" on each side)
Insert:  5 1/2" x 7 1/4" (score at 3 3/4", 4 3/4" & 5 3/4")

Here's what it looks like open.


There's 10 note cards with envelopes, a personalized stamp and a Basic Black Stampin' Spot in there for her!  Check back on Sunday to see the cards I made!

Remember, when Sale-A-Bration starts next week, you can get the SAB items free with every $60 of product you order (before shipping & tax).  So start making your list because there is some super fun SAB products this year!

Head on over to my online store to get some cardstock, note cards with envelopes and a personalized stamp so you can make this project for someone special in your life!

Have an inspired day!


Thursday, March 21, 2013

Happy Hello Simply Sent Kit

We have less than 48 hours left in SAB.  Have you got your free SAB items yet?  You still have a bit of time to place those orders and get some free product and why not choose the Happy Hello Simply Sent Kit.  This is a fantastic card kit that comes with 8 pre-cut, pre-scored, and pre-printed cards!  All you have to do is embellish (with the fun embellishments provided), write a little message, pop it in an envelope and you've made someone's day!

Like most Stampin' Up! products, demonstrators get it in their hands and find new and different ways to use it!  The Happy Hello kit is no exception and there's loads of ideas out there for this kit.  Today I have one of those "other ideas" to show you!


Yep, that's right...it was a card, but now it's a box!  I've seen this idea all over the place, so I'm not sure who to credit the original idea to, but whoever it was, THANK YOU!!!! 

It's super simple to make.  Lay your flat card on the Simply Scored so that the original score line is vertical.  You will want to score a line 1/2" on either side of the original score line (parallel to the original score line).  Then turn the card so that your score lines are horizontal and score 1" in from each side.  Then you just want to do some trimming on those score lines so that you can fold it up into a box.  Secure the sides with some Tombow and you're ready to embellish with the fun embellishments that come in the kit.  We used some Basic Gray ink and a stamp to add the word friends to the box.

Now, some of the cards are pre-printed with the word "hello" on them.  That's ok, they will still work for this project.....that's why my flower is where it is!

We put a cello bag full of yellow jelly beans in our boxes.


Remember SAB ends tomorrow, so you will want to head over to my online store ASAP to take advantage of the sale and get some super fun free products for yourself!

Have an inspired day!


Wednesday, March 20, 2013

Sycamore Street

Consider this a PSA...Sycamore Street will be closing on Friday!  That's right, we will be saying good bye to Sycamore Street DSP, ribbons and buttons on Friday when SAB ends for another year.  The good news is that you still have today, tomorrow and Friday to place your last minute orders  to qualify for SAB and stock up on some Sycamore Street products (and the other products, if you want!).

I love the Sycamore Street DSP.  There's such a wide variety of patterns that I find it easy to use for all kinds of occasions and looks.


I originally saw this card on Pinterest, but rather than pin it I filed it away in my brain for future reference and now I can't find it again to give the original creator credit.  So, if you made a card like this and pinned it...thanks for your inspiration!

This card is a Basic Gray base with a piece of embossed Basic Gray cardstock over top it.  Don't you just love the new Honeycomb Embossing Folder?  I love how it can look fun and whimsical, casual or elegant!  I added a piece of the Sycamore Street DSP along the bottom of the card and covered the "seam" with some of our luscious Two-Toned Ribbon (also from the Spring Catalog).

Everything you need to create this card can be found in my online store.  So, head on over there with the shopping list to place your order today!

Shopping List:
  • Cardstock (Basic Gray, Whisper White)
  • DSP (Sycamore Street...FREE with a qualifying SAB order and only available until Friday!)
  • Ribbon (Two-toned Basic Gray)
  • Vintage Faceted Buttons
  • Whisper White Bakers Twine
  • Big Shot
  • Honeycomb Embossing Folder
  • Decorative Label Punch
  • Stamps (One In a Million)
Have an inspired day!


Friday, February 22, 2013

The Curly Label Punch had a Baby!

This Sale-A-Bration, our Curly Label punch had a baby and named it the Petite Curly Label punch.....and, it's ADORABLE!!!!


Recently, I paired the adorable Petite Curly Label punch (SAB) with the new Print Poetry DSP (Spring Catalog) to create two versions of a super cute and simple card!  It kind of reminds me of a patchwork quilt!

My stamp clubs did a birthday version of the card with blues and greens this month.  Here's a closer look.


And, I did a thank you version with pinks and greens at a supper meeting with an EWI group this month.


Here's the exciting news!  You can get everything you need to make these cards and qualify for an SAB item (the punch!) and be able to make loads of these cards for all kinds of occasions!

Supply List:
Assorted Cardstock (2012-2014 In Colors) $8.50
Stitched Satin Ribbon (choose one of the In Colors) $12.25
Very Vanilla Cardstock $9.25
Print Poetry DSP Stack $8.50
Classic Ink Pad (choose one of the In Colors) $7.25
Petite Pairs Stamp Set $25.95
Petite Curly Label Punch FREE

So, which version is your favorite?  Do you prefer the blues and greens or more girly pink and green?

Have an inspired day!


Thursday, January 24, 2013

Soup & Stamps

One of my favorite events that I do during the year is my SAB kick-off...Soup & Stamps!  I look forward to this event as much as my customers do!  It really is a fun evening of dinner and some stamping.  I always make 2 BIG pots of soup (one cream based and one broth based) as well as buns or biscuits.  We enjoy a fun dinner together and then we finish our evening with some stamping!

This year I made Chicken Parmigiana and Corn Chowder soups as well as home made buns and a super yummy Coconut Cake.  It was delicious!  And, I have put my Corn Chowder recipe on the LA Stamper Cooks blog, so be sure to go and check it out!

I always do a fun project that incorporates as many SAB products as I can.  This was the project this year.


Isn't is cute!  I learned how to do the box during one of the stamping demonstrations at Leadership.  For the life of me, I can't remember who showed it, but I'm thinking it was Shelli?!?!?


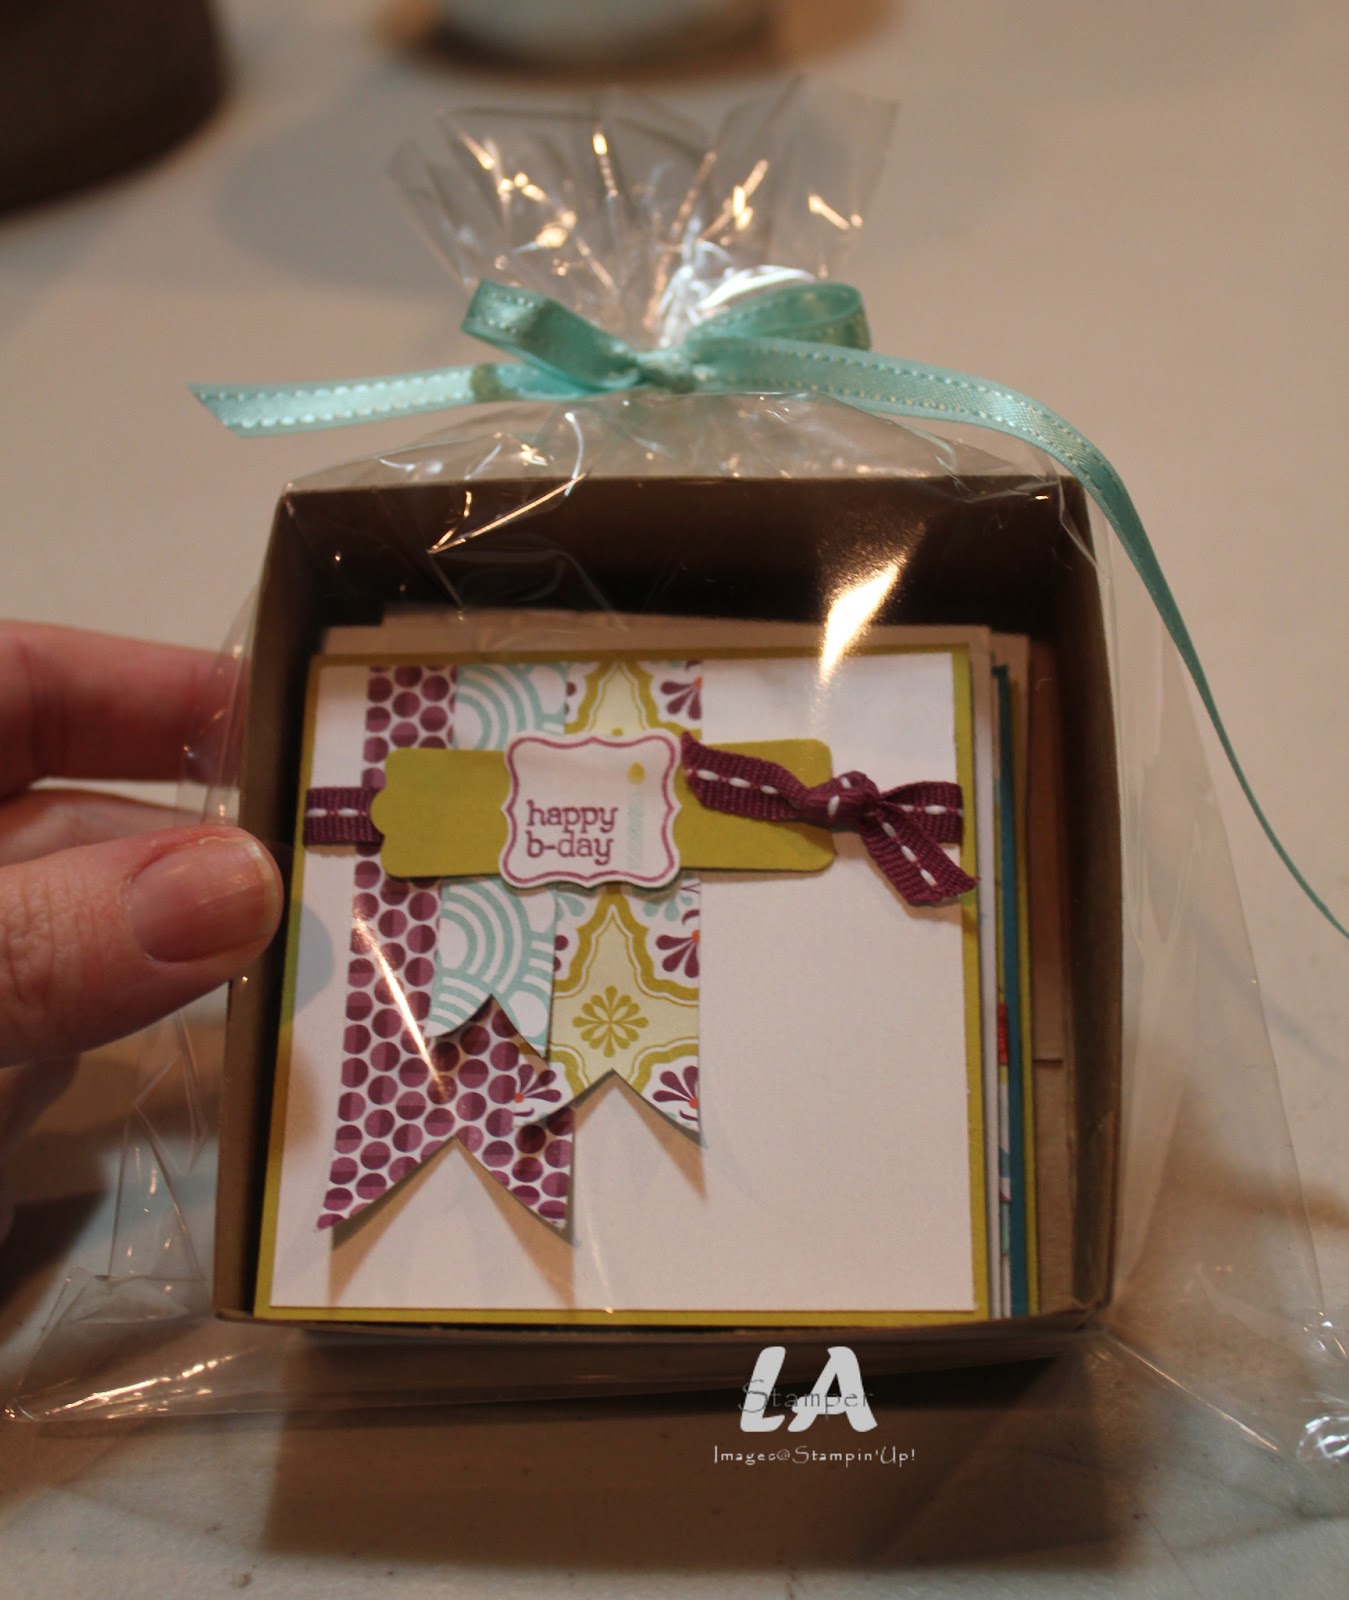
It's the easiest box ever!  I cut down one of our Kraft boxes to be an inch and a half high (and with no top).  Then I stamped it with the Distressed Dots background stamp and some Versamark ink.

The project included 4 cute 3x3 cards with matching envelopes.  The cards featured the Pretty Petites set, Sycamore Street DSP and the Ribbon & Button pack...all of which can be earned during SAB!


I love them all!

Remember to check out my Corn Chowder recipe here and don't forget to place your $60 or more order to earn some FREE stuff!

Have an inspired day!


Tuesday, January 22, 2013

Digital Day

You think Friday is the best day of the week, right?  Well, I'm here to tell you, you are mistaken!  The best day of the week is Tuesday because Tuesday is digital day and Stampin' Up! releases new digital downloads!  You can find this week's downloads in my online store.

I took a few My Digital Studio classes when I was in Orlando a couple weeks ago and was inspired to use the program more and show you more fun projects done with it.  So, I decided to incorporate a hybrid card as one of my club projects this month.


I started with a template from the Lemonade Stand digital disk (it's a SAB item, so you can get this disk free...and it's FULL of super fun stuff!).  This particular template was for a 6x6 card and I just re-sized it to a normal card front size.  Then I printed it on Whisper White cardstock.

After I trimmed it, I did some layering with Island Indigo and Daffodil Delight ink and stamped a sentiment (which is from the Best Dad set).  And, to finish it off, I blinged it up!


That's right...9 big rhinestones baby!  You may need sunglasses to look at this card!!!!!

I do have to thank the talented Heather Summers for her inspiration!  She showed a card very similar to this during her digital class in Orlando. 

Remember, you can find today's downloads in my online store and the template I used for this card is from the Lemonade Stand disk (which is a SAB item).

Have an inspired day!


Thursday, March 29, 2012

Try Something New

One of the things I love about being a demonstrator is the monthly magazine we get called Stampin' Success.  This magazine is exclusive to demonstrators and recently underwent a bit of a makeover!  I love the new format and all the new ideas that are included in this magazine...it makes my job a lot easier because I feel like I don't have to re-invent the wheel with my business because Stampin' Up! helps me with everything I need!

This last month, there was a technique in the Stampin' Success that caught my eye!  It's called Acrylic Distress and it's a super easy technique that packs a punch!


We explored this technique this month in my clubs...both my Stamp Clubs and my Scrapbook Clubs.  Basically you start with a piece of cardstock which you paint a thin layer of acrylic paint on.  Once the paint is dry, you run the cardstock through your Big Shot with an Embossing Folder (I used the Petals A Plenty folder for this project).  After that's done, you sand it and the paint ends up sanded off the raised parts of the design.  Once you're done sanding and have brushed off the dust, you can leave it as is, or you can rub some ink (in a contrasting color) over top of it.


Not only did I used the featured technique from Stampin' Success, but I used the same card they had in the article!  I changed it up a bit by using different colors and adding a whole lot of stamping fun to it...we're talking stamping, embossing, pearls, ribbon, twine, punching and DSP.  And, I have to say, I absolutely love the final result and I think my clubs liked this technique too!

Now, I have to say, time is running out for Sale-A-Bration!  Did you notice the stripe embossing on the card?  That embossing folder, while in the catalog, is one of the items you can get FREE during Sale-A-Bration.  Why would you want to pay for it if you can get it FREE!!!!!!  So, you need to go place a minimum $60 order so you can get this fun embossing folder free!  And, while you're doing that, you might want to consider doing what I do and joining my team of demonstrators!  During Sale-A-Bration, the demonstrator starter kit is only $150 AND  you will get a free pack of Designer Paper or a Digital Download each month for the rest of the year!  What a deal!!!!  I would love to have you join my team, so if you've been thinking of signing up, or just want more into, please contact me.

Have an inspired day!