Showing posts with label Tags. Show all posts

Thursday, August 13, 2015

Weekly Deals Tag

Hi Stampers!  Each week Stampin' Up! releases some Weekly Deals, which are items that you can get at a pretty sweet discount.  More often than not, I love all the items available for the Weekly Deals and this week was no exception.


When I was looking at the Weekly Deals today inspiration hit!  It all started with the Scalloped Tag Topper Punch (which is on sale...and you need one, trust me!) and the In Color Washi Tape (also on sale and looking for a new home at your house!).  From there it just morphed into a fun flower tag that included the Classy Designer Buttons, Wild Wasabi Seam Binding and Clothespins (all on sale too!).


It all just seemed to fit together with a big ole flower from the Flower Patch set (cut out with the Flower Fair Framelits).  And, of course, once I had a fun tag, I needed something to put it on!  So, out came the new Gift Bag Punch Board!


And, there you have it!  A bright and fun tag (made with loads of stuff on sale) on a super fun bag ready to fill with something wonderful for someone special!

Here's all the items on sale this week.  You can order any of them in my online store (but hurry because there's a limited quantity of items available at these prices), or contact me directly to place your order!


Have an inspired day!


Thursday, October 16, 2014

Freaky Friends

Hi Stampers!  Now that Thanksgiving is over it's time to start thinking Halloween!  Have you made up some cute little Halloween treats for the trick-or-treaters in your neighborhood yet?  Or maybe for your kid's classmates at school? 

At the Fall Conference I attended we did Halloween themed make & takes.


The upper left project is a fun box made with the new Gift Box Punch Board!  It's a great new tool that everyone needs in their craft rooms...quick and easy boxes!  This box is finished off with a belly band made with the Motley Monsters DSP, some ribbon and a tag.

The upper right project is an altered Tag-a-Bag.  It's quick and easy to alter these little bags for any occasion!  This one uses a doily, some Motley Monsters DSP and check out that fabulous ghost!  It's cut out of Glimmer Paper with the new Fun Fall Framelits!  The eyes are pearls colored with Blendabilities.  So fun!

The card is super quick and easy.  My favorite part is the embossed eyes!!!  They are also from the Freaky Friends stamp set and were embossed with the Crushed Curry embossing powder.  Spooky and fun!

Everything you need to create these projects and more can be found in my online store.  Head on over there and place an order today so you can get started on some super fun projects!  Or, if you would prefer, you can contact me to place your order.

If you like what you see and are Canadian I would love to be your Stampin' Up! demonstrator.  Contact me today and I can get a catalog in the mail to you ASAP!

Have an inspired day!


Tuesday, August 5, 2014

Christmas Bliss Card & Tag Set

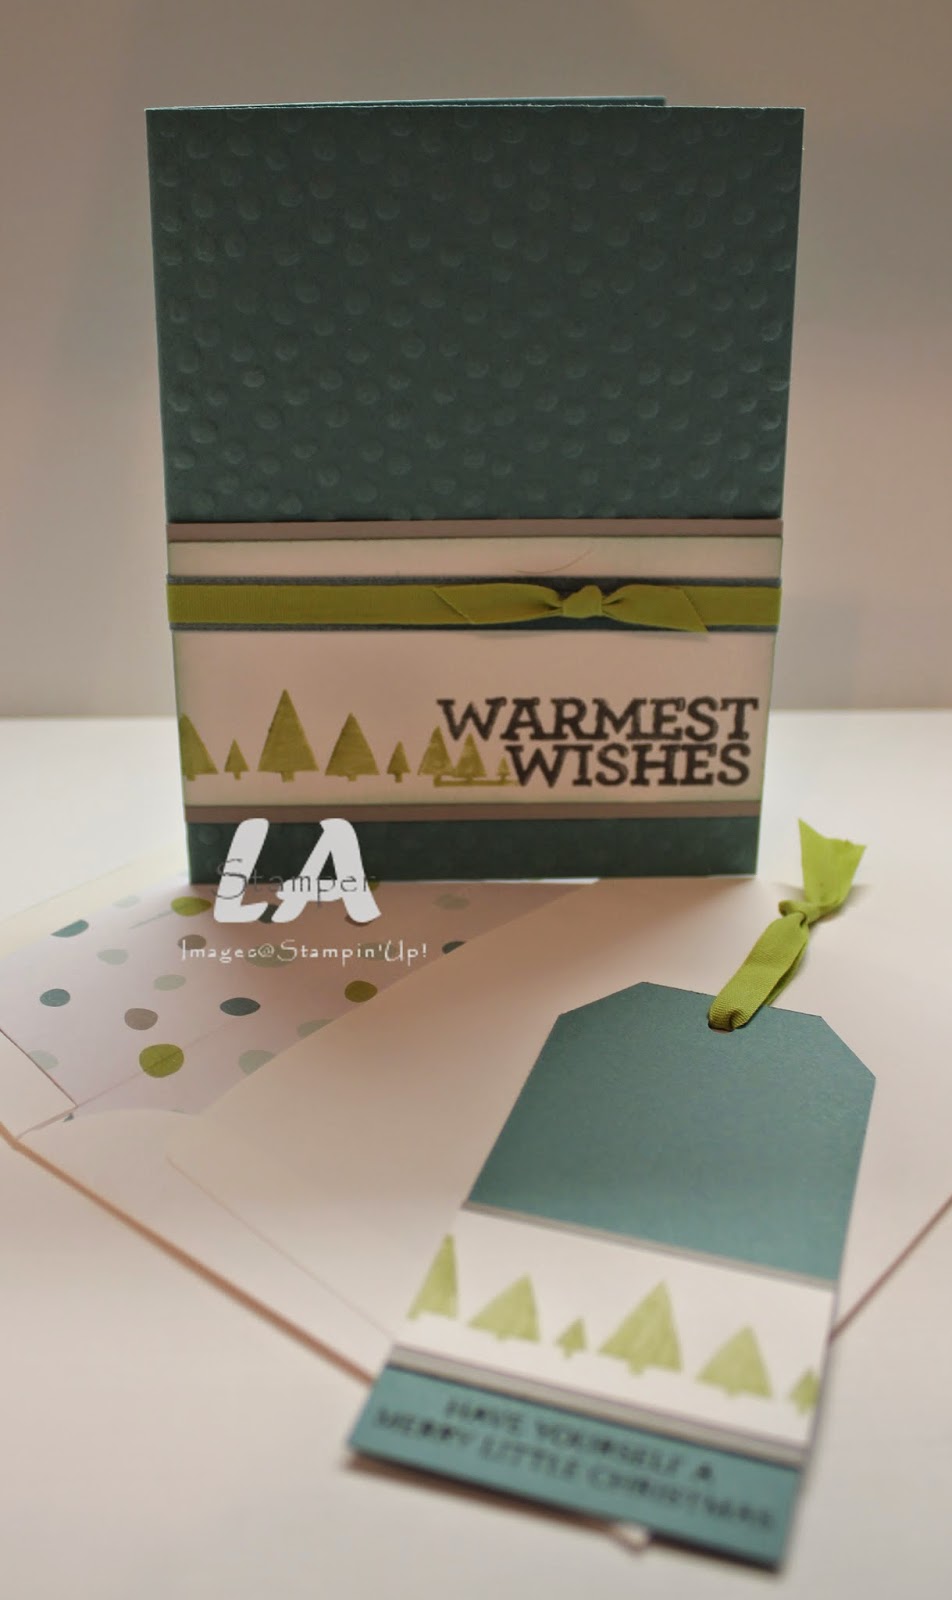
Well, it is sweltering here...not that I'm complaining because it won't be long before it's minus 5 million and snowing again!!!!  Along the lines of thinking cooler thoughts, I decided it would be fun to have a Christmas in July class.  So, at the end of July I had a group of ladies over to get a jump on their jingle with this fun project!


The did a card & tag set featuring the Christmas Bliss stamp set and some new DSP, All is Calm (which will be in the upcoming Holiday Catalog...coming soon to a mailbox near you!).  They made a fun divided box to hold their creations which had a clear lid!  Yep, we used the window sheets to make a lid for our boxes so you can see the fun creations inside!  In addition to their boxes, they also made 4 cards with lined envelopes and 4 tags.


I am loving the colors in the All is Calm DSP...I'm pretty sure I will be using a lot of this DSP in the coming months!!!!  Did you  notice the DSP in the envelopes?  It's super easy to fancy up your envelopes with the Envelope Liner Framelits and DSP of your choice!


And, here it is all packaged up nice in the box!  I tied a piece of Smoky Slate chevron ribbon around the box when all was said and done just to finish it off.

I still have a few kits left if you are interested in doing this class virtually.  The virtual class includes the stamp set, supplies for the projects (excluding tools and inks), written instructions, postage to get it to you and a link to exclusive videos so you can see how to put it all together.  Cost is $50.  Let me know if you are interested!  Please note this is only available to Canadians.

Have an inspired day!


Thursday, July 31, 2014

Gold Glitz Star

At my Catalog Kick off Party way back at the beginning of June, I had a New Catalog Scavenger Hunt for people to participate in.  I had fun watching them search through the new catalog for the answers to the 15 questions I had and even more fun watching and listening to them speculate on the answer of the bonus question...What is Lisa's favorite new In Color!  Only 2 people got it right...Blackberry Bliss!  Everyone that participated was promised a sparkly prize.


I surprised them with this fun little prize in with their orders!  They each got a container of the new Gold Glitz Dazzling Details.  I packaged them up in 4x6 Cello Bags tied with some new Night of Navy Seam Binding (I am SO excited about this color of seam binding!) and attached a simple circle tag!


The stamp I used is from a special demonstrator stamp set and I thought it was perfect for this occasion!  I stamped the image with Night of Navy ink on Whisper White cardstock and then punched it out with the 1 3/4" Circle punch.  I finished it off by adding some of the Gold Glitz to two of the stars!

Simple, sweet and fun!  Have an inspired day!


Tuesday, July 15, 2014

Inspire. Create. Share. 2014

As you are reading this I am on my way to sunny Salt Lake City for Stampin' Up!'s annual convention.  I am so excited to be on a road trip with some good friends and so excited to see my friends from across North America that I don't get to see very often!

One of the things I do every convention is make a little gift for my downline that are attending.  This year I spoiled them!


They each got a little package with a notebook and pen, altered first aid kit, bag tag and a little jar of goodies to snack on!


The notebook is covered with Flashback DSP and some Hello Honey ribbon.  I stamped "creative" along the ribbon...that creative is from a special convention set I got a couple years ago!  You can see how I altered the notebook here.  The pen is an RSVP pen that I rolled some DSP (again, the Flashback DSP) up into the barrel.  I love doing this with my pens...it's an easy way to make cute pens and then I know when people steal my pens because they are unique!!!!


The tags were cut from DSP (Flashback) covered chipboard.  I used the new Bigz die Party Pennants.  I love that the pennants come in 2 sizes on this die!  It's embellished with some punched pieces (colors from the Flashback DSP....Pool Party, Real Red, Hello Honey) and then each one has their initial on it.  I used the Perfect Print Alphabet Bigz die for that.  It's finished off with a piece of Hello Honey ribbon so they can tie it to their bags.  And, they now have a cute way to distinguish their bags in the sea of 3000 bags that are all the same!


I found these super cute little travel first aid kits when I was getting groceries at Superstore one day!  They come in a white plastic container and have all the essentials for minor first aid stuff like paper cuts and blisters (the most common convention injuries!).  The container was easy to alter with some more Flashback DSP and then a belly band made from cardstock.  The belly band was made with the Angled Tag Topper punch and tied shut with some of the new cotton ribbon in Real Red.  We're gonna have the cutest first aid kits around!


And, of course they needed some treats!  I got these cute little jars from someone selling leftover wedding favor stuff and they are perfect for this sort of thing.  I filled them with some gummies and then added a DSP (Flashback) circle to the lid.  It's finished off with a piece of cotton ribbon, this time in Pool Party.

And, here it is all packaged up cute and ready for them to get....


Don't you just love it?!?!?!  Everything but the notebook fit in these cute little plastic berry containers I also found on my Superstore grocery shopping trip!  Because the notebook didn't fit, I placed the berry container on top of the notebook and tied the two together with some of the awesome new Crushed Curry Striped Grosgrain.

Now that you've seen a lot of the patterns from the Flashback DSP pack, make it one of the ones you get this month with the sale!  DSP is buy 3 get 1 free for the month of July and with so many gorgeous DSP's to choose from you may even want to get them all...you know, buy 6 get 2 free or buy 9 and get 3 free!!!!

Head on over to my online store and order your DSP today!  Don't forget to use the hostess code CZKJ2ZAD when placing your order so you can be entered to win a pack of washi tape!

Have an inspired day!


Thursday, June 26, 2014

Hello Honey & Lost Lagoon Cake Pop!

Each time a new catalog comes out I do a big swap with the demonstrators on my team.  We get together and stamp an afternoon or evening away and go home with loads of new samples to share at our events.  For the last swap we did in May, one of the projects I did was a cake pop holder.


As soon as I saw this stamp in the Num Num stamp set I knew exactly what my project would be!  My color inspiration came from the Moonlight DSP stack and I paired Hello Honey with Lost Lagoon and a little bit of Basic Gray.


I started with a strip of Hello Honey cardstock which I stamped with an image from the Mosaic Madness set and Hello Honey ink.  I punched each end with the Scallop Tag Topper Punch and did some scoring in the middle so it would be able to sit flat on a table.

The little saying is from the Num Num set and I colored it with Stampin' Write Markers to get it multi-colored.  I stuck it on my project with the new Fast Fuse adhesive and embellished with a little Lost Lagoon banner and a metal button.  The cake pop is tied in with some Lost Lagoon ribbon (you know...that luscious new In Color ribbon that you need every color of!!!).

I will admit that at first I didn't really like the new Fast Fuse adhesive.  It's really sticky, but there's a bit of a learning curve.  Now that I've figured it out I think I will be using it a lot more!!!!  Here's a little video comparing Fast Fuse and SNAIL so you can see the difference between the two...and I had a little Harry Potter moment (HP fans will know it when they see it!!!)!


Everything you need (except the cake pops!) to create this project can be found in my online store.  Head on over there with the shopping list and place your order today!

Shopping List
Stamps:  Num Num, Mosaic Madness
Ink:  Hello Honey, Stampin' Write Markers (Hello Honey, Lost Lagoon, Basic Gray)
Carstock:  Hello Honey, Lost Lagoon, Basic Gray
Accessories:  Lost Lagoon Stitched Satin Ribbon, Whisper White Baker's Twine, Basic Metal Buttons
Tools:  Banner Punch, Scallop Tag Topper Punch, Stampin' Trimmer, Fast Fuse Adhesive

Have an inspired day!


Thursday, June 19, 2014

Blackberry Bliss Sympathy Card

Continuing on with Blackberry Bliss this week, I have a simple and pretty Sympathy card to show you.


I don't' often make sympathy cards, but I just loved the saying in the Blooming with Hope set and it seemed to fit nicely with the card.  And, one of the best things about stamping is that you could easily re-create this card with a birthday wish!


I started with a blackberry bliss base for my card and layered on a piece of Sahara Sand which I stamped with the flower image (with Sahara Sand ink).  I am loving the combination of Sahara Sand and Blackberry Bliss...who am I kidding, I am loving Blackberry Bliss with almost anything right now!!!!!

The focal point is a Whisper White tag.  I stamped the flower image with black StazOn ink and watercolored it (Aqua Painters, Blackberry Bliss and Mossy Meadow ink).  Then I stamped my sentiment, added some piercing and finished it off with some Blackberry Bliss ribbon (did I mention how much I love the new In Color ribbon!) tied with some Linen Thread.

The result is a beautiful and simple card.  Although when I made about 35 of them for swaps I was no longer thinking they were simple and was seeing little pierced dots in my sleep!!!!

You can find all the supplies you need to create this card at home in my online store.  Head on over there with the shopping list and place your order today!

Shopping List
Stamps:  Blooming with Hope (hostess)
Ink:  Blackberry Bliss, Sahara Sand, Mossy Meadow, Black StazOn
Cardstock:  Blackberry Bliss, Sahara Sand, Whisper White
Accessories:  Blackberry Bliss stitched satin ribbon, Linen Thread
Tools:  Aqua Painter, Stampin' Dimensionals, Paper Piercer and Mat, Angled Tag Topper Punch

Have an inspired day!


Thursday, January 23, 2014

Fresh Prints Dog Tag

My youngest son has a pretty awesome teacher this year for Grade 1 and he absolutely adores her!  Last week one of her dogs turned 9 and he thought that he should give Weezie (her dog) a present because "9 human years is, like, so old in dog years"!!!!  So we put some fancy dog treats in a little bag.  It's clear that he is MY  son because the little bag wasn't enough, he thought it needed a nice tag that said "Happy Birthday Weezie" with room for him to write "love Sawyer".


I used the new Scallop Tag Topper punch (LOVE IT!!) to make my tag.  There's a little piece of Fresh Prints DSP along the bottom (also LOVE IT!!!).  I wrapped some of the Real Red Stitched Grosgrain around it and then stamped some candles (from the Create A Cupcake set).  I finished it off with a Vintage Button tied with some Linen Thread.


Super, super simple and sweet!  I love how he signed his name, and that he was adamant that there be 3 treats in there...2 for the birthday dog and one for her new puppy!  Sigh...I have a sweet boy!

Head on over to my online store to stock up on everything you need to make some super awesome tags...a Tag Topper Punch, some Fresh Prints DSP, some cardstock, ribbon and maybe even some buttons!

Have an inspired day!


Thursday, January 9, 2014

Language of Love Meets Fresh Prints

Last weekend I did one of my favorite things...got together with my downline!  We had a blast learning about some of the new products in the Occasions catalog and Sale-A-Bration, enjoyed a delicious potluck lunch and then stamped the afternoon away together!  I have some crazy talented demonstrators in my downline who I am proud to call my friends.

One of the projects I did for our swap was a fun little Valentine's bundle full of chocolates, of course!


And, here's a little different view so you can see the chocolates better!


You can see I covered 6 chocolates with some of the patterns from the Fresh Prints DSP stack.  I love this little stack of DSP...the colors are perfect and the patterns are so fun for a variety of projects.  And, it's cut to a perfect size for card making!

The chocolates are stacked and then wrapped with a piece of Burlap Ribbon and tied at the top with some Cherry Cobbler Chevron Ribbon to make a little pouch.  To finish it off, I made a fun tag.


For this tag, I used the new Angled Tag Topper Punch...LOVE these new punches so much!  I did some stamping with the new Language of Love stamp set both on the tag and also to make the little pennant with the metal button on it.  I think the Language of Love set is quite possibly one of the CUTEST stamp sets in the Occasions catalog!  The little striped banner was cut with the new Banners Framelits.  It's embellished with some new Natural Chevron Ribbon (another of my favorite new products!) layered with some ruffled ribbon.

Isn't it the cutest little bundle of chocolates?  I love how it turned out!

Head on over to my online store to order some of the fabulous Fresh Prints DSP and don't forget to add on the super cute Language of Love stamp set!

Have an inspired day!


Wednesday, October 31, 2012

Happy BOO to you!

Well, today I was supposed to post the second of my Parade of Ornaments along with another video, but it just seemed weird to be posting a Christmas ornament on Halloween!  So, I have decided to show you one last Halloween project (that you could have finished for tonight if you wanted!) and the ornament and video will post tomorrow.

Yesterday after school, Carter and I made 120 pretzel pumpkins.  They were super easy, loads of fun and only took us about 40 minutes start to finish!  I dipped and he did the stems...


All you need is little pretzels, orange candy melts and green M&Ms.  I melted my candy melts in a glass bowl over a pot of boiling water.  Once they were all melted, I dipped the pretzels in and then put them on waxed paper lined cookie sheets and before they hardened, Carter put a green M&M on them so they would have a stem.  Once they hardened, and we tasted for quality control, I packaged a lot of them up in some of the Medium Cello bags tied with a ribbon and a cute tag.


The tags are super simple.  I used the Spooky Bingo bits and stamped a bit before punching with the Tag Punch.  The bags are tied shut (and the tags are attached) with some of the narrow Taffeta ribbon in either Pumpkin Pie or Old Olive.  Super cute and super easy...I hope the kids enjoy them!

I also did up some little treat bags for some super special little ones.  Again, a VERY easy project...I just stamped some small white paper bags.


So, if you're looking for some simple last minute Halloween projects, I hope you've been inspired.  Happy BOO to you and have an inspired day!


Friday, March 23, 2012

Tulips!

There are some things that just scream spring to me!  One of those things is Tulips.  The other morning my mom called and asked if we were going to be around.  She had a meeting to come to down here and wanted to stay with us for a night.  It was really short notice, but of course I said it was ok!  Yesterday before she went back home, she came back here for a little visit with the kids and when she got back to the house, she had some tulips for me.  I love them!

Now, I don't get flowers very often, so I had to search for the "safe place" I keep my one and only vase in!!!  I put the tulips in some water and they looked pretty, but needed a little something.  So, this morning I added some ribbon and a super cute tag to the vase.


I used my favorite Two Tags die and cut half of the tag that folds.  Then I embellished with a strip of So Saffron DSP which I edged with some Lucky Limeade cardstock that was punched with the Dotted Scallop Ribbon Border Punch.  I stuck the punched pieces on the DSP so that just the little scallops were peeking out and then I stamped one of my favorite sentiments on it.  You can find this sentiment in the Pursuit of Happiness set.

The flower was done with the new Blossom punch which you can find in the Occasions Mini right now.  Or, you can sign up for my  Blossom Punch/Mixed Bouquet class on March 30 and get one as well as doing some fun projects with it!  If you want more info on the class, please let me know.  I need to know if you want to join me by Monday at the latest!

There are two sneak peek items on this project!  Can you guess what they are?

And, on a day when I look out my backdoor and see this...


And my dogs go outside and end up looking like this...


Seeing this on my dining room table is fantastic....


Thanks for the tulips mom!

Have an inspired day!


Monday, May 2, 2011

Mini Catalogue Monday-Triple the Fun!


So tonight was my Summer Mini Open House and I had a blast featuring the new Triple Layer Punches with a super fun technique..Inlaid Embossing!

I have to say, the new Triple Layer Punches are FABULOUS!!!  These punches are MUST HAVE projects for any punch "collector" and papercrafter!


The girls started by punching some flowers in Marina Mist, Daffodil Delight and Wild Wasabi, which were then used on a fun little card and tag.


The card is where they got to do the fun technique!  First they selected the flowers they wanted to use on the card and glued them onto the Whisper White piece.  Then that whole piece gets embossed with the Square Lattice Embossing Folder and ends up almost looking like a piece of fabric! Once it's embossed, you add a brad to the center of one of the flowers for a little visual interest, some ribbon and a little sentiment.  Then the whole piece was glued onto a piece of Wild Wasabi.

With the leftover flowers, they made a tag.


Of course, the tag was done with the Two Tags die.  I *heart* that die!!!!  The tag is Wild Wasabi.  There's a strip of Marina Mist and a strip of Whisper White across it.  It's finished off with some of the punched flowers layered together, embellished with a brad and stuck on with a Stampin' Dimensional.  Then a piece of Daffodil Delight ribbon was tied at the top.  So cute!

Have an inspired day!