Showing posts with label clubs. Show all posts

Thursday, April 30, 2015

Mother's Love Mini Pizza Box

Hi Stampers!  This month my clubs did a super fun mini pizza box.


I designed it to hold some 3x3 cards and there's even room for some chocolates or some other special little gift, like jewelry!
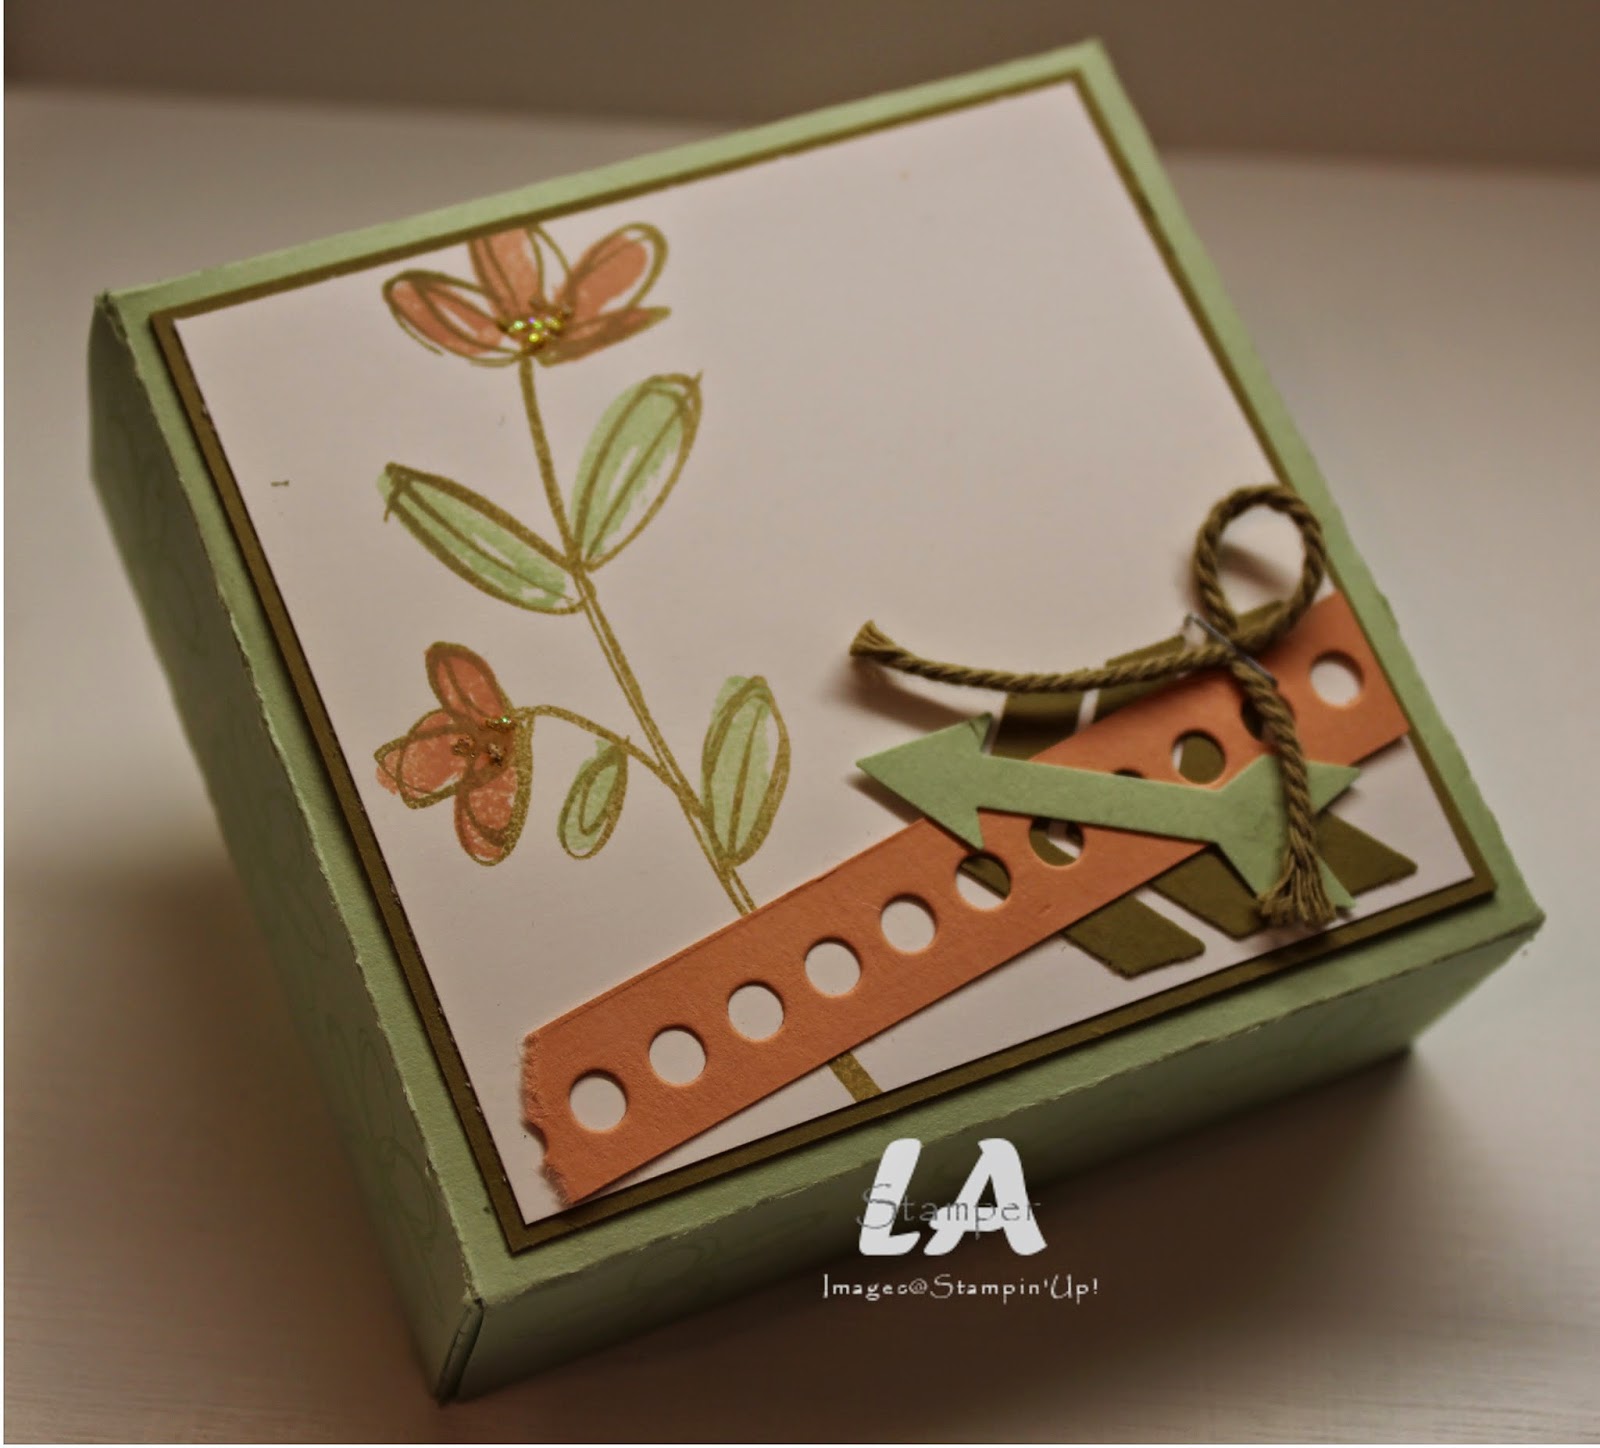

The box is pretty simple and is made from a piece of cardstock measuring 6x11. With the 6" side along the top of your Simply Scored, score at 1-1/4" and 4-3/4". Then turn your cardstock so the 11" side is along the top of your Simply Scored and score at 1-1/4", 4-7/8", 6-1/8" and 9-3/4".  Check out the diagram below to see where you need to make the cut lines. Crease all the score lines really well and then fold it up and glue the tabs to make a box. Your box should open like a pizza box.


Wanna see what my club peeps made for inside the box?  Yeah, I thought so!


Three sweet little 3x3 cards featuring the Mother's Love stamp set which you can find in the Occasions Catalog. I used the retiring 2013-2015 In Colors, Pistachio Pudding, Crisp Cantaloupe and Baked Brown Sugar.

I love these little pizza boxes. They are just so darn cute! Here's a couple more that I have done.

This one is Strawberry Slush with the Crazy About You set and Stacked With Love DSP stack. I made the black rhinestone is just a regular old Rhinestone that I colored with a black Sharpie.

This one also uses Strawberry Slush and the Stacked With Love DSP with the Painted Petals set.

That last one has an embossed vellum strip.  Here's a little trick for sticking vellum down....make it longer than you need it and fold the ends behind and stick them to the back of the cardstock layer.  Here's a close up of the edge so you can have a better look.


That's all for today!  Everything you need to make any of the three boxes shown today can be found in my online store.  You can contact me to order or order through the online store.  Don't forget to enter the hostess code MPXDNXGV when you order online!

Have an inspired day!


Sunday, August 3, 2014

Simple Birthday Wishes

It's Simple Card Sunday again and today I have a simple birthday card to share.  This is a card that my clubs did in June!


I used the super fun Endless Birthday Wishes photopolymer set for this card.  I love my rubber stamps a lot, but I have to say I do enjoy some aspects of the photopolymer stamps.  They are clear which is pretty cool...you can see right through them when you stamp them which makes for perfect placement.  I also enjoy being able to put a string of words together to make a sentiment like I did for this card.  Just place them where you want them and press the block onto them...voila, instant stamp!


I started with a Pear Pizzazz card base which I embossed with the Perfect Polka Dots embossing folder.  The cake was stamped with Basic Gray ink on a small square of white cardstock and placed behind the long white strip.  See how the cake is colored?  I did that with a stamp from the Work of Art set...I think this is going to be a must have set like Gorgeous Grunge!  I added a little sparkle with Dazzling Details on the sparklers on the cake!

Let's talk about that large white strip, shall we?  I started by punching out a 1 3/4" circle, then pierced around it.  I stamped the sentiment and added a small scallop trim (with the Dotted Scallop ribbon Border Punch).  I finished it off with three Daffodil Delight punched stars.  The whole strip is put on the card with Stampin' Dimensionals so that it looks like the cake is recessed in behind the white strip.  Fun little technique for a little different spin on a card!

You can find everything you need to make this card in my online store.  Head on over there with the shopping list and place your order today!

Shopping List
Stamps:  Endless Birthday Wishes, Work of Art
Ink:  Basic Gray, Strawberry Slush
Cardstock:  Pear Pizzazz, Whisper White, Daffodil Delight, Strawberry Slush
Accessories:  Dazzling Details
Tools:  Dotted Scallop Ribbon Border punch, Paper Piercer, template and mat, Itty Bitty Accents Punch Pack (star), Big Shot, Perfect Polka Dots embossing Folder, Stampin' Dimensionals

Have an inspired day!


Thursday, January 30, 2014

Muslin Bags with Gold Glitter Hearts!

It glitters, it glitters!!!!!  I came across a super fun glitter heart bag when perusing Pinterest a few weeks ago and fell in love.  Of course, I had to re-create it with my SU supplies.  So out came the Mini Muslin Bags, Gold Glitter and Tombow glue!  I did try it with Heat & Stick powder, versamark and a heart stamp first and was NOT impressed with the results...so don't try that, it didn't work as well!

I knew my club ladies would LOVE it as much as I did so it became one of our club projects in January.....and I've had gold glitter ALL over my dining room and kitchen for a couple weeks now (It just keeps showing up!).  My poor puppies have had sparkly noses and I'm sure the delivery guy is wondering why I always have glitter on me now!!!


Isn't it pretty!!!!  I'm so excited with how it turned out.  We finished our bags off with a cute little tag and filled them with a bag of bath salts.  Super fun gift idea!  Here's a little photo tutorial so you can make one too!


To make my little heart stencil, I used a piece of the cardboard that comes in the back of a pack of DSP.  I cut it to the size that I wanted and used a heart framelit to cut out the heart shape.  I also used a piece of that same cardboard inside my bag to give it some stability when gluing and glittering.  Make sure to put a piece of waxed paper or parchment paper inside the bag too so you don't glue the bag together.  Seriously, with all the colors of glitter you can get and all the shapes of framelits we have the possibilities for this project are endless!

You can find all the stuff you need to create this project in my online store.  Don't forget that when your order gets to $60 you can choose a FREE SAB product!

Have an inspired day!


Thursday, July 25, 2013

Birthday Basics Pop-Up Presents Card


Yesterday I shared my birthday frame with you and today I have a super fun matching card to share with you!  This card was inspired by fellow demonstrators Lisa Young and Rose Coleman!


The card itself it pretty simple and straight forward.  A little embossing, some simple stamping and a touch of DSP (the Birthday Basics DSP!).  The magic happens on the inside of this card!  Have a look!


Isn't it fantastic!  The stack of presents pops up and is a super fun surprise for the recipient of the card!


I just love it!  And, the pop-up part could really be anything...a birthday cake or wedding cake, a sand castle...the possibilities are endless!

It looks like it would be complicated, but it's actually really easy.  Here are some measurements and then there's a video for you to see how it comes together.  Remember that the solid lines indicate cutting lines and the dotted ones indicate scoring lines.  The measurements are for the pop-up insert for the card and it's made to fit on a standard quarter-fold card base (4 1/4 x 5 1/2).


And, now, the video!


Remember, until the end of the month DSP is buy 3 get one FREE!  You can find all the details on this special in my online store.  But, before you head to my online store, grab the shopping list so you can order everything you need to create this card at home!

Shopping List
Cardstock-Bermuda Bay, Very Vanilla, In Color (2013-2015)
DSP-Birthday Basics
Ink-Bermuda Bay
Stamps-Sketched Birthday
Big Shot-Perfect Polka Dots Embossing Folder, Chalk Talk Framelits
Ribbon-Bermuda Bay Taffeta
Stampin' Trimmer (and scoring blade)
Adhesive-SNAIL, Tombow, Stampin' Dimensionals and Glue Dots

Have an inspired day!


Wednesday, July 24, 2013

Birthday Basics Frame

Wow!  Has it really been almost 2 months since I posted?  It's crazy how life flies by when you have a lot going on.  I was smart before Kevin had his surgery and set up quite a few posts, but then it was one thing after the other, my posts ran out and well, family came first so my blog (and a lot of other things) were neglected.  I am happy to say that after some scary moments (coming home to an ambulance in front of my house and quite a few hours in the ER), Kevin is doing well and recovering nicely.  Each day he is able to do more and more for himself which means I can get back to my beloved stamp room and creating!  It will still be a long time before things are back to "normal" at our house, but I see improvement everyday and I'm getting my stamping mojo back!

So, cheers to this being the start of consistent blogging and lets kick it off with a fun birthday project (because I just got back from the biggest birthday bash...Stampin' Up!'s convention celebrating their 25th anniversary!).

This is a project my clubs did last month.  I love, love, love the Birthday Basics designer paper in the catalog right now and I thought this was a great project to use it.


I found some inexpensive plain wood frames at my local big box craft store.  They are PERFECT for altering with fun Stampin' Up! product!  As you can see, I did mine with the balloon paper, but my club members got to choose their paper from the pack so they were all different!  I traced my frame onto the DSP and then cut it to fit.  The DSP is mod-podged to the frame.  To clean up the edges, I sanded it and then sponged it.

Everyone did a little banner embellishment for their frames with cardstock that matched their paper and the coordinating Hearts A Flutter stamp set and framelits.


Here's a little tip about making banners like this.  All the pieces are stuck on the frame (and to each other) with Stampin' Dimensionals.  Then, I tied two little bows...one for each end...and glued them on.  So, it looks like it's strung on a piece of Baker's Twine, but really it's not!

And, to finish off the frames, we added some ribbon around the outside edge.


The In Color Stitched Satin Ribbon fit perfectly around the edge of the frame and matched the colors in the DSP.  Perfect!

Until the end of July, when you order 3 packs of DSP you will get 1 FREE!  You can find all the details about this special on my website here.

And, as always, you can shop for all the stampin' supplies needed to create this project at home in my online store!  Head on over there with the shopping list and place your order today!

Make sure you stop back tomorrow to see the coordinating card (and a video) that goes with this fun frame.  Have an inspired day!


Shopping List
Birthday Basics Designer Series Paper
2012-2014 In Color Cardstock
Gumball Green Stitched Satin Ribbon
2012-2014 In Color Ink Pads
Stampin' Sponges
Whisper White Baker's Twine
Hearts A Flutter stamp set
Hearts A Flutter Framelits
Basic Rhinestones
Fabulous Phrases stamp set
Stampin' Dimensionals
Bermuda Bay ink and cardstock

Friday, May 17, 2013

What a Week!

This last week has been a crazy emotional roller coaster!  My husband and I celebrated our 14th anniversary by driving 2 hours away from home for him to have a spinal fusion surgery done.  We were both nervous about the surgery.  And, to top it off, it was a busy week for me trying to get everything done that I needed to before his surgery and the 5 days I would be spending away from home and my sweet boys while with him until he's ready to come home.

I'm happy to say that his surgery went well and he is now on the long road to recovery.  He's still in the hospital, and will be for another couple days, but I've already noticed an improvement in the way he walks!  And, he has told me that his nerve pain is better (not gone, but much better) and he has some feeling back in his foot already!  Yay!  I am trying to be super positive that he will make a full recovery and be good as new in the next few months.

While in Calgary, I visited with my good friend Rose.  I enjoyed a wonderful dinner with her and her family and then I got to join her stamp club!!!!  I had a blast being the "student" that evening and meeting her club members.  They were all so welcoming and sweet!  It was wonderful getting to know all of them!

Like I did with my clubs this month, Rose's projects were a mix of retiring product and some sneak peeks of new stuff!


We made a fun box using the retiring Fancy Favor Box.  This is a die that I will definitely be missing a lot when it's gone!


We also used some fun new products...a new color (Strawberry Slush), 2 new stamp sets and the super fun new Simply Pressed Clay and the Clay Molds.  I made a button!!!!  So fun!

We also did 2 cards, but I'm only going to show you one today!  I'm saving the other because my clubs are going to make it next month with some super fun new products.


This card uses some of the Spring Catalog products (get them while you can...the Spring Catalog is done at the end of the month!) and a retiring color (Not Quite Navy).

It was a fun evening spent with a great friend...just what I needed!

Have an inspired day!


Friday, February 22, 2013

The Curly Label Punch had a Baby!

This Sale-A-Bration, our Curly Label punch had a baby and named it the Petite Curly Label punch.....and, it's ADORABLE!!!!


Recently, I paired the adorable Petite Curly Label punch (SAB) with the new Print Poetry DSP (Spring Catalog) to create two versions of a super cute and simple card!  It kind of reminds me of a patchwork quilt!

My stamp clubs did a birthday version of the card with blues and greens this month.  Here's a closer look.


And, I did a thank you version with pinks and greens at a supper meeting with an EWI group this month.


Here's the exciting news!  You can get everything you need to make these cards and qualify for an SAB item (the punch!) and be able to make loads of these cards for all kinds of occasions!

Supply List:
Assorted Cardstock (2012-2014 In Colors) $8.50
Stitched Satin Ribbon (choose one of the In Colors) $12.25
Very Vanilla Cardstock $9.25
Print Poetry DSP Stack $8.50
Classic Ink Pad (choose one of the In Colors) $7.25
Petite Pairs Stamp Set $25.95
Petite Curly Label Punch FREE

So, which version is your favorite?  Do you prefer the blues and greens or more girly pink and green?

Have an inspired day!


Wednesday, January 30, 2013

More Amore!

If I remember my french lessons in Junior High correctly, amore means love.  So one of the product suites in the Spring Catalog, More Amore, translated would mean more love!  And, there's lots to love about this product suite!


I have a love for Designer Paper...do you?  The papers in the More Amore Specialty DSP pack are so pretty and, of course, coordinate beautifully with the Hearts A  Flutter stamp set and matching Framelits.  Last week I featured this product suite with my clubs and they made this fun and easy card.  It's a Basic Gray card base jazzed up a but with some DSP, embossed paper (don't you love the new Honeycomb embossing folder?!?!?!), ribbon and some stamping!


Can you even imagine my excitement when I realized the small heart punch is a perfect match for the heart in the valentine stamp from the Delightful Dozen set?!?!?!  And, it's even cuter when you pop it up with a dimensional!!!

Did you notice the ribbon?  It's the cotton ribbon from the holiday catalog.  At the end of the spring catalog there's a page of items still available from the Holiday catalog and I was thrilled that this ribbon was on that page!

All items used to make this card can be found in my online store.  And, if you place a $60 or more order you will earn FREE SAB items!  Head on over to the online store and check it out!

Have an inspired day!


Friday, October 12, 2012

Fall Yummies

Peanut Butter and Chocolate...the perfect combination, right?  So, it's only natural that the best candy is Reece's Pieces!  And, it just so happens, that Reece's Pieces are the perfect colors for use in fall projects!

I'm not sure how half my Reece's Pieces went missing!!!!
This little gem was one of the projects my Stamp Clubs did in September.  I found the little jars at my local craft store (a loooooong time ago) in the wedding section.  They are PERFECT for all kinds of projects.  We filled our jars with Reece's Pieces and then did a little decorating...a fun tag tied on with some Early Espresso stitched ribbon.


Lots of new Big Shot stuff was used for the tag...Wood Grain Embossing Folder, Window Frame Framelits, Autumn Accents Bigz die (all from the Holiday catalog) and my old friend the Square Lattice Embossing Folder!

Now, we made ours with a to/from tag, but you could easily do this as a table marker and put names on the tags.  They would look super cute on a Thanksgiving table (for my American friends who haven't had their turkey day yet!), or any fall gathering with family and/or friends!

If you are interested in making fun projects like this and having a night out each month to craft, consider joining one of my stamp clubs!  My clubs are now flexible and you can choose to come on Monday, Tuesday or Thursday on the third week of the month.  I have both a Scrapbook and a Stamp club starting in November.  If you have any questions, please contact me and ask away!  I would love to have you and your friends join one of my clubs.

Have an inspired day!

Thursday, July 26, 2012

Scrunched Flowers!

Have you wondered how some of the samples in the catalog are made?  Specifically the flowers on the Subtles page?  Well, I learned how at Convention and the showed my stamp club this month.  We used the flower as an embellishment on a super cute box and then made 3 fun cards to go in the box.  Have a look!


See that super cute flower?  Keep reading, because after I show you the cards, I will show you how to make the flower!

I used the fun and summery color combination of Elegant Eggplant, Raspberry Ripple and Lucky Limeade.  So fun!  I also used the Reason to Smile set.  Have you got your Reason to Smile set yet?  Hello...$5 stamp set...what are you waiting for?!?!?!?!  All you have to do is place a $60 order in my online store and once your total (before shipping & tax) reaches $60, enter the number for the Reason to Smile set.  You definitely don't want to miss out in this fantastic stamp set, so hurry, it's only available until the end of July!

We did the bleaching technique on the background of this one, a fun banner embossed with the Chevron pattern and a few little pearls in the middle of the flower finish it off nicely!

This one has an embossed frame and the sentiment is outlined with some Dazzling Details to give it a little bling!

A fun polka dot embossed background, some scalloped ribbon and a fun tag shape (Apothecary Accents Framelits) make this card super fun too!

So, there are the three cards they made.  Now do you want to see how we made the flower on the box?  Well, I have a treat for you!  I made my very first video to show you!


Fun, eh?  So what do you think of my video?  Leave me a comment and let me know!

Have an inspired day!


Monday, July 2, 2012

Hallo...what?

One of the things I'm trying out with my new clubs is Stump the Stamper.  The club hostess can bring something to try and stump me with.  It can be anything she wants, a stamp set, a tool, a die, an ink color, and while my club girls are stamping away I will make something with what the hostess brought.  I'm loving this...it's fun! 

This month, I was almost stumped with the Peek-a-Boo Frames die.  I have this die, but I don't use it very often!  And, this month, it took me a while to come up with something!

For some reason, I had a Halloween idea pop into my head.  Yeah, I dont' know why either!!!  But, here's what I came up with!


The o's open up (that's the Peek-A-Boo Frame part!) and there's little jack-o-lanterns under them!


My card base is Pumpkin Pie cardstock which I stamped with teh Bingo Card background stamp.  The whole card base is matted with a piece of Basic Black cardstock.  The boo is on a piece of Kucky Limeade cardstock which was embossed with the Spider Web Embossing Folder and is matted with a piece of Elegant Eggplant cardstock.

I'm pretty pleased with how it turned out!

I have a new Stamp Club starting in August.  This club will meed on the third Monday of each month and run for 10 months.  I do still have some spaces available in this club, so if you're interested in coming once a month to do some fun stamping projects, play Stump the Stamper with me and learn new stamping techniques and ideas let me know!  I would love to have you join my club!

Have an inspired day!


Thursday, March 29, 2012

Try Something New

One of the things I love about being a demonstrator is the monthly magazine we get called Stampin' Success.  This magazine is exclusive to demonstrators and recently underwent a bit of a makeover!  I love the new format and all the new ideas that are included in this magazine...it makes my job a lot easier because I feel like I don't have to re-invent the wheel with my business because Stampin' Up! helps me with everything I need!

This last month, there was a technique in the Stampin' Success that caught my eye!  It's called Acrylic Distress and it's a super easy technique that packs a punch!


We explored this technique this month in my clubs...both my Stamp Clubs and my Scrapbook Clubs.  Basically you start with a piece of cardstock which you paint a thin layer of acrylic paint on.  Once the paint is dry, you run the cardstock through your Big Shot with an Embossing Folder (I used the Petals A Plenty folder for this project).  After that's done, you sand it and the paint ends up sanded off the raised parts of the design.  Once you're done sanding and have brushed off the dust, you can leave it as is, or you can rub some ink (in a contrasting color) over top of it.


Not only did I used the featured technique from Stampin' Success, but I used the same card they had in the article!  I changed it up a bit by using different colors and adding a whole lot of stamping fun to it...we're talking stamping, embossing, pearls, ribbon, twine, punching and DSP.  And, I have to say, I absolutely love the final result and I think my clubs liked this technique too!

Now, I have to say, time is running out for Sale-A-Bration!  Did you notice the stripe embossing on the card?  That embossing folder, while in the catalog, is one of the items you can get FREE during Sale-A-Bration.  Why would you want to pay for it if you can get it FREE!!!!!!  So, you need to go place a minimum $60 order so you can get this fun embossing folder free!  And, while you're doing that, you might want to consider doing what I do and joining my team of demonstrators!  During Sale-A-Bration, the demonstrator starter kit is only $150 AND  you will get a free pack of Designer Paper or a Digital Download each month for the rest of the year!  What a deal!!!!  I would love to have you join my team, so if you've been thinking of signing up, or just want more into, please contact me.

Have an inspired day!