Showing posts with label LA Stamper Classes. Show all posts

Thursday, January 29, 2015

Best. Day. Ever!

I held my annual Soup & Stamps night last weekend and it was a BLAST!  I made 2 big pots of soup (Corn Chowder & Taco Soup) and a double batch of biscuits to enjoy.  At Soup & Stamps, you can eat as much as you want and I think most of us enjoyed a bowl of each soup!  The dinner conversation was fantastic and we wrapped up our dinner with some delicious cake.  Then, it was stampin' time!


Because Soup & Stamps is a kick off to SAB, the stampin' project featured some of the fab SAB products...the Best. Day. Ever stamp set and the Best Year Ever DSP.

I was inspired by a project my friend Becky made at Christmas time.  I loved the way she put small boxes into one of the Tag-A-Bag Gift Boxes and when I realized that 3 of the Tiny Treat Boxes fit inside the Tag-A-Bag box, I knew what the project was going to be!
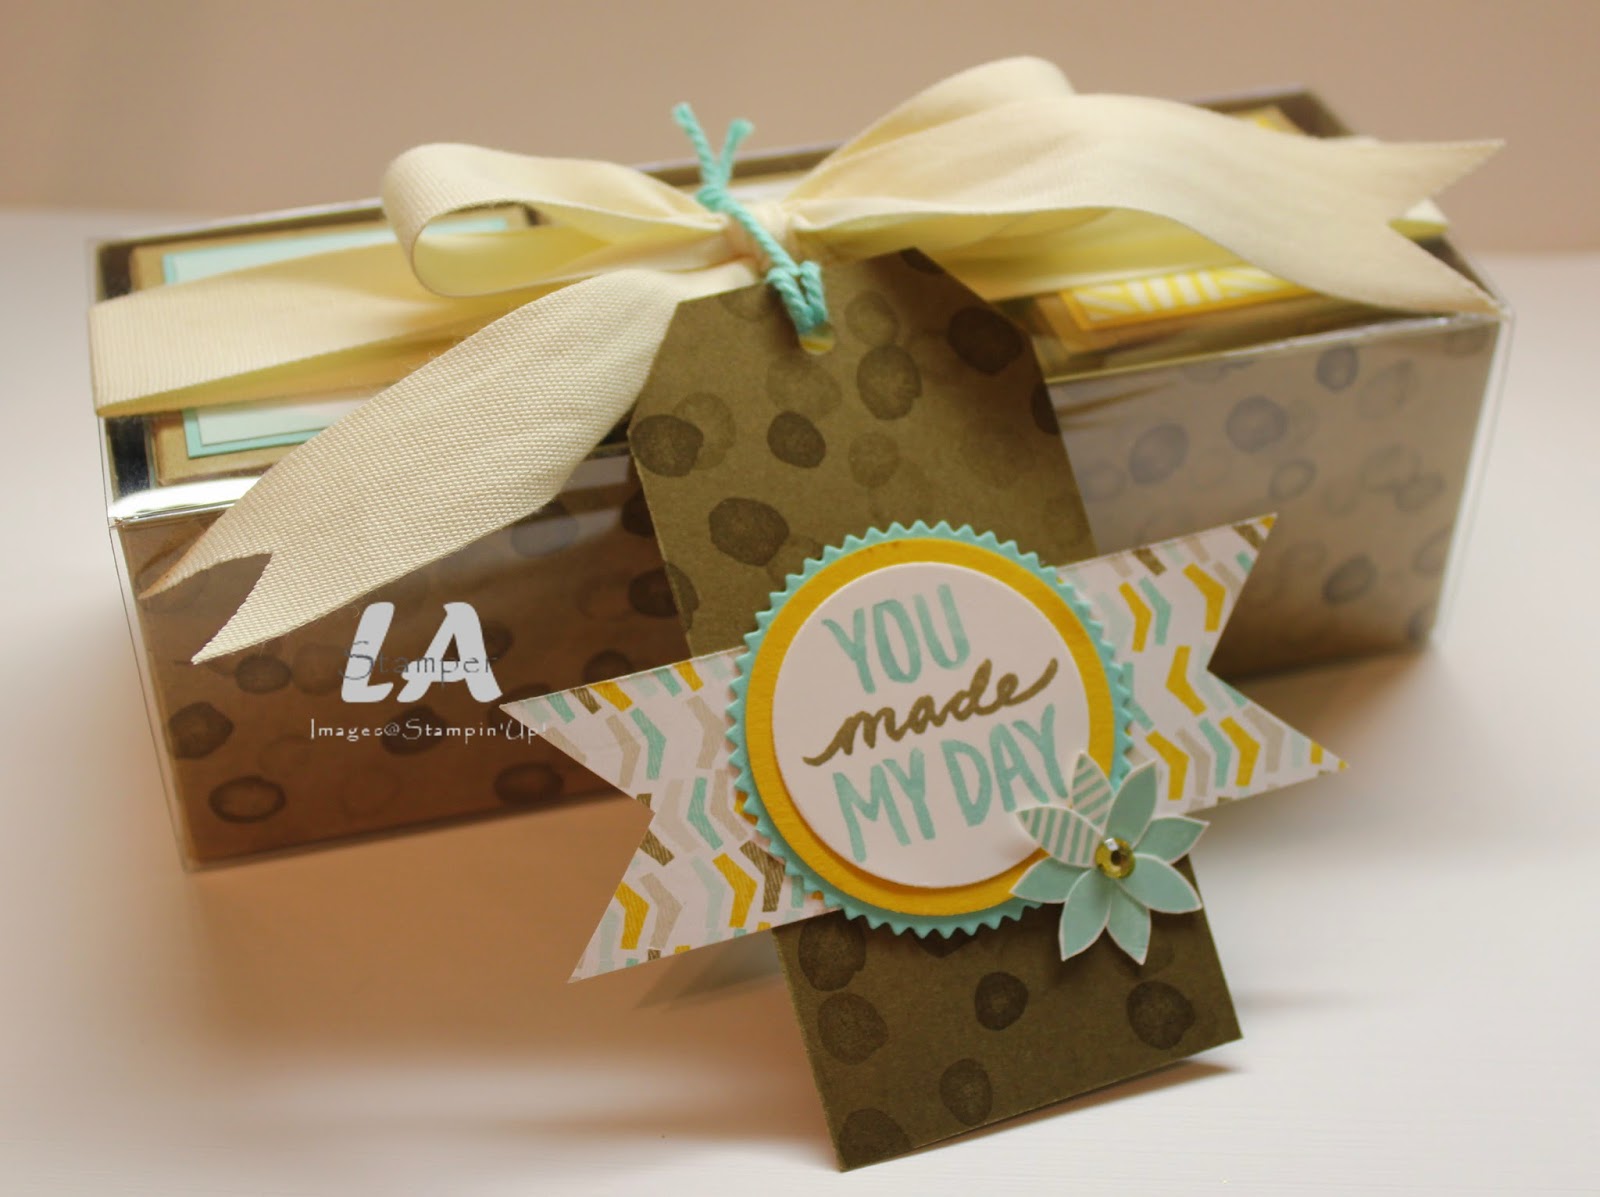


Super cute, isn't it!  I love how easy it is to dress up our boxes with a little stamping and some DSP!

The tag is tied on to the sleeve of the Tag-A-Bag box so you don't have to untie it all to get into the treats!  You just slide the sleeve off and all the prettiness stays right where you want it to!  We finished it off with a fun and simple tag.


Did you notice the yellow rhinestone on the tag?  That is done by coloring a regular old rhinestone with BLENDABILITIES!!!!!  Yes, you can use your Blendabilities to color rhinestones (although you want to be careful that the rough surface of the rhinestone doesn't cause the tip of the Blendabilities to fray).  And, don't forget you can get the Blendabilities as free SAB items when you place a $60 order (before shipping and tax)!  Check out the SAB brochure for more details!

Are you Canadian and need a Stampin' Up! demonstrator?  I would love to help you out!  Contact me and I can get some catalogs to you or if you're local you can join some of my classes.

Have an inspired day!


Thursday, October 9, 2014

Coffee & Cards

Hi Stampers!  In September I started a new kind of class, Coffee & Cards!  This is a monthly class which I offer in a morning or evening session.  We get together, make 3 simple cards and enjoy some delicious baked goods with coffee, tea or apple cider!

Here's the line up of cards everyone did in September!


And our delicious baked good to enjoy was Spice Cake!  I used my tried and true recipe that I turn to every fall or whenever I get a craving for Spice Cake!  I have shared the recipe on my LA Stamper Cooks blog, and you can find it here.


It was a great class and I can't wait for the October one!  If you're local you can join us for Coffee & Cards on Tuesday, October 14 from 9:30-11am or 7:30-9pm!  Contact me to RSVP!

Have an inspired day!


Saturday, September 6, 2014

Seasons of Wondrous Wreath

Winter, spring, summer & fall...Wondrous Wreath can do it all!  I don't usually post on Saturdays, but today is an exception because I have a super fun announcement.  I'm starting monthly online classes called "Inky Fingers" classes.  You can find all the information on these classes up at the top right below my title banner...just click on the Inky Fingers Classes tab!

I'm kicking off this program with a class featuring my favorite set from the Holiday Catalog this year, Wondrous Wreath.


This class includes the Wondrous Wreath set and Framelits, supplies to make the 4 cards shown, written instructions and access to an exclusive video so you can see how to make the cards!


See how versatile this set is?  And, I have loads more ideas that I will be posting over the next few months!  Here's the best part!  I'm kicking off these monthly classes with a super fun contest over on my Facebook page.  You are definitely going to want to head over there and enter!

So, if you like what you see, check out all the details on how the Inky Fingers classes will work here and then contact me to order the Inky Fingers Wondrous Wreath class!

Be sure to check back tomorrow for the regularly scheduled Simple Card Sunday...I have a super fun and easy card for you tomorrow!

Have an inspired day!


Thursday, August 28, 2014

Frightful Wreath

Hi Stampers!  It's here, it's here, it's here...the Holiday Catalog is LIVE today and you can finally order all of the awesome new products in it!  Today I have a spooktacular project to share with you!


I am in love with this wreath and can't wait to hang it up!


This spooky project is a kit in the Holiday Catalog!  I've made mine a little different than the instructions (no surprise, right?!?!?!).  You can find this kit on page 36 of the Holiday Catalog or in my online store here.

And, here's the best part!  I'm offering this project as a private class.  All you have to do is find a minimum of 4 friends and choose a date!  It's $40 per person and after I receive payment for everyone attending, I order the kits.  Then on the date we choose, I show up at your place kits in hand (or you come to me) and we craft the afternoon or evening away!  Sounds like fun doesn't it?  So, don't delay!  I have limited dates available in September and October for you to have a spooktacular wreath class with your friends.  Contact me today to book your date!

Have an inspired (and spooktacular) day!


Tuesday, August 12, 2014

A Girl and Her Blendabilities


Hi Stampers!  Remember last week when I showed you that card that I had colored with the Blendabilities?  And, remember how I said I was hopelessly addicted?  Well, I have another Blendabilities card to show you!  Tonight was my Blendabilities for Beginners class and it was so fun!  Everyone got a package of Blendabilities and a Memento Ink Pad.  We learned all about the markers and how to use them.  We made a color chart, colored some accessories and then just played with them by coloring some images.  Finally, we finished the evening making a card!


What do you think?  It was one of those cards that went a total different way than I had originally planned, but I'm so happy with the way it turned out.  I even got an "oooh, that's really pretty" from my husband when I showed him and it takes a lot to get that reaction out of him!!!!

I love how you can shade and blend with the Blendabilities.  Here....take a closer look at the coloring.....


Did you spot the little sneak peek item in this close up?  Leave a comment telling me what you think it is!

Everything you need to make this fun card can be found in my online store.  Grab the shopping list and head on over there to place your order.  Don't forget to use the hostess code JVPYSGHR to be entered to win a prize (that sneak peek item I mentioned!).

Shopping List
Stamps:  Bloom with Hope (Hostess), And Many More
Ink:  Crumb Cake, Mememto Black
Cardstock:  Crumb Cake, Rich Razzleberry, Old Olive, Whisper White
Accessories:  Blendabilities (Rich Razzleberry, Old Olive, Daffodil Delight), Old Olive Baker's Twine
Tools:  Big Shot, Modern Mosaic embossing folder, Modern Label punch, Stampin' Sponges

Have an inspired day!


Tuesday, August 5, 2014

Christmas Bliss Card & Tag Set

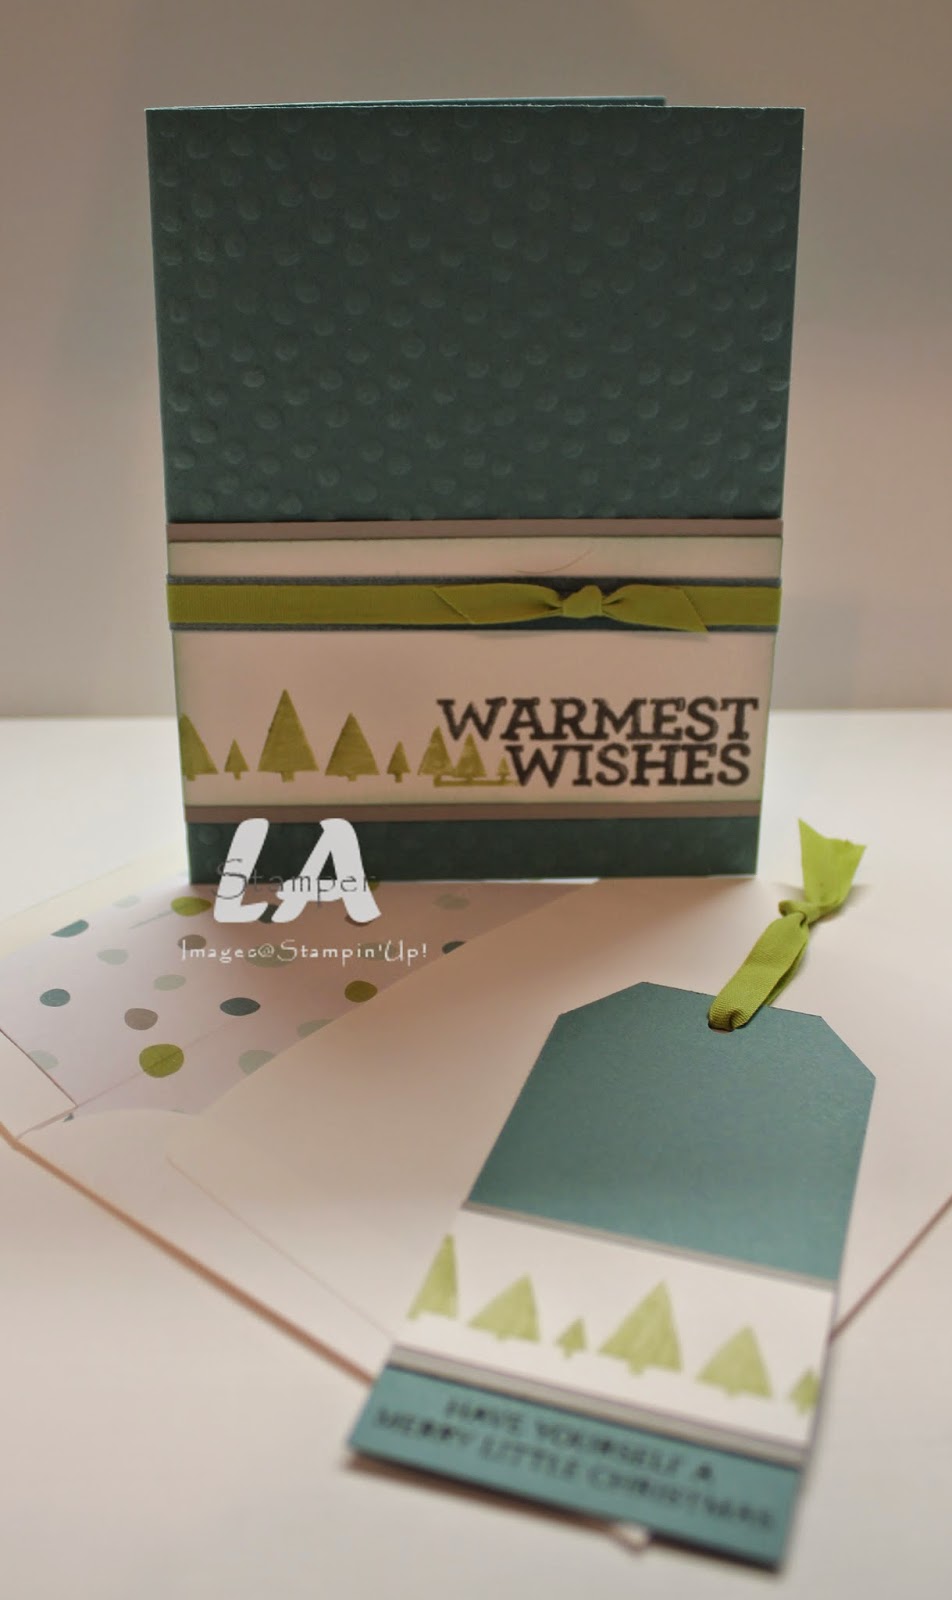
Well, it is sweltering here...not that I'm complaining because it won't be long before it's minus 5 million and snowing again!!!!  Along the lines of thinking cooler thoughts, I decided it would be fun to have a Christmas in July class.  So, at the end of July I had a group of ladies over to get a jump on their jingle with this fun project!


The did a card & tag set featuring the Christmas Bliss stamp set and some new DSP, All is Calm (which will be in the upcoming Holiday Catalog...coming soon to a mailbox near you!).  They made a fun divided box to hold their creations which had a clear lid!  Yep, we used the window sheets to make a lid for our boxes so you can see the fun creations inside!  In addition to their boxes, they also made 4 cards with lined envelopes and 4 tags.


I am loving the colors in the All is Calm DSP...I'm pretty sure I will be using a lot of this DSP in the coming months!!!!  Did you  notice the DSP in the envelopes?  It's super easy to fancy up your envelopes with the Envelope Liner Framelits and DSP of your choice!


And, here it is all packaged up nice in the box!  I tied a piece of Smoky Slate chevron ribbon around the box when all was said and done just to finish it off.

I still have a few kits left if you are interested in doing this class virtually.  The virtual class includes the stamp set, supplies for the projects (excluding tools and inks), written instructions, postage to get it to you and a link to exclusive videos so you can see how to put it all together.  Cost is $50.  Let me know if you are interested!  Please note this is only available to Canadians.

Have an inspired day!


Sunday, July 13, 2014

Doin' the Tangelo Twist


I will admit that Tangelo Twist is my least favorite In Color this year.  It's an orange thing...I just have a hard time with orange!  But, it's a great color for masculine cards...especially boy birthday cards which I seem to need a LOT of!  ;)


I started this card with a piece of Whisper White which I stamped with Tangelo Twist and the Chevron stamp.  I built from there trimming and matting with Night of Navy and finally putting it on a Tangelo Twist card base.  The Happy Birthday's are from the Teeny Tiny Wishes set and I used my Stamp-A-Ma-Jig to get them in line down the card!  I stamped a Tangelo Twist one on some scrap and just cut it out with scissors and matted it on some Night of Navy.  It's put on the card with Stampin' Dimensionals so it has a little "pop"!  I finished off the card with 3 Night of Navy stars which I punched with the new Itty Bitty Accents Punches.

Here's a little video about the Stamp-A-Ma-Jig so you can see how easy it is to work with!


You can find everything you need to create this card in my online store.  Head over there with the shopping list and place your order today!

Shopping List
Stamps:  Chevron, Teeny Tiny Wishes
Ink:  Tangelo Twist, Night of Navy
Cardstock:  Tangelo Twist, Whisper White, Night of Navy
Tools:  Itty Bitty Accents Punch Pack (star), Stampin' Dimensionals

Have an inspired day!


Sunday, July 6, 2014

Hello Mossy Meadow


It's Simple Card Sunday again and this week I'm kicking off Mossy Meadow week!  Sooooo, today I have a fun and easy Mossy Meadow card to share.


I love, love, love the way this card came together!  I started with a Crumb Cake card base which I sponged with Crumb Cake ink and stamped some flowers from the Petite Petals set (also with Crumb Cake ink).  The Mossy Meadow squares are just that...squares of cardstock (some textured with the Fancy Fan Embossing Folder and some not), sponged with Mossy Meadow ink and placed on the card in an alternating pattern.  I embellished with a hello Honey flower (also stamped from the Petite Petals set).  The leaves are some luscious Mossy Meadow ribbon and I added a little pearl to the center of the flower.  Ca-ute!  I finished off the card with a "hello" stamped with Mossy Meadow ink.  This particular hello was from the Endless Birthday Wishes photopolymer set.

You can find everything you need to create this card in my online store.  Head over there with the shopping list and place your order today!

Shopping List
Stamps:  Petite Petals, Endless Birthday Wishes
Ink:  Mossy Meadow, Crumb Cake, Hello Honey
Cardstock:  Mossy Meadow, Crumb Cake, Mossy Meadow
Accessories:  Basic Pearls, Mossy Meadow Stitched Satin Ribbon
Tools:  Fancy Fan Embossing Folder, Big Shot, Stampin' Dimensionals, Stampin' Sponges

Have an inspired day!


Thursday, July 3, 2014

Lost Lagoon Birthday

Another simple card today featuring Lost Lagoon!  This one is from my In Color class a few weeks ago.


I started with a Smoky Slate card base, which I sponged the edges of with Smokey Slate ink.  The Lost Lagoon layer is embossed with the Honeycomb embossing folder.  See that tiny scallop along the edge of the Lost Lagoon piece?  That's a strip of Whisper White cardstock which was punched with the Dotted Scallop Border Punch.  I love to use just part of it as a super cute little scallop edge!  The card is finished off with a Happy Birthday from Itty Bitty Banners set which was cut out with the Bitty Banners Framelit set and I added some bling in the form of two rhinestones!

Shopping List
Stamps:  Itty Bitty Banners
Ink:  Smoky Slate, Lost Lagoon
Cardstock:  Lost Lagoon, Whisper White, Smoky Slate
Accessories:  Rhinestones
Tools:  Big Shot, Honeycomb embossing folder, Bitty Banners framelits, Dotted Scallop Ribbon border punch, Stampin' Sponges

Head on over to my online store with the shopping list to order everything you need to recreate this card at home!

Have an inspired day!


Sunday, June 22, 2014

Simple Hello Honey Thank You Card

A couple weeks ago I had my "Meet the New Kids" class where I introduced everyone to the new In Colors, aka the "new kids" in the catalog.  We did a fun little color combination sheet and made a simple card for each new color.  Last week I showed the Blackberry Bliss card and this week we are moving on to Hello Honey!


I love the combination of a yellow and a brown.  Here you see Hello Honey paired with Early Espresso for a simple and quick thank you card.  The background was made with strips of Hello Honey cardstock which were sponged around the edges.   I started with a 4x4 piece of Hello Honey cardstock and cut strips that measure 1 3/4", 1 1/4", 3/4" and 1/4".

The focal point is a tag made from Naturals White cardstock and the Angled Tag Topper punch.  I simple stamped a flower from the new Blooming with Hope hostess set, stamped some thank you's up the side with  Hello Honey ink and finished it off with a little Hello Honey ribbon.  The new In Color ribbons are luscious and so pretty....you definitely need them all!  The tag was attached with Stampin' Dimensionals to give it a little pop off the card.

You can find all the ingredients for this card in my online store.  Head over there with the shopping list today to place your order!

Shopping List:
Cardstock:  Hello Honey, Early Espresso, Naturals White
Ink:  Hello Honey, Early Espresso
Stamps:  Blooming with Hope (hostess), Lots of Thanks
Tools:  Stampin' Trimmer, Stampin' Sponges, Stampin' Dimensionals

Have an inspired day!


Monday, September 2, 2013

Best of Brides & Babies-Happy Anniversary

Hello!  It's time to share another Best Of card with you.  This last Saturday was my "stampaversary" so I thought it was appropriate to share an anniversary card with you.  Can you believe it was 11 years ago that I became a Stampin' Up! Demonstrator...by far one of the best decisions I ever made (and I honestly made it in a snap!).


This card was one of the ones my girls made at my Best Of Brides & Babies class a while back.  I love those little birds holding the heart...so cute!  The birds were stamped on watercolor paper and then colored with Stampin' Write Markers.  I love coloring with markers on watercolor paper because you don't get those lines where the color overlaps like you do on regular cardstock.

Don't forget to check out my Events Page so you can see when the next Best of Class is happening.  Your fee includes the stamp set and supplies to make 3-4 projects with it!  I would love to have you and your friends join the fun!

Head on over to my online store with the shopping list so you can order everything you need to create this card at home.

Have an inspired day!


Shopping List
 
Stamps:  Best of Brides and Babies
Ink:  Stampin' Write Markers (Early Espresso, Real Red, Old Olive, Crumb Cake, Soft Suede)
Paper:  Old Olive, Real Red, Crumb Cake, Soft Suede, Watercolor Paper
Embellishments:  Real Red Stitched Grosgrain Ribbon
Tools:  Big Shot, Chevron Embossing Folder, Decorative Label punch, Paper Piercer, Essentials Paper Piercing Pack
Other:  Stampin' Dimensionals, staple

Monday, August 5, 2013

Best of Brides & Babies...Christmas Card?

When the Best of Brides and Babies set came out in May, I immediately thought the bells would be perfect on a Christmas card.  Here's what I came up with...


I went with untraditional Christmas colors for this one...Island Indigo and Smoky Slate.  All the stamping is done on Shimmery White cardstock.  Wow...it's been a REALLY long time since I pulled that cardstock out (so long that I had to check the catalog to make sure it hadn't retired!).  You can't really see it in the picture, but IRL it has a pretty and subtle shimmer to it. 

One set of bells is matted on Smoky Slate, embellished with some super fun mini silver brads and then popped up with Stampin' Dimensionals.

First Christmas card of the year and I love it!  What do you think?

Remember, the Best Of sets are released on the first of each month.  For every 6 that you collect, you can choose a stamp set valued at $17.95 for free!  The sets will be available until next March and you have until next April to redeem your free set(s).  You can find all the info on the Best Of sets in my online store or by clicking the Best Of tab at the top of this page.

Have an inspired day!


Monday, July 29, 2013

Best of Greetings

Have you started your collection of Stampin' Up!'s Best Of stamp sets yet?  In celebration of their anniversary each month a new stamp set is released with some of the most popular images from the last 25 years.  The June set was Best of Greetings and included 8 sentiments.  My Best of Greetings class participants made 8 note cards...one for each of the stamps in the set!


I did 4 layouts and they did 2 cards for each layout.  Here's a closer look at them.


And, there you have it!  All 8 super simple cards!

The Best Of sets are released on the 1st of each month and will all be available until March of 2014.  For every 6 sets you purchase, Stampin' Up! will give you a set of your choice valued at $17.95 or less and you have until next April to redeem those sets!  Just remember to put the "25" sticker from the stamp label sheet in each set on the special card.  All the info on these sets can be found in my online store or on the Best Of page (see the tab at the top of my blog...just under the header). 

Have an inspired day!


Monday, May 27, 2013

Best of Butterflies Monarch

The Best Of sets are a combination of popular stamp images from the last 25 years and 1 new image for this year.  Every time there's a new set, I try and remember which set each image is from!  With the Best of Butterflies set, I remembered all the butterflies!  There was one I was really excited about.  I always loved this butterfly, but never got the set it came in.  Here's a look at what I did with it with my class a couple weeks ago.


Now, I don't know if I've colored that butterfly like a monarch, but it reminds me of one, so I'm going with it!  I layered it with a Honeycomb embossed piece of cardstock and a fun little banner.  I love everything about this card!

Have an inspired day!