Showing posts with label Stampin Up. Show all posts

Thursday, July 10, 2014

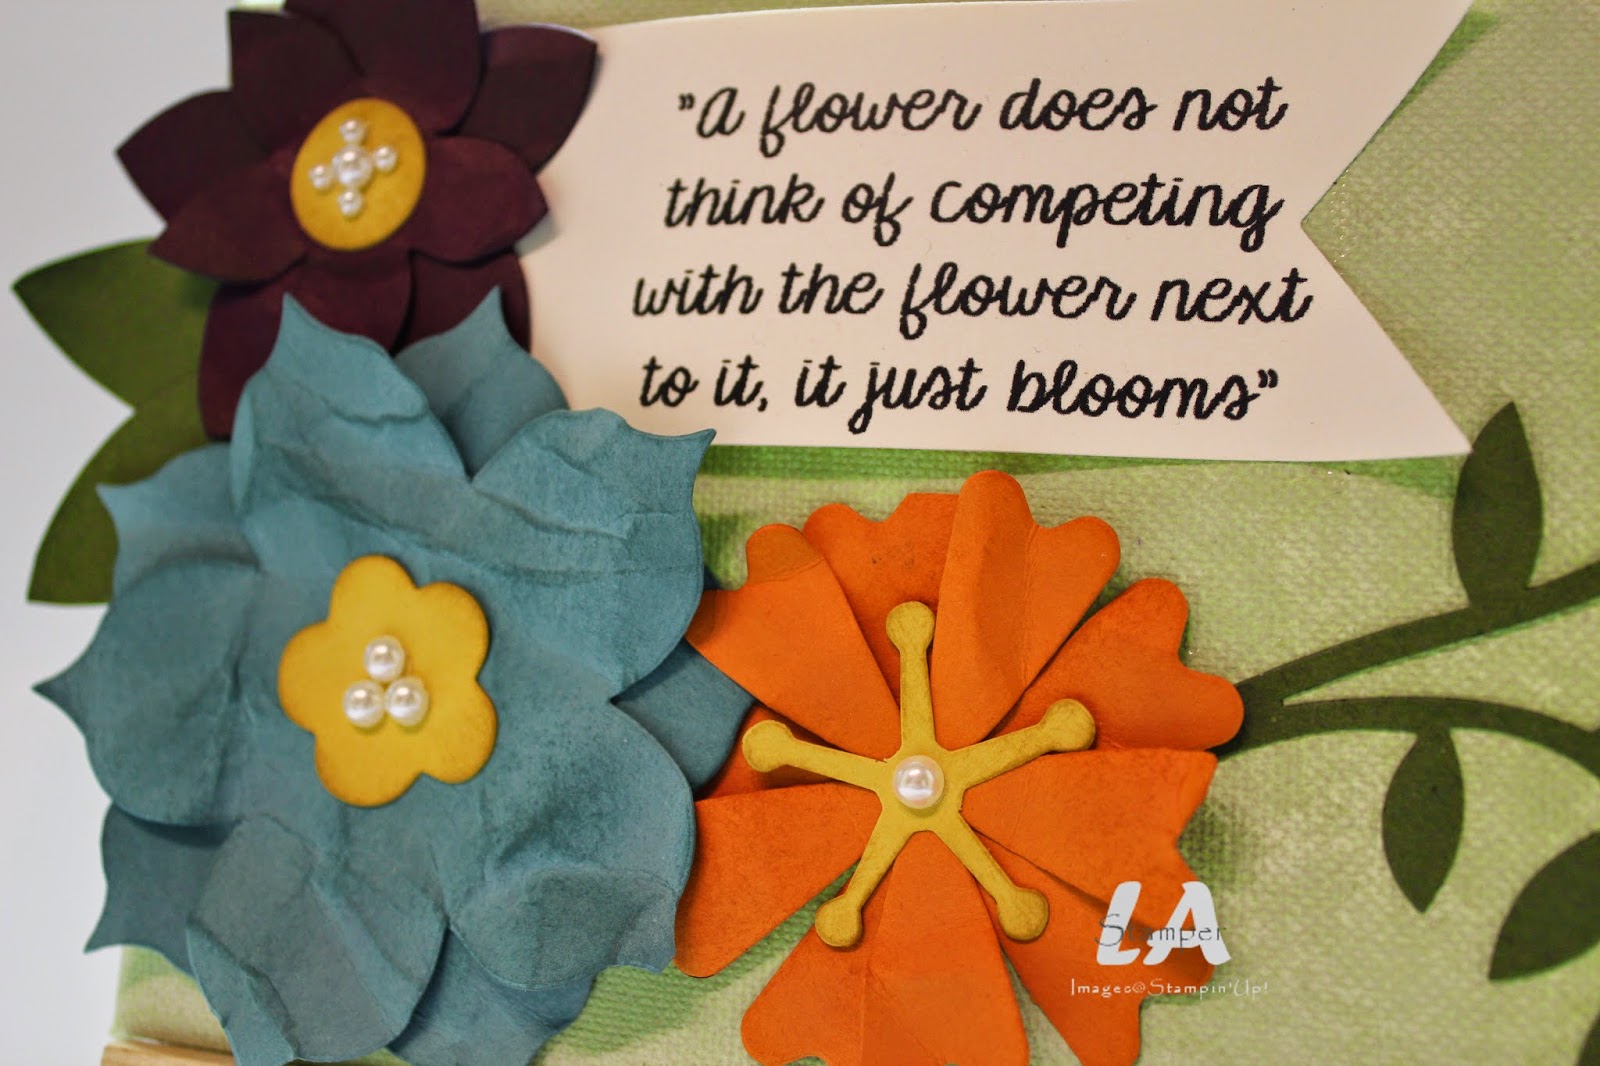
Mossy Meadow Mini Canvas


A few weeks ago I held my Inspired by Ink Stamp & Share.  It's a day where I get together with my girls on my team and we stamp, we share, we laugh, we eat....I could go on, but you get the idea!  It really is a great day....even though this last time it was POURING rain!

Like I mentioned, we stamp and part of our day consists of make & takes.  This time around we did an In Color mini canvas for one of our make & takes.


We started by spritzing the canvas with a mixture of Mossy Meadow ink and water (mixed together in a Stampin' Spritzer).  Then we cut out flowers using all of the new In Colors and the new Floral Frenzy die.  A little scrunching, sponging and layering and voila!


The quote was done in MDS and then printed on Very Vanilla cardstock.  It was cut out with the Banner Framelits and then stuck on.

I chose this particular quote for a very specific reason.  I think of all the people on my team as flowers.  Even though we all do the same business, we don't compete with each other, rather we cheer each other on and work together so everyone blooms!

You can find all the stampin' supplies needed to make this little gem of a project in my online store.  Head over there with the shopping list and place your order today!

Shopping List
Ink:  Mossy Meadow, Lost Lagoon, Tangelo Twist, Blackberry Bliss, Hello Honey
Cardstock:  Mossy Meadow, Lost Lagoon, Tangelo Twist, Blackberry Bliss, Hello Honey, Very Vanilla
Accessories:  Pearls
Tools: Big Shot, Flower Frenzy Bigz die, Banners Framelits, Stampin' Sponges, Stampin' Spritzers
Other:  Mini Canvas from my local Dollarama

Have an inspired day!


Sunday, April 13, 2014

Gorgeous Grunge Simple Masculine Card

A lot of people struggle with making masculine projects.  I am not one of those!  I'm not exactly sure why, but masculine cards come very easily to me.  Take today's card....


It's simple and oh so masculine with the color scheme, embossing, ribbon knot (and, well, the type of ribbon), simple sentiment and it's been grungified!  Yes, that's a word when you're creating cards!  Sponging the edges and using the Gorgeous Grunge stamp set can make any project grungified!!!!

Here's a close up of some of the masculine elements.

 
There you have it.  A simple, masculine card.  Please head on over to my online store with the shopping list so you can create this card and add it to your stash!

Shopping List
Cardstock:  Crumb Cake, Cajun Craze, Night of Navy
Ink:  Early Espresso, Crumb Cake
Stamps:  Gorgeous Grunge, Yippee Skippee
Accessories:  Natural Ribbon, Big Shot & Houndstooth Embossing Folder, Stampin' Sponges

Have an inspired day!


Thursday, January 30, 2014

Muslin Bags with Gold Glitter Hearts!

It glitters, it glitters!!!!!  I came across a super fun glitter heart bag when perusing Pinterest a few weeks ago and fell in love.  Of course, I had to re-create it with my SU supplies.  So out came the Mini Muslin Bags, Gold Glitter and Tombow glue!  I did try it with Heat & Stick powder, versamark and a heart stamp first and was NOT impressed with the results...so don't try that, it didn't work as well!

I knew my club ladies would LOVE it as much as I did so it became one of our club projects in January.....and I've had gold glitter ALL over my dining room and kitchen for a couple weeks now (It just keeps showing up!).  My poor puppies have had sparkly noses and I'm sure the delivery guy is wondering why I always have glitter on me now!!!


Isn't it pretty!!!!  I'm so excited with how it turned out.  We finished our bags off with a cute little tag and filled them with a bag of bath salts.  Super fun gift idea!  Here's a little photo tutorial so you can make one too!


To make my little heart stencil, I used a piece of the cardboard that comes in the back of a pack of DSP.  I cut it to the size that I wanted and used a heart framelit to cut out the heart shape.  I also used a piece of that same cardboard inside my bag to give it some stability when gluing and glittering.  Make sure to put a piece of waxed paper or parchment paper inside the bag too so you don't glue the bag together.  Seriously, with all the colors of glitter you can get and all the shapes of framelits we have the possibilities for this project are endless!

You can find all the stuff you need to create this project in my online store.  Don't forget that when your order gets to $60 you can choose a FREE SAB product!

Have an inspired day!


Tuesday, January 28, 2014

Sale-A-Bration, Soup & Stamps!


I just love that sentiment stamp!  It's part of the Yippee-Skippee set and I think it's a perfect way to sum up last Saturday when I held my annual Sale-A-Bration kick off...Soup & Stamps!  This is one of my favorite events to do!  I make 2 HUGE pots of soup (this year it was Creamy Tomato Tortellini & Beef Vegetable with Barley), some biscuits and delicious dessert.  My ladies are treated to supper and then we stamp! This event is always so much fun and this year was no exception.


Busy creating!
Mmmmm...fresh out of the oven (as people were arriving) cheese biscuits!
"Souper" yummy Texas Sheet Cake....I used Pioneer Woman's recipe!
Blueberry Lemon Bundt cake...the recipe for this one was from my Looneyspoons Collection cookbook (LOVE that cookbook!)

Can you believe I totally forgot to take pictures of the delicious soups?  You'll just have to take my word for it...they were yummy!

I bet you want to see the project everyone made, right?  I usually do a set of cards or a box and some cards at Soup & Stamps, but this year I decided to do something totally different and we did a mini album!  I actually used 5, yes 5, SAB products...Sweet Sorbet DSP, Petal Parade stamps, Banner Blast stamps, Banner punch, and the Decorative Dots embossing folder!  Of course, I had to throw in some Occasions Catalog products too...Basic Metal Buttons, Perfect Pennants stamps, Banners framelits, and the Angled Tag Topper punch!

The mini album starts with one piece of 12x12 cardstock which you score and cut to make your "pages".  It all folds up in to a small package.  The pictures show it as you would unfold it.....


It was loads of fun to make.  Here are a few of my favorite parts...


I love, love, love these little banners!  They are the perfect little accent for the corner of a page or card front.  And, I love that the coordinating punch punches out the stamped images without leaving a white border around them...small things like that make me happy!


This part makes me REALLY happy!  Do you recognize the metal buttons?  I used the one with the raised edge and realized that the small circle punch from the Itty Bitty Shapes Punch Pack fit right on there like it was meant to be!  Here's the part that made me squeal with delight.  A dimensional under each button and shazaam there was the perfect closure for the flap on this pocket!  Here's a little tip...put the dimensional on the button, then stick the tail of the Baker's Twine to the dimensional and then stick it down on the cardstock.  It seemed to work best that way for me!


This is my favorite stamp in the Perfect Pennants set!  And I just love it here with a little ruffled ribbon along the bottom!  So cute!  And, check out that Distressed Dots embossing action...LOVE it!

Lastly, I have the measurements for you so you can create one of these little beauties yourself!


You basically take a 12x12 piece of cardstock and score it at 2 3/8 and 7 1/4.  Then you turn it and score at 3 7/8, 4 1/8, 8 and 8 1/4.  You can see in the picture where you need to cut the skinny sections out.  Any of the flaps can be made into pockets or you can cut any of the flaps off to change up your album.

Have fun with this one!  I would love to see your version of this mini album!

Head on over to my online store (or contact me) to purchase the supplies you need to create one of these and earn some free SAB products!  Have an inspired day!


Sunday, January 26, 2014

Perfect Pennants Love

Happy Sunday!  I hope your weekend was fantastic!  Mine was good, but "souper" busy....more about that in Tuesday's post.  Today I have a fun and simple valentine card to show you because it's Simple Card Sunday!


When I first saw the Occasions catalog I immediately love the Perfect Pennants set and coordinating Banners framelits (which are available separately or in a bundle so you can save 15%)!  When it came time to place my pre-order I waffled on the set a bit, but in the end I ordered it and boy am I glad I did!  I'm finding it a great and versatile set that works well with the Banners framelits and without.  Today's card is a great example of how I've used it without the framelits.


I created a fun and simple card using the popular ombre effect.  The heart image is from the Perfect Pennants set and stamped in shades of purple...Wisteria Wonder, Perfect Plum & Elegant Eggplant.  I stamped the hearts on Whisper White cardstock which was matted with Brushed Gold cardstock.  Gold is so trendy right now...I'm seeing it everywhere!  I used the "love" from the Pennant Parade set and stamped it on one of the Wisteria Wonder hearts with some Elegant Eggplant ink.  I finished the card off with an Elegant Eggplant card base.

Head on over to my online store to get everything you need to re-create this card at home...you could even get a series of pink or turquoise inks to create your card!  Remember, if you're ordering ink pads you're going to want to order an ink refill at the same time.  Our firm foam ink pads ink our stamps beautifully, but don't hold as much ink as our old felt ink pads.  By having an ink refill on hand you will always be able to have a nice juicy ink pad ready for stamping!  And, don't forget to check back on Tuesday to see about my "souper" fun weekend!

Have an inspired day!


Thursday, January 23, 2014

Fresh Prints Dog Tag

My youngest son has a pretty awesome teacher this year for Grade 1 and he absolutely adores her!  Last week one of her dogs turned 9 and he thought that he should give Weezie (her dog) a present because "9 human years is, like, so old in dog years"!!!!  So we put some fancy dog treats in a little bag.  It's clear that he is MY  son because the little bag wasn't enough, he thought it needed a nice tag that said "Happy Birthday Weezie" with room for him to write "love Sawyer".


I used the new Scallop Tag Topper punch (LOVE IT!!) to make my tag.  There's a little piece of Fresh Prints DSP along the bottom (also LOVE IT!!!).  I wrapped some of the Real Red Stitched Grosgrain around it and then stamped some candles (from the Create A Cupcake set).  I finished it off with a Vintage Button tied with some Linen Thread.


Super, super simple and sweet!  I love how he signed his name, and that he was adamant that there be 3 treats in there...2 for the birthday dog and one for her new puppy!  Sigh...I have a sweet boy!

Head on over to my online store to stock up on everything you need to make some super awesome tags...a Tag Topper Punch, some Fresh Prints DSP, some cardstock, ribbon and maybe even some buttons!

Have an inspired day!


Tuesday, January 21, 2014

Just Sayin'...It's Painter's Tape!

Today I have a really fun and easy technique to show you!  Since Valentine's day is just around the corner, my clubs are doing Valentine's projects and this is one of the ones they did this month!


Confession time...I keep a notepad and pen beside my bed for when ideas come to me at night!!!  Seriously, sometimes I dream about cards and stamps.  Some of my best ideas have come from my dreams and me writing them down or sketching them when I wake up...or when I'm trying to fall asleep and can't!  I can't be the only one who does this, right?!?!?!? Today's project is one of those dream projects.  It just came to me one night, and I love how it all turned out in the end.


I started with the white piece and did the Painter's Tape Technique on it with Pink Pirouette and Strawberry Slush ink.  Once that was done, I used the Word Bubbles Framelits to cut out the word bubble shape.  Some sponging with Real Red ink around the edges, including the word bubble, help the white layer to stand out a bit.  I stamped in the word bubble with the Just Sayin' stamp set on a piece of Pink Pirouette cardstock.  It's embellished with a little pink pirouette button (from the Subtles set) and some Real Red Taffeta ribbon.  The whole white layer is put on the card with some Stampin' Dimensionals so it has a little pop to it!

Check out my Painter's Tape video so you can see how easy this technique really is!


And, here's one more card I did with the Painter's Tape Technique.  This card was inspired by a card I saw that fellow demonstrator, Deb Valder, did.  It features some of the In Colors this year as well as one of my favorite stamp sets, Flower Shop!


Head on over to my online store to place your order for everything you need to re-create both of these cards at home!  Have fun trying the Painter's Tape Technique...and let me know how it goes for you (I would love to see some of your painter's tape technique creations).

Have an inspired day!


Sunday, January 19, 2014

Sweet Sorbet Simple Cards

I'm bringing back Simple Card Sunday!  I feel that it's important to send out cards to people, both for special occasions and just because.  And, with the busy lives we all lead, simple cards are the way to go!  Don't get me wrong, I love a card that I can get lost in...layers, stamping, embellishments and so on, but sometimes ya just need to do something quick and simple!

In my post last Thursday I showed you the box 'o cards I made for my grandma, with the promise that I would show you the cards today.  Well, here they are!  I did 10 cards total and to keep it simple I did 5 designs, 2 of each design.


And, there they all are!  I kept with the colors from the Sweet Sorbet DSP and used the Petal Parade stamp set as well as a variety of sentiments.  I think it took me less than an hour total to make all 10 cards...cute, easy and simple!

Don't forget that Sale-A-Bration starts at the end of the week.  With every $60 you purchase (before shipping & tax) you will qualify for a FREE SAB item...including the Petal Parade stamp set, the Sweet Sorbet DSP and the embossing folder I used on the last card pictured!  Start making your list so you're ready to order when SAB starts!

Have an inspired day!


Monday, September 2, 2013

Best of Brides & Babies-Happy Anniversary

Hello!  It's time to share another Best Of card with you.  This last Saturday was my "stampaversary" so I thought it was appropriate to share an anniversary card with you.  Can you believe it was 11 years ago that I became a Stampin' Up! Demonstrator...by far one of the best decisions I ever made (and I honestly made it in a snap!).


This card was one of the ones my girls made at my Best Of Brides & Babies class a while back.  I love those little birds holding the heart...so cute!  The birds were stamped on watercolor paper and then colored with Stampin' Write Markers.  I love coloring with markers on watercolor paper because you don't get those lines where the color overlaps like you do on regular cardstock.

Don't forget to check out my Events Page so you can see when the next Best of Class is happening.  Your fee includes the stamp set and supplies to make 3-4 projects with it!  I would love to have you and your friends join the fun!

Head on over to my online store with the shopping list so you can order everything you need to create this card at home.

Have an inspired day!


Shopping List
 
Stamps:  Best of Brides and Babies
Ink:  Stampin' Write Markers (Early Espresso, Real Red, Old Olive, Crumb Cake, Soft Suede)
Paper:  Old Olive, Real Red, Crumb Cake, Soft Suede, Watercolor Paper
Embellishments:  Real Red Stitched Grosgrain Ribbon
Tools:  Big Shot, Chevron Embossing Folder, Decorative Label punch, Paper Piercer, Essentials Paper Piercing Pack
Other:  Stampin' Dimensionals, staple

Thursday, August 15, 2013

Peek-A-Boo Birthday

I think it's time for another video, what do you think?  It just so happens that I have a super fun project with a video to share with you today!

At Convention a few weeks ago, Shelli demoed projects that move and one really stuck out to me.  She did one that uses the Peek-A-Boo Frames die and used it in an unconventional way.  How many of you have the Peek-A-Boo Frames die collecting dust on your shelf?  I know mine was pretty dusty when I got home and went to make this card!!!!!

Check it out...


And, here it is open....


Isn't it fun!  I love interactive cards like this one.  Who wouldn't want to receive a fun birthday card like this one!!!  And, I really love this color combination...Smoky Slate, Island Indigo and Crushed Curry. 

Now, rather then me trying to type out how to do this card, it's much easier for you to watch.  So, enjoy the tutorial video and then go dust off your Peek-A-Boo Frames die and make a few cards like this!


So, what did you think?  Leave me a comment and let me know if you give this card a try!

Head on over to my online store with the shopping list to order everything you need to make this card in the comfort of your own home!  Don't forget to use the August hostess code 9S2F9VJ2 (on the shopping cart screen...bottom left) so you get entered in a draw for a free embossing folder of your choice!

 Have an inspired day!


Shopping List
 
Stamps:  Petite Pairs, Birthday Candles Jumbo Wheel
Ink:  Smoky Slate, Island Indigo & Crushed Curry markers
Cardstock:  Smoky Slate, Island Indigo, Crushed Curry, Whisper White
Embellishments:  Chevron Ribbon (Crushed Curry), Baker's Twine (Island Indigo), Epic Day Washi Tape
Tools:  Big Shot, Peek-a-Boo Frames die, Oval Punch
Other:  Stampin' Sponges

Tuesday, August 13, 2013

Hi, Hello, Howdy....

Say what you want with Personalized Stamps!  Although they are shown mostly with addresses in the catalog, you can get our Personalized Stamps with anything you want on them!


This particular stamp is one I won during prize patrol at Convention!  It's one of my favorite personalized stamps this year...the Casual Monogram Personalized Name stamps.  You can get any letter of the alphabet on the top line and then whatever you want on the bottom 3 lines.  I love how this one is an H and the other lines have lots of ways to say hello!  So cute!

Anything that you want to avoid having to write over and over again is perfect for a personalized stamp.  Here are some ideas for you:
  • kids names (my kids have stamps with their names on them so they can stamp valentines, etc)
  • addresses
  • favorite quotes or sayings
  • favorite Bible verse
  • your web address
  • a "follow me" stamp...your website, your FB page, your Pinterest
  • "For Deposit Only"
  • a special stamp for the back of your projects (handmade by...)
When ordering personalized stamps, remember that there is character limits per line, so just make sure you don't go over those limits when planning your stamp.  I can give you more info or you can find in in our Annual Catalog!


I love the rustic Natural Trim ribbon and Linen Thread combined with a sophisticated Vintage Faceted Button.  It's kind of a mish mash look that works so nicely...especially with these colors.  Lovin' the Coastal Cabana and Soft Suede together!

You will want to contact me for information about ordering your own personalized stamp and for everything else head on over to my online store with the shopping list so you can order what you need to create this card!

Have an inspired day!


Shopping List
 
Stamps:  Casual Monogram Personalized Stamp, Flower Shop
Ink:  Soft Suede ink pad, Stampin' Write Markers (Soft Suede, Coastal Cabana)
Paper:  Soft Suede, Very Vanilla & Coastal Cabana cardstock
Embellishments:  Vintage Faceted Buttons, Linen Thread, Natural Trim Ribbon
Tools:  Big Shot, Chevron Embossing Folder, Chalk Talk Framelits
Other: Stampin' Dimensionals

Friday, August 9, 2013

Coastal, Coastal Cabannnnnaaaaaa.....

You have to sing my title in your head to the tune of Copa Cabana!  It's what goes through my head whenever I reach for my Coastal Cabana ink pad...which is a lot because I'm finding I am LOVING this new In Color!  It's a beautiful color that is both soft and striking...yes, that is possible!!!!  It reminds me of the color of the Caribbean when you're looking down at it from an airplane.  And, really, who doesn't love a color that makes you sing when you use it!!!!


Waaaay back in June when I did my new catalog kick off party, this was one of my make & takes.  I wanted something simple and cute that showcased one of the new in colors, and I think this card did just that!  It's a super simple monochromatic card that would work for lots of different occasions just by changing out the sentiment.  You could even change the color if...gasp...you aren't feeling the Coastal Cabana love like I am!

Don't forget to head on over to my online store with the shopping list to get all the supplies you need to create this card at home!

Have an inspired day!


Shopping List
 
Stamps:  Betsy's Blossoms, Teeny Tiny Wishes
Ink:  Coastal Cabana*
Cardstock:  Whisper White, Coastal Cabana*
Embellishments:  Whisper White Taffeta Ribbon
 
*You could order the 2013-2015 In Color Cardstock and Ink Pad bundle and make these cards in all the new In Colors!  It's a great way to get all the new In Colors...all 5 ink pads and some of each color cardstock.  Priced at $36.95, it's like getting the cardstock FREE!

Thursday, August 8, 2013

Birthday Basics Candles

I can't believe that in less than a month my kiddos will be back in school!   Shhhh...don't tell anyone, but I'm a little excited!  The days when all 5 of my day home kids are here combined with my own 3 kids it gets a little crazy and exhausting around here!!!!  I also thrive on routine and although I love the first few weeks of lazy summer days when we just do whatever, I start longing for the routine of school days by August.

Anyhoo...I'm sure you stopped in today to see some stampin, so lets get on with it, right!  I'm sharing my second swap card from convention with you today.  I always do 2 different swap cards at SU events for a couple reasons.  First, I get bored doing lots of the same card and second, lots of times it's nice to be able to swap 2 for 2 with someone if they have 2 fabulous cards!


My card was super simple, but super fun!  And, I actually had 2 versions of it...but I totally forgot to take a picture of the other version.  It had the birthday hat paper on it and was done with Island Indigo rather than Raspberry Ripple.


You can see I did a layer of the DSP matted with cardstock and then embellished with some fun little banners.  The stamped banner is popped up with some Stampin' Dimensionals.  To get two colors on one image, I used my Stampin' Write Markers rather than an ink pad.

This card is super simple and doesn't require a whole lot of supplies.  Head on over to my online store with the shopping list to order the supplies you need to create this card today!  If you use the hostess code 9S2F9VJ2 and place your order before August 30, you will be entered in a draw for an embossing folder of your choice!

Have an inspired day!


Cardstock:  Smoky Slate, Raspberry Ripple, Whisper White
DSP:  Birthday Basics
Stamps:  Sketched Birthday
Ink:  Stampin' Write Markers (Raspberry Ripple, Smoky Slate)
Tools:  Big Shot, Bitty Banners Framelits
Other:  Stampin' Dimensionals