Showing posts with label Two-Step Stamping. Show all posts

Thursday, August 6, 2015

Watercolor Wings....Stampin' On the Road!

Hi Stampers!  I mentioned in my last post that I recently attended Stampin' Up!'s convention and participated in a huge organized swap.  As if 80 cards wasn't enough, at the last minute I decided that I wanted to make some cards for my special friends and general swapping. So, I cut all the supplies I needed and got them ready to stamp on the drive to convention!  Stamping is a great way to pass a 12 hour car ride...well, stamping and a lot of laughing and good times with a great friend!


I stamped, sponged and assembled away as we traveled south to Salt Lake City.  It was quite the adventure making swaps cards while driving through the winding mountain highway and through a nasty storm (we seem to get caught in a storm every year)!

Stampin on the road somewhere between Montana and Idaho!


I'm happy to say I completed all the cards I wanted to on the drive and they were ready for swapping when convention started!


I think Watercolor Wings is one of my favorite sets in the catalog and is the only set I used for this card.  You have so many options to give the butterflies details with this stamp set...two step stamp it, or three step stamp it for even more detail! Because it's a photopolymer set, you can easily see through the stamps to line them up perfectly (even if you're stamping on the road!).  I chose to three step stamp it and used Soft Sky, Tempting Turquoise and Island Indigo to stamp the butterfly.  The body and antenna were done with Soft Sky as well as the sentiment.

TIP:  Best adhesive for sticking the Burlap to your projects....Tear & Tape Adhesive! It's super easy to use and super sticky for the burlap.

If you are in Canada and need a Stampin' Up! demonstrator, I would love to help you out!  You can find everything you need to create this card in my online store.  Place your order there or contact me to place the order for you!

Have an inspired day!


Tuesday, April 14, 2015

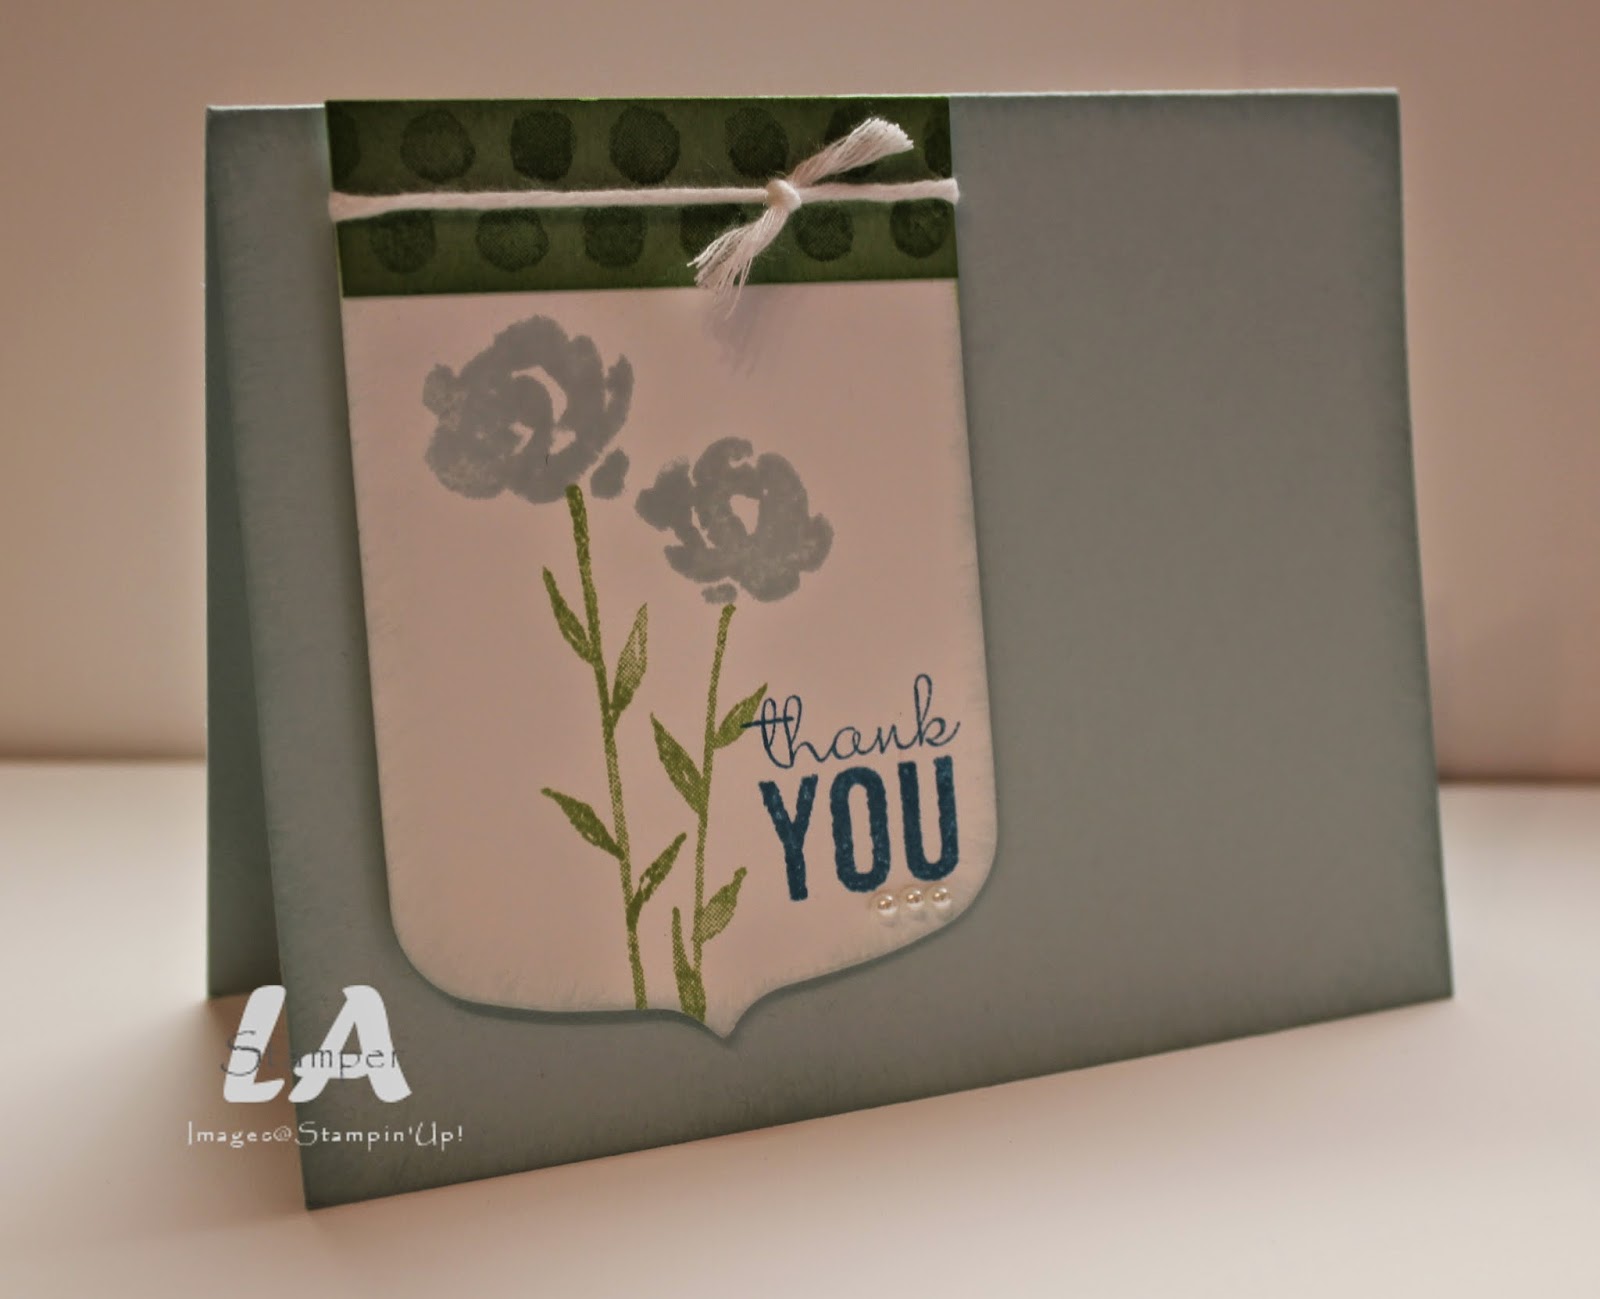
Painted Petals Thank You

Hi Stampers!  Another card featuring the Painted Petals set today!


Soft Sky and Pacific Point are two colors that I don't use often, however, with the Painted Petals and coordinating DSP, Painted Blooms, I have been pulling them out more and more....and they go so well together!!!


My card base is Soft Sky which I sponged with Soft Sky ink.  I used part of a banner cut with the Party Pennants die for my focal point.  Everything is stamped on that banner!  I added a small strip of stamped cardstock along the top and tied some of the fab new Painted Blooms Cotton Twine around.  Have you used this twine yet?  You need to!  It's so soft and pretty and comes in three great colors....Soft Sky, Wild Wasabi and Whisper White.

Everything you need to create this card is available in my online store so head on over there with the shopping list and place your order today (or contact me to place your order).
 

Shopping List
Stamps:  Painted Petals
Ink:  Soft Sky, While Wasabi, Pacific Point
Cardstock:  Soft Sky, Whisper White, Wild Wasabi
Accessories:  Pearls, Painted Blooms Cotton Twine
Tools:  Big Shot, Party Pennants Die, Stampin' Dimensionals, Stampin' Sponges

If you are Canadian and need a Stampin' Up! demonstrator, I would love to help you out!  Contact me today to get a copy of the current catalogs.

Have an inspired day!


Sunday, January 25, 2015

Simple Card Sunday 13 - Pacific Point Painted Petals

Hi Stampers!  It's Simple Card Sunday and I have a great card for you this week featuring the new Painted Petals stamp set and Painted Blooms DSP from the 2015 Occasions Catalog.


It's been a while since we had a Simple Card Sunday, so let me refresh your memory about what kind of card a Simple Card Sunday card is!
  • It must be able to be completed in 10-15 minutes max
  • It must use minimal supplies
  • It must be able to be made in 5 easy steps

Are you ready?  Let's get started with the step-by-step!

  • Start by folding a 5-1/2 x 8-1/2 piece of Pacific Point cardstock in half.
  • Stick a 1-1/4 x 4-1/4 strip of Painted Blooms DSP along the right side of the card base.  Stick a 1 x 4-1/4 strip of embossed Wild Wasabi cardstock right beside it followed by a 1/4 x 4-1/4 strip of Crushed Curry stuck beside the Wild Wasabi.
  • On a 1-3/4 x 2-3/4 piece of Whisper White cardstock, stamp the floral image from the Painted Petals stamp set with Soft Sky ink.  Stamp the leaves and stems with Wild Wasabi ink and then stamp a sentiment over the flowers with Pacific Point ink.
  • With ribbon scraps (Wild Wasabi Seam Binding, Soft Sky 1/8" Taffeta & a Burlap Ribbon string), make some ribbon loops and layer them together.  Staple them to the Whisper White piece with the Handheld Stapler.  Apply Stampin' Dimensionals to the back and stick it to a 2 x 3 piece of Soft Sky cardstock
  • With SNAIL, stick the Soft Sky cardstock to the center of the card.
Here's the video so you can follow along in real time.


I have another card done with the same layout to share with you today.  This one features the new BYOP stamp set, also in the Occasions 2015 Catalog.


I love the ombre look of the letters!  I did that with my Bermuda Bay Blendabilities.  So fun!  Here's the inside of the card....


I added a strip of Bermuda Bay cardstock to the bottom on the inside of the card, but only stuck it down on three sides creating a little pocket perfect to hold a gift card!

Everything you need to make the two cards featured today can be found in my online store and because it's Sale-A-Bration, you can earn free product with every $60 you order (before shipping and tax).  You can also contact me to place your order!

If you like what you see and are Canadian, I would love to be your Stampin' Up! demonstrator.  Contact me today to start your creative journey!

Have an inspired day!


Thursday, October 30, 2014

Festival of Trees

Hi Stampers!  Today I have a fun Christmas card featuring the Festival of Trees set and punch.  I think the Festival of Trees set and punch is a must have out of this year's Holiday Catalog!


Today's card was inspired by a couple cards in the catalog...check out page 13 and page 24 and see if you can spot the cards that inspired me!


Another must have....the large polka dot embossing folder!   I am loving it a lot right now!

Shopping List
Stamps:  Festival of Trees
Ink:  Crushed Curry, Mossy Meadow
Cardstock:  Very Vanilla, Hello Honey, Mossy Meadow
Accessories:  Gold Glitz Dazzling Details, Gold Baker's Twine
Tools:  Big Shot, Large Polka Dot embossing folder, Tree Punch, Stampin' Dimensionals

**Don't forget the Festival of Trees set and Tree punch can be purchased as a bundle so you can save some $$

Everything you need to create this card can be found in my online store.  Head on over there to place your order today, or contact me directly to place an order.

Have an inspired day!


Thursday, September 18, 2014

Festival of Trees Swap Card

Hi Stampers!  On Tuesday, I showed you one of my swap cards from when I got together with my downline for our Holiday Catalog Shoebox Swap.  Today I'm going to show you my other swap card.


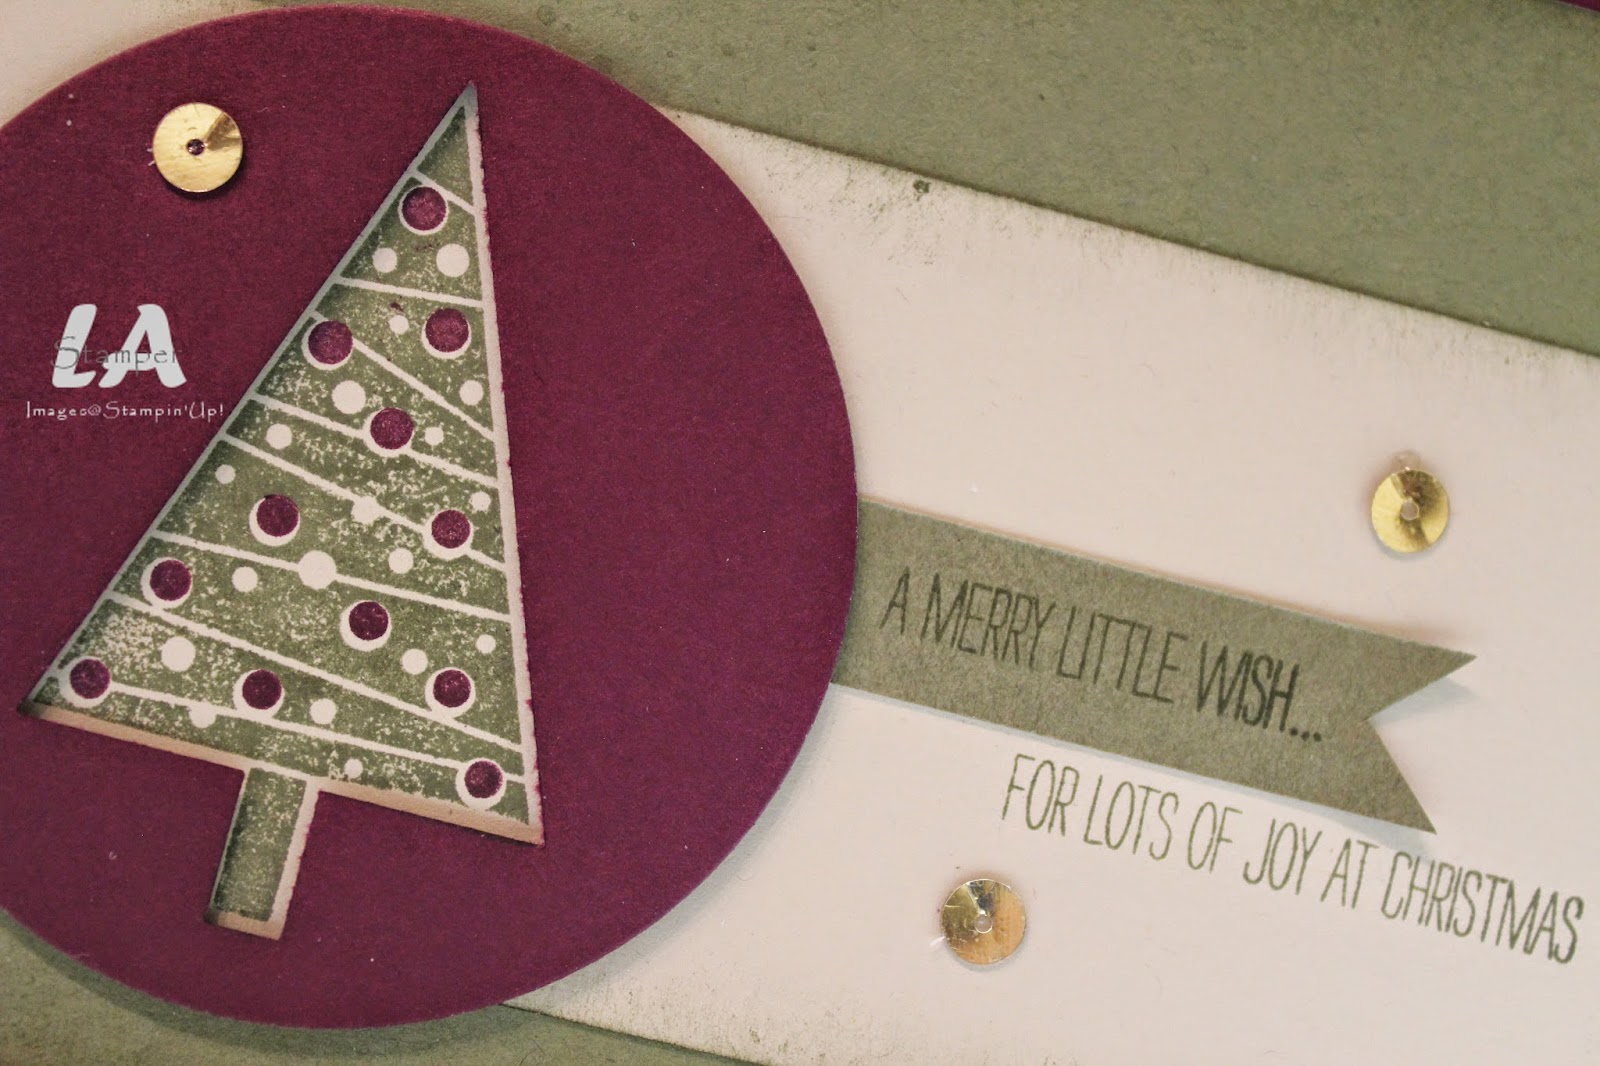
You all know that my favorite set from the Holiday Catalog is Wonderous Wreath, but I think the Festival of Trees set is a close second!  I love the variety of trees and that there's a coordinating punch so I can punch out all those fun trees!


Blackberry Bliss, Always Artichoke and Sahara Sand...one of my new favorite color combinations!  Here's a little tip for this card, punch the tree out of Blackberry Bliss cardstock and then cut it out in a circle shape with the Circle Framelits and voila, you have a tree shape in a circle!  You can then stamp your tree on your background cardstock and have it perfectly fit in the tree shape you punched.  Another thing I love about this set is that it's photopolymer so it's super easy to stamp the tree with one color (Always Artichoke) and then stamp the decorations with another color (Blackberry Bliss) and get them perfectly lined up!

You can find everything you need to create this super fun card in my online store.  Head on over there with the shopping list and place your order today!  Bonus...the Festival of Trees set is bundled with the Tree Punch so when you order them together you save 15%!

Shopping List
Stamps:  Festival of Trees, Gorgeous Grunge
Ink:  Blackbery Bliss, Always Artichoke
Cardstock:  Blackberry Bliss, Always Artichoke, Sahara Sand
Accessories:  Gold Sequins
Tools:  Stampin' Sponges, Tree Punch, Big Shot & Circles Framelits

Have an inspired day!


Sunday, August 24, 2014

Simple Card Sunday - Episode 3, Wonderous Wreath Card

Hi Stampers!  Welcome to Simple Card Sunday!  Today I have a super fun, super easy Christmas card to share.  I know...Christmas?!?!?!  But, it's never too soon to start thinking about making your Christmas cards and this design is so simple it might even be the one for you this year!


Remember, for a card to be included in Simple Card Sunday it has to use minimal supplies, be completed in 5 easy steps and be able to be made in 10-15 minutes.

Are you ready?  Here we go!


Sigh...I LOVE this card and I LOVE this stamp set!!!!

Here are the 5 easy steps:
  • Fold the Old Olive (5 1/2 x 8 1/2) piece in half
  • On the Whisper White piece ( 3 3/4 x 5), stamp the biggest wreath image with Pear Pizzazz ink.  Stamp the smaller wreath image over the first stamped image with Old Olive ink.  And, then stamp the berry image with Real Red ink over the wreath.
  • Stamp the sentiment at the bottom of the card with Old Olive ink
  • Mat the Whisper White piece on the Real Red piece ( 3 7/8 x 5 1/8).  Apply Stampin' Dimensionals on the back of the Real Red piece and then stick it on the folded Old Olive card base.
  • Tie a simple bow with some Real Red Cotton Ribbon and stick it on the wreath with a glue dot.
Check out the video to see me make this card in real time and a ribbon bow tip!


Here's one more card made with this same layout.  This card features the Bright & Beautiful stamp set from the Holiday Catalog as well as the Star Framelits!  You can get the Star Framelits bundled with the Bright & Beautiful set FREE when you purchase a Big Shot before August 31.  Already have a Big Shot?  That's wonderful!  You can get the Framelits and set bundled at a 15% discount until the end of August.  Head over to my online store to place your order today and don't forget to use the hostess code JVPYSGHR to be entered into a draw for some awesome gold metal buttons.


Get a jump on your jingle!  You can find everything you need to create my featured card in my online store starting August 28 when the Holiday Catalog goes live!  Don't forget to order the envelopes so you'll be all set to send your cards out!  Head on over there with the shopping list to place your order today!

Shopping List
Stamps:  Wonderous Wreath
Ink:  Pear Pizzazz, Old Olive, Real Red
Cardstock:  Old Olive, Real Red, Whisper White
Accessories:  Real Red Cotton Ribbon

Have an inspired day!


Sunday, February 24, 2013

Raining Flowers!

Actually, it's not raining anything here as I type this...it's snowing (and who knows what the weather will be like when this actually posts!!!!).

The summer before last, I got the Raining Flowers set at Convention.  I will admit, it's not my favorite set and it rarely has seen ink since I got it (gasp...I know!).  As I was prepping some cards for an event I was speaking at I thought I should dust it off and use it for a super simple card.


Two-step stamping always packs a big old WOW and I knew the brand new stampers I was going to meet that night would find this card easy to create and pretty!  We started with my favorite Note cards with envelopes (my go-to product for quick and easy cards).  I trimmed them all down ahead of time so my stampers could mount their whole card on a piece of Perfect Plum cardstock.  I love this option to add a small splash of color to these simple cards.  Them we got to stamping...starting with the outline stamp in Basic Gray and then the "fill-in" image which I had them color with markers.  Finish it off with a sentiment and you've got yourself a perfect little thank you card that took no time to complete! 

For this card, I chose a thank you sentiment (from the Delightful Dozen set) because I chatted with them a little bit about the power of a thank you and how a super simple card like this can make someone's day!  But, you could easily put a different sentiment on this card and use it for almost any other occasion.

Have an inspired day!


Friday, July 13, 2012

Smile...Need a Reason?

I have so many reasons to smile today!

-It was raining (actually thundering) when I woke up this morning...which is good because it's been HOT here and the rain is welcome (and I love thunder!).

-It's clearing now so my kids can go outside to play after lunch

-My Holiday Catalog preorder came yesterday (yay...new stamping stuff to play with...and you're going to love the new Holiday Mini)

-My Passport arrived yesterday (boy, that was a stressful wait!)

-It's FRIDAY (even though it's Friday the 13th!!!)

-I get to go to Convention next week and see my Stampin' Up! family!

-I have a wonderful family

-I have great friends

I could go on, but I'm sure you came here to see the biggest reason to smile today, right?  When my order cam yesterday, the new Reason to Smile stamp set was in it.  Yep, the set on special and only available this month for $5 (when you place a $60 order).  Of course, I couldn't wait to get ink to paper with it and here's what I came up with...


Isn't it pretty!!!!  I pulled out the Reason to Smile set and a pack of new DSP (from the Holiday Catalog...I think it's my new favorite DSP!) and got to work!  I pulled my colors right out of the DSP...Raspberry Ripple and Lucky Limeade.  Here's a close up of the fun parts of this card.


I colored my stamp with markers to get both colors on it and then stamped the outline image with Early Espresso.  The sentiment is from the One in a Million set (I love that new set!) and after I stamped it I cut it out with the new Bitty Banners Framelits.  And, of course, added a little bling!

Well, I must sign off for today.  I have laundry, packing for next week (for both me and my kids...they are going to "Camp Grandma & Grandpa" since Kevin still has to work next week!!!), swaps to finish, a super cool project to finish (the one I mentioned on Facebook yesterday!) and lunch to make!  Have an inspired day!


Sunday, May 16, 2010

I Scream, You Scream...

...we all scream for ICE CREAM!!!!!  One of my favorite sets in the Summer Mini is the Sweet Scoops set.  I absolutely love it.  So, for Simple Card Sunday, I'm sharing a "Sweet Scoops" card.


Don't you love it!!!  I stamped the cone with Soft Suede.  The ice cream is done with Pink Pirouette and kissed with Regal Rose.  The scoop is kissed with the stamp in the set that looks like wood grain.  At first I was so confused about that stamp, but doesn't it make the ice cream look real?  Stampin' Up! thinks of everything!

The ice cream image was stamped on Whisper White sponged with Soft Suede ink and then was mounted on a piece of Pink Pirouette.  Then I stuck all that onto a piece of Soft Suede cardstock that was punched with the Scallop Border punch.  It's stuck to the card with Stampin' Dimensionals.  And it's finished off with a "Wish Big" from the Short & Sweet set stamped in Soft Suede.  The entire card is sponged around the edge with Soft Suede ink.


The great thing about makin 3x6 cards, is that you can usually make them into a 6x6 scrapbook page if you don't want to do a card.  Here's a look at the little 6x6 page I made with the same supplies as I used on the card.  I stuck a piece of Soft Suede piece on my page so you can see where I would put a picture.


Well, I feel the need to go eat some ice cream now, so that's all for today!  Have an inspired day!


Saturday, April 3, 2010

Two-Step Into Spring

Well, Sale-A-Bration is officially over for another year, but don't worry, Stampin' Up! has a new special for you this month.  We're Two-Stepping into Spring with a sneak peek at a set that will be offered in the new Idea Book & Catalogue in July as well as some fabulous two-step stamp sets at 20% off.  Check it out.

And, Stampin' Up! has added more items to the clearance rack!  There's some awesome deals to be had and some products that I know some of you were looking for at the end of last year!  Click the link on the right to go to my website and start shopping!  These items can only be purchased online and are only available while supplies last!

I'll be back later with a scrapbook layout to share!  Have an inspired day!

Lisa