Wednesday, November 2, 2011

Poppies

What a crazy week I've had...lots of family time with Kevin coming home after 2 weeks of being in Ottawa, sick kids, last minute Halloween prep and lots more so my blog got pushed to the bottom of my priority list!  But things have calmed a bit and I'm back.

It's November which means it's time to get a poppy and remember the sacrifices made for the life we enjoy today.  Now, I know that the poppies are sold to raise money for veterans and I'm all for that, but those silly poppies always fall off my coat and get lost.  So, this year I made my own poppy.  Actually I made it last spring for a demo I did and have been saving it in a safe place until now!


For some reason I can't get a good picture, but I will describe as best I can for you!  I used Poppy Parade cardstock and cut it with the Fun Flowers die.  I cut two flowers (the one with the points on the petals), cut the points off the flowers, scrunched them and then peeled just the petals apart (so the flower is still attached together in the middle).  I layered the two flowers together off-setting the petals.  Then I kind of scrunched the petals a bit.  The middle of the poppy is a black button from the Neutrals package.  I put a little knot of black ribbon in the middle and made some leaves with Old Olive Satin Ribbon.  The whole flower is attached to a pin back and it looks awesome on my black Stampin' Up! jacket!!!  This poppy isn't going anywhere...until I want it to!

Here's a look at Halloween at hour house this year...

Cookies for Preschool!  Sawyer and I made sugar cookies...black bats and orange pumpkins.  Sawyer had fun stamping the jack-o-lantern faces before I cut them with a pumpkin shape cutter.

Our pumpkins!  Kevin is super proud of his Oilers pumpkin!!!

My kids dressed up as Phineas, Ferb and Agent P!!!!

Have an inspired day!


Monday, October 24, 2011

A Little Over the Top!

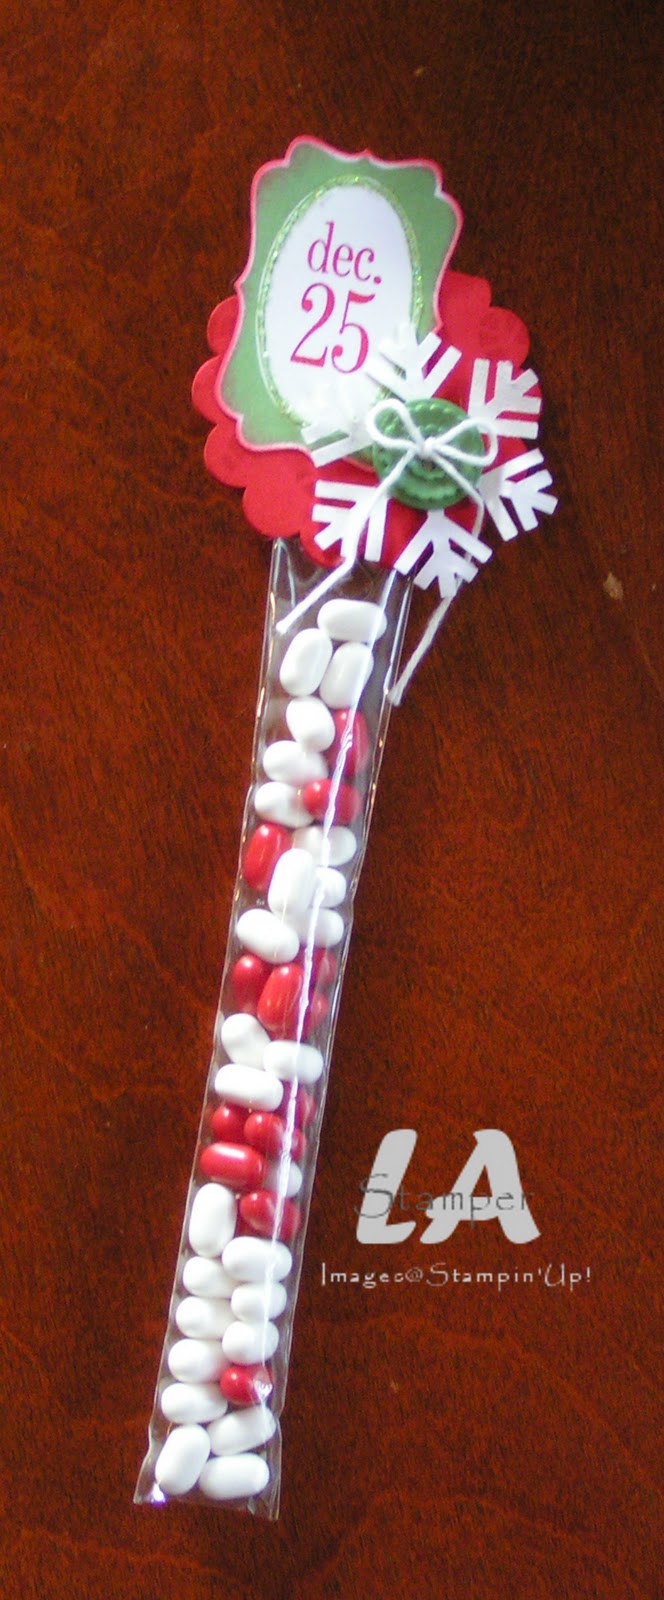
Did you notice the fun new cello bags in the Holiday Mini?  They're 1x8 and a steal of a deal at $3.50 for a pack of 50!  There are so many ways you can use these bags...you're definitely going to want to order some today!

Check out what my clubs did with them this month...


It's a little over the top, and I wouldn't do something this involved for my kids to give their classmates, but for someone special it's totally worth it!  The bag is filled with Holiday Tic Tacs (the cinnamon and mint ones) and then I used a bunch of punches to create the topper.  Here's a closer look...


I love the button in the middle of the snowflake!  That button is from the Holly Berry buttons in the Holiday Mini.  It's a great pack of buttons...you get a bunch of Real Red and Wild Wasabi buttons in the pack.  I tied a piece of Whisper White Baker's Twine through the button...love the Baker's Twine!  Did you  notice the little bit of bling around the dec. 25?  That was done with another of my favorite products in the Holiday Mini...the Dazzling Details!!!  When you order some treat bags, you're definitely going to want to order a bottle...or two...of the Dazzling Details!

That's all for today.  I will be back tomorrow with another idea for these fun little bags.  Have an inspired day!


Sunday, October 23, 2011

Simple Leaves

Today for Simple Card Sunday, I have a quick and easy card using my favorite new stamp set (Gently Falling).


It's a 3x6 card with a fantastic layout that's easy to adapt to almost any occasion.  I stamped some leaves from the Gently Falling set and then added a great sentiment.  I accented my card with the new Early Espresso ribbon in the Holiday Mini, but when my clubs made it I let them choose between the Cherry Cobbler and Early Espresso ribbon...the card looks great with either color!  Add a few brads, stick it all together and you're done!

Next Sunday I'm going to start showing simple Christmas cards each week.  Hopefully you will be inspired to get some Christmas cards made using my quick and simple designs!

Have an inspired day!


Thursday, October 20, 2011

Stockings!

I {heart} stockings and was thrilled when I saw the line of stocking products in the Holiday Mini.  Recently I featured the Stocking die at my To Die For Class and the class participants got to make 2 projects with the die. Check out the info on the To Die For class on my Events & Classes page (link at the top!) to see all the details!  If you have a Big Shot it's a FREE class and I feature a different die each month.  Next month is the Petite Pocket die and I have some fabulous ideas with that die that you don't want to miss!

Today I'm going to show you the card my class participants made!


We placed the folded cardstock onto the die just under the top of the stocking so that it would have a fold at the top and create a shaped card!  The cuff, heel and toe were cut from Whisper White cardstock...I love how the die makes the little stitching lines!  The holly leaves were cut with the Stocking Accents die and the sparkly berries were punched from Red Glimmer Paper.

The only downside to this projects is that the card ends up being too big to fit into a standard envelope!

Stop by tomorrow to see the other project the class did...it's super fun!

Have an inspired day!


Wednesday, October 19, 2011

2-4-6-8...

2-4-6-8...who do you appreciate... Do you remember that chant?

I always wanted to be a cheerleader when I was a kid...I was never coordinated enough and I don't remember us even having cheerleaders at the schools I went to. Well, I am WAY off topic! This post isn't about cheerleading, but about a quick and easy box!


This is a 2-4-6-8 box and it's super easy to do with the new Simply Scored Tool.  You need a piece of cardstock that measures 8 1/2 x 5 1/2 (to make this box...you can change that second measurement to alter the height of your box).  Line up your cardstock so the 8 1/2 side is along the top of the Simply Scored and score at 2, 4, 6 & 8.  Then turn your cardstock a quarter turn and score it at 1 1/2 or 2.  Then you just fold it into a box and you can embellish and fill with treats!

I used the Square Lattice embossing folder on the More Mustard piece and to accentuate the embossing pattern, I brayered my embossing folder with Early Espresso ink before embossing the cardstock.  This way, the ink goes into the recessed parts of the design when it's embossed...one of my favorite things to do with the embossing folders.

That's all for today!  Have an inspired day!