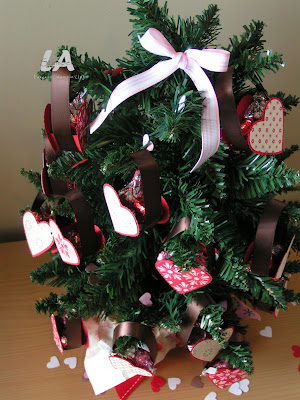
I had my two little Christmas pine trees sitting on my shelf waiting to get put away and also had one of my swap items from Convention. One day I looked at the two things and it hit me...a Valentine's Advent Tree!
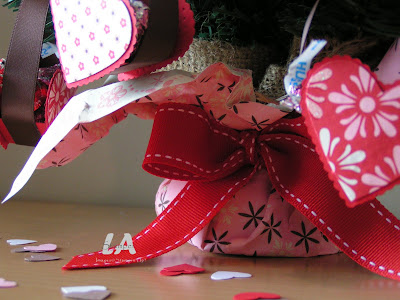
The bottom of the tree is covered in a piece of burlap. I wasn't going for the rustic look with this project and thought it needed to be prettied up a bit. So, I took a sheet of the Sending Love DSP and spritzed it with water until it was pretty wet...not dripping, but wet...and formed it around the bottom of the tree. To hold it in place, I tied a piece of Real Red Double Stitched Ribbon around it and then I played with the paper a bit, so that when it dried it would look pretty. Remember to be careful if you're doing this becuase when the paper is wet, it tears very easily!
I also punched some hearts with the new little heart punch in the Occasions Mini from the colors that are in the DSP. Then I literally threw the hearts at the tree...some stuck in the branches and some fell around the tree like confetti.
Here's a closer look at the little treat holders.
So ca-ute! I bet you're wondering how I made them...right? Well, I took some step-by-step pictures just for you!
The cast of characters...
The red hearts have been cut out with the Big Shot and that new little heart Embosslit...I *heart* that new little embosslit! Did you know what when it cuts out the scalloped heart it also embosses teeny tiny little hearts in it. Love it!!! The DSP hearts were punched from various Sending Love scraps with the Full Heart Punch. The ribbon of choice was Chocolate Chip Satin. I find that the Tombow Multi-Purpose Adhesive is the BEST adhesive for this project...just remember a little goes a long way! I chose to use SNAIL to attach the ribbon though. Here's a closer look at those little squares in the top left hand corner of the picture...
I even wrote the measurements and scoring instructions for you! Once you have it scored, you make little cuts along the edges as shown on the one to the right in the picture. After you've made the cuts, you fold and adhere like this...
Just make a 'V' with them! Next step, attach the hearts (the DSP hearts were stuck to the Red Hearts before sticking them to the 'V').
I used the teeny tiny embossed hearts as a guide to place the heart and V together. When you have the hearts stuck on both sides it should look like this...
All that's left is to attach the ribbon (I used 7 inches of ribbon for each one and wrapped it all the way around the 'V' with), fill it with treats and hang it on the tree. I made 14 total heart treat holders...one for each day until Valentine's Day. Each of my treat holders on my tree holds 3 Hershey's Hugs or Kisses (so my boys can each have a treat to count down to Valentine's Day and not fight over who gets one and who doesn't!). You can also fit a Hershey's Nugget in them...that's what I did for my Convention swaps! I think these would make FABULOUS wedding favors, or even a just becuase treat for someone special!
So what do you think? Don't you love this project! I'll be back tomorrow with another fabulous project for you.


No comments:
Post a Comment
Thank you so much for your comments. It means a lot to know there there are people out there reading my little blog and being inspired by what I create! Happy stampin' and have an inspired day!